Our past post How to Save Clicks using Drag and Drop in Windows 10 can easily make understand the importance of this feature. Sadly this attribute is missing from Windows 11 taskbar which a number of users want to regain to fasten the working on the computer. So here you will find how to enable drag and drop in Windows 11 taskbar in less than a minute.
Due to the withdrawal of this functionality, some people even consider to downgrade to Windows 10. As the readers are eager for a way to restore drag and drop in taskbar on Windows 11, we are going to list all the ways to enable it again.
Table of Contents
Enable drag and drop in Windows 11 taskbar
Here is how to enable drag and drop in Windows 11 taskbar –
Way-1: Through a tool on GitHub
- Go to the following link –
https://github.com/HerMajestyDrMona/Windows11DragAndDropToTaskbarFix/releases
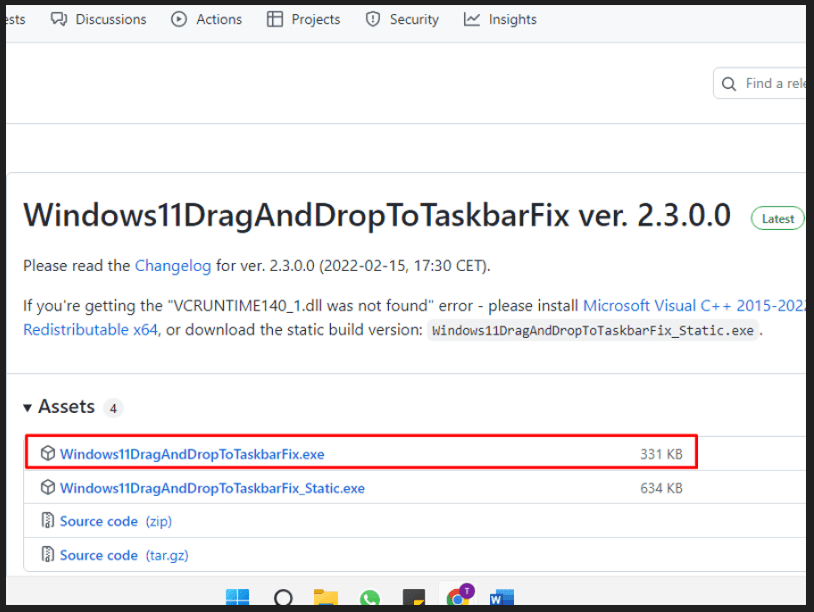
- Click on “Windows11DragAndDropToTaskbarFix.exe” to download the file.

- Once the download is complete, go to Downloads.
- Double click on Windows11DragAndDropToTaskbarFix.exe.
- If Windows Defender SmartScreen appears, click on More info.
- Then select Run anyway.
- In case, you get a message – VCRUNTIME140_1.dll was not found then follow the link in this sentence. Furthermore, you can simply download and install Microsoft Visual C++ 2015-2022 Redistributable x64 to repair the problem.
- Now, drag and drop is activated on Windows 11.
See – How to Increase or Decrease Drag and Drop Sensitivity in Windows 10.
Way-2: Via Drag and Drop Toolbar
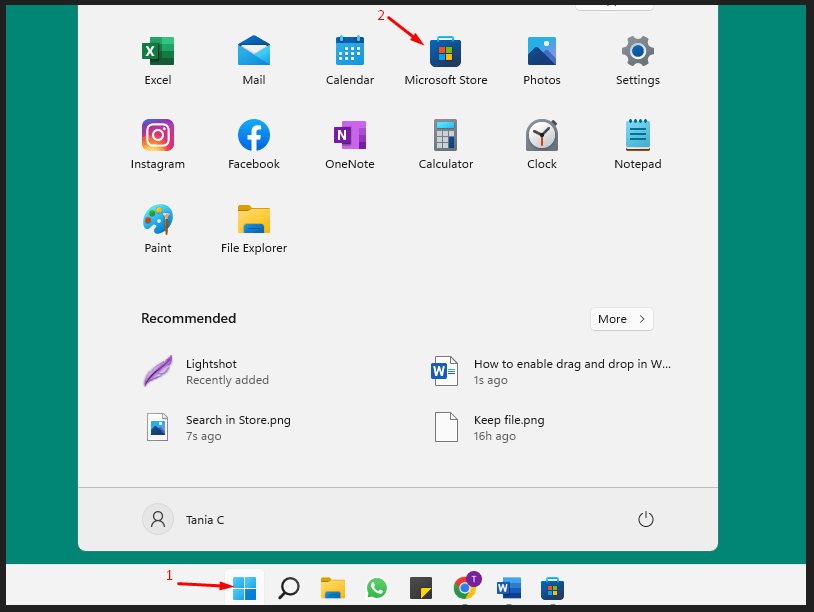
- Click on – Start Menu.
- Go to – Microsoft Store.
- In the search box, type – Drag and Drop Toolbar for Windows 11.
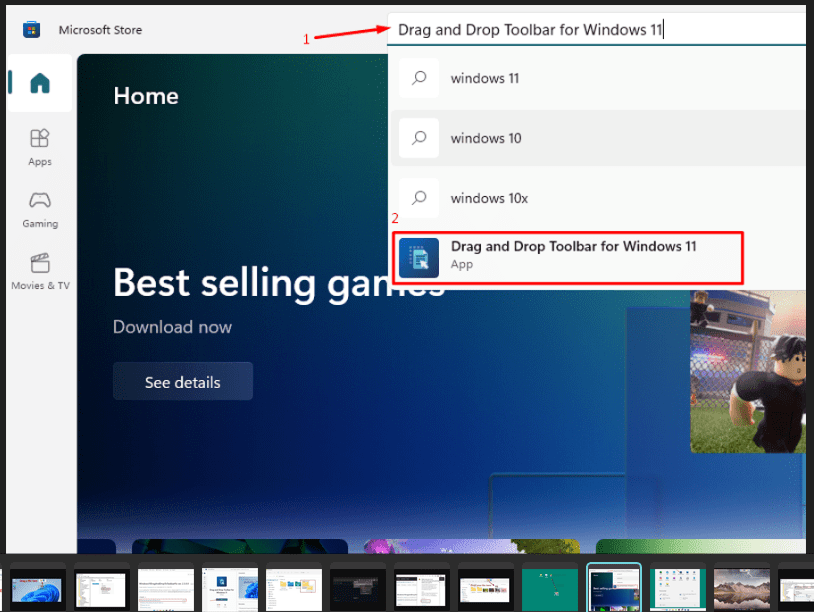
- Select the correct option from the dropdown that appears.
- Click on – Get.
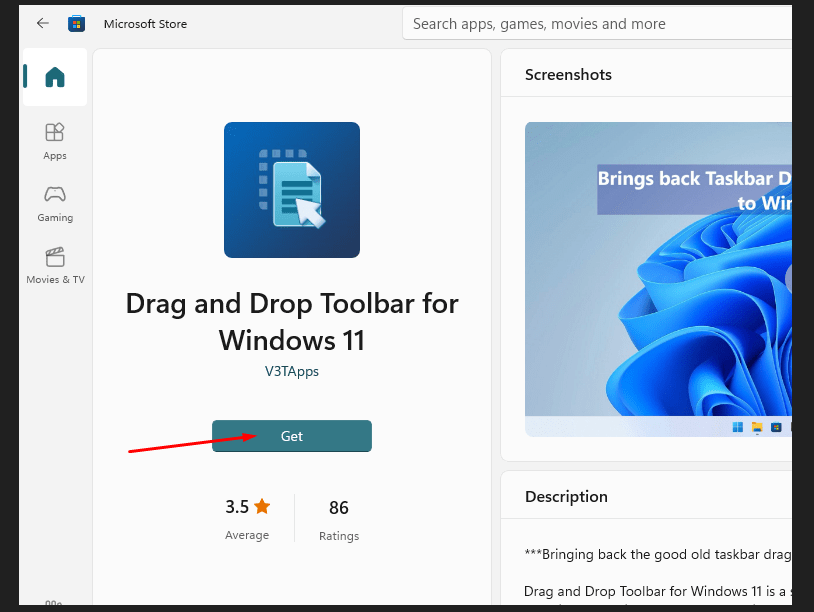
- Once it’s installed, you will see appearing a new taskbar on the top of the desktop screen.
- The top-taskbar allows you to drag and drop any file into the destination folder.
Way-3: Using Regedit modification
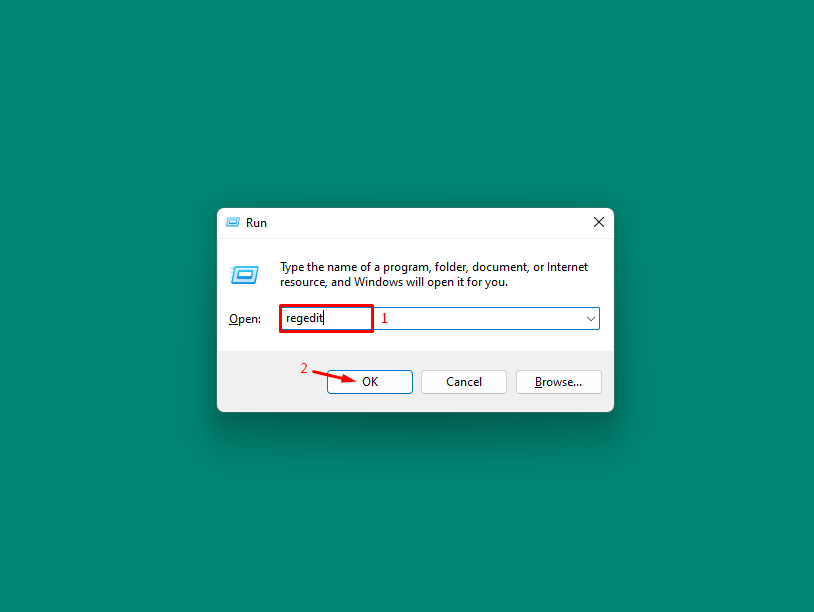
- Press – Winkey + R.
- Type – regedit.
- Hit – Enter.
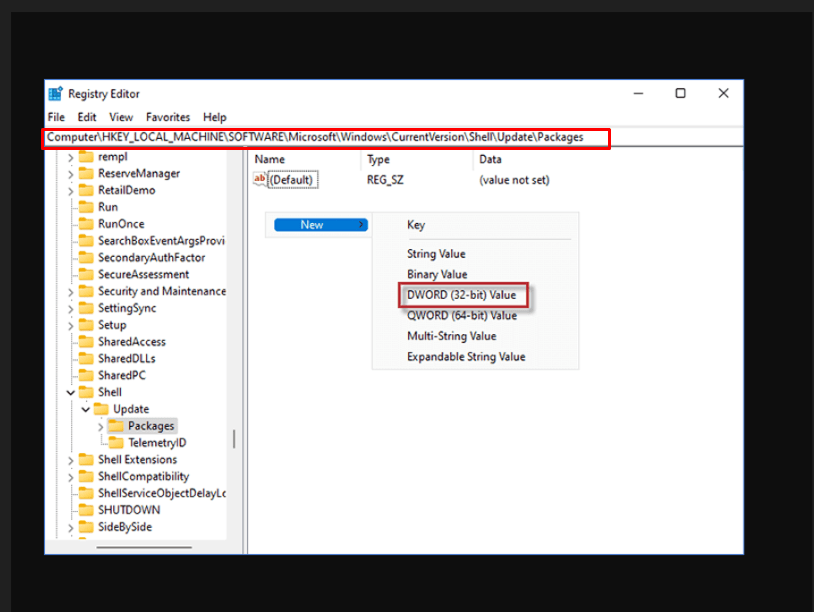
- Navigate to the following path:
HKEY_LOCAL_MACHINE \ SOFTWARE \ Microsoft \ Windows \ CurrentVersion \ Shell\Update \ Packages
- Now Go to the right pane.
- Right-click anywhere on the blank space.
- Choose – New > DWORD (32-bit) Value.
- Right-click on this newly created value file.
- Select – Rename.
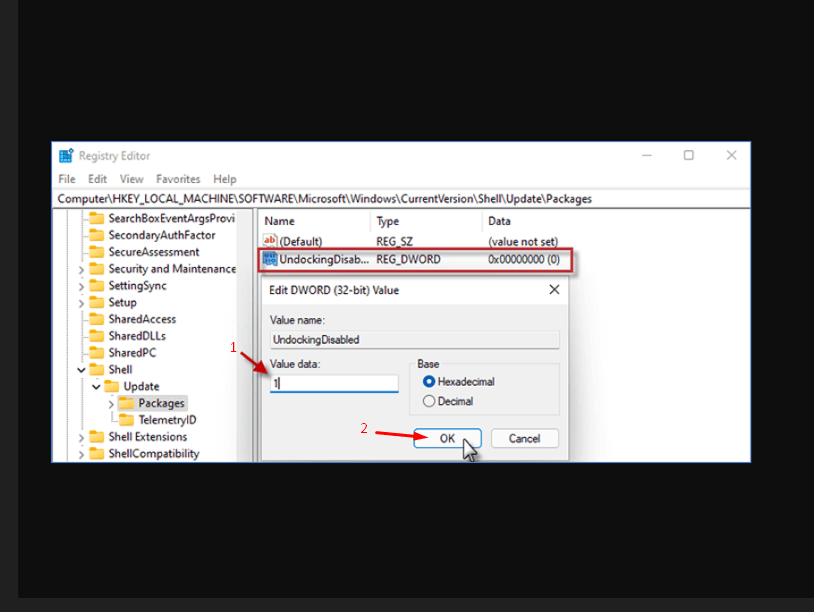
- Name the new Value as
UndockingDisabled. - Double-click on it to change the Value data 0 to 1.
- Click – OK.
- Then close the Registry Editor and restart the PC.
- When your PC reboots, you can get a taskbar like in Windows 10 so you have got success to enable drag and drop in Windows 11 taskbar.
Way-4: Using Alt + Tab Shortcut
Because Windows 11 can’t drag files, this version adds a next level Split Screen functionality. Using this can compensate for the task of drag and drop by following way –
- Choose – the folder or file you want to drop by drag.
- Press and hold – left mouse button.
- Put the folder or file in grab mode by moving it a bit.
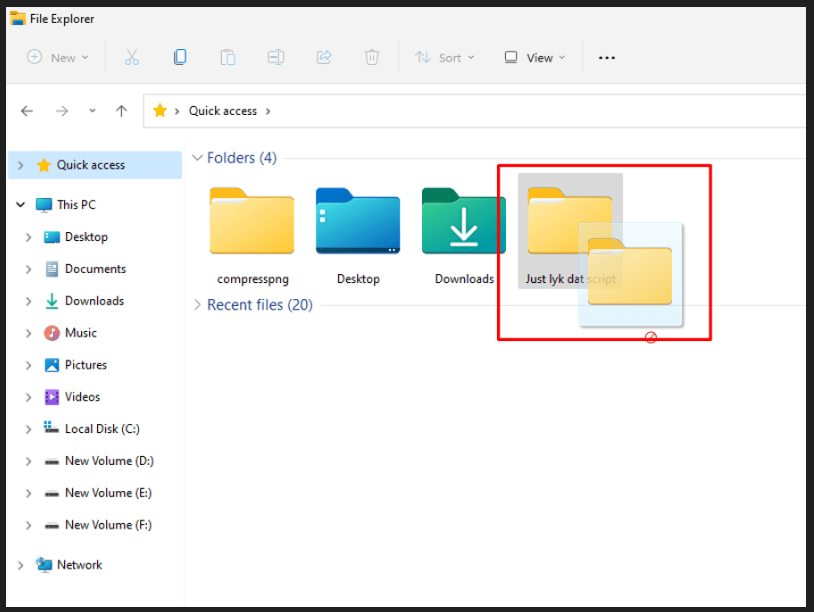
- In grab mode (with the click button held down), press – Alt + Tab to bring up a list of available tabs.
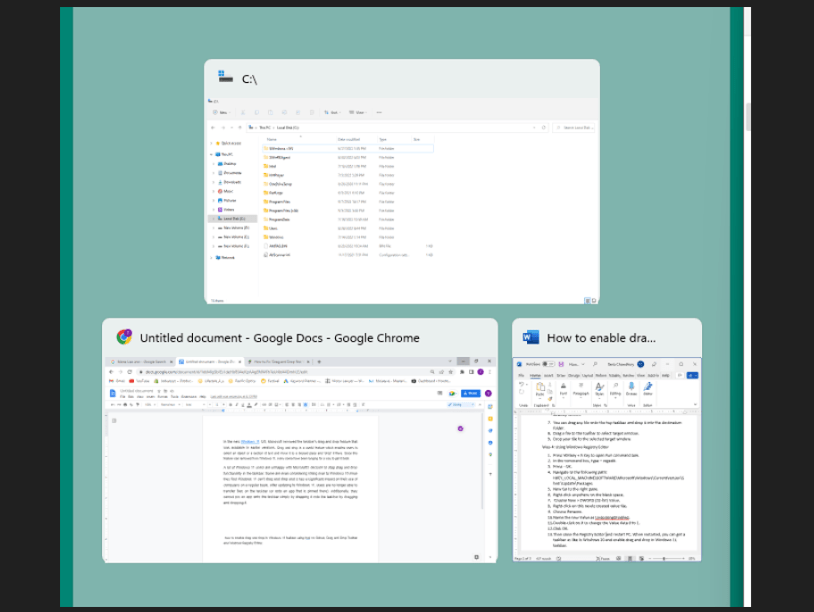
- Keep Alt key pressed and continuously hit – Tab key to navigate through all the available tabs.
- Once you reach the desired location, release – Alt+Tab.
- Now leave the mouse button to drop the file.
Methods:
Way-1: Through a tool on GitHub
Way-2: Via Drag and Drop Toolbar
Way-3: Using Windows Registry Editor
Way-4: Using Alt + Tab Shortcut
That’s all!!
