Performing Defragment Hard Disk Drive in Windows 10 sometimes becomes deadly necessary to make a computer run fluently as well as to boot up faster. Due to prolonged use, the disk drives become fragmented making the windows laggy. Here you will find the optimization and defragment methods via the built-in tool, Command Prompt, moreover, PowerShell
What is Optimize and Defragment Hard Disk Drive in Windows 10?
Optimization and defragment are the maintenance utilities in Windows 10 including the previous editions that improve the performance. Hard disk drives are prone to get fragment after taking huge workload over the days.
They find too tough to read the data in windows or take a long time. Eventually, the computer slows down and we feel uncomfortable to work along.
In order to get rid of the clog, we need to optimize the windows by defragmenting it. This process might take a bit longer but repairs the drive that ends up with a boost up of the speed.
The necessity of Defragment
Hard disk consists of spinning platters and the data you store takes a place around these. After you save files and folders they get arranged in sequence with blocks on each side of platters.
Because of the fragmentation, data in the blocks split and divaricate from one another. The process puts all these broken parts together and arranges in the same fashion as it was earlier further.
When do you need to Defragment Hard Disk Drive in Windows 10?
Defragment is system maintenance you should run once found the device not performing as expected. It depends upon usage actually. There is no hard and fast rule. Generally, a defragment should be carried out before 10% fragment occurs in the disk.
Even though Windows 10 defrags on a weekly basis automatically, users can do it manually too once the device is sluggish.
- For a normal user who only runs windows to check Emails, web browsing, Playing light games occasionally, one defragment in a month might be enough.
- People who operate the system more than 8 hours a day will have to do it once in two weeks at least.
- Heavy users like developers, programmers and others must perform a defragment when the fragment limit reaches up about 5-7% to experience better speed.
Effects of Defragment Hard Disk Drive in Windows 10
The prime effect of defragmenting is the improvement the overall performance of the computer. However, this does following things in the system:
- Fragmentation causes severe damage to the system performance which is well recovered by Defragmentation.
- Because of fragmentation, a system needs to utilize excessive resources like RAM and CPU in order to complete a task. Defragment on the other hand reduces extra load from processor and Memory making the computer run faster.
- Some applications can’t run at all in case of fragmentation which gets back into action after defragmenting.
- Makes the backing up process smooth.
- Accelerates application launching, Shortens time in File Explorer, and removes lag in hibernate or getting back from hibernation.
- Makes faster boot and reboot.
Table of Contents
How to Optimize and Defragment Hard Disk Drive in Windows 10
There are quite a few easy procedures to Optimize and Defragment Hard Disk Drive in Windows 10 such as using Drive properties, Command Prompt, and PowerShell. Let’s see them in details:
Using the Built-in Optimization Drive tool
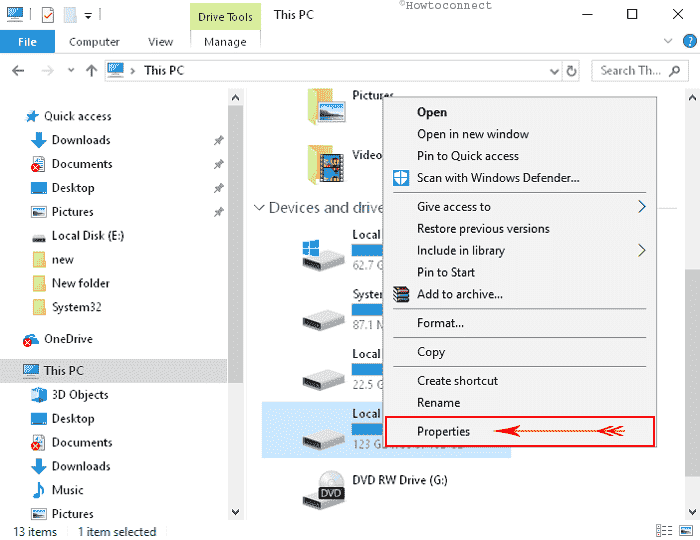
Step-1: Hold down Windows+E hotkey altogether in order to launch the File Explorer.
Step-2: Make a right click on any Disk drive you like to defragment and Select Properties.
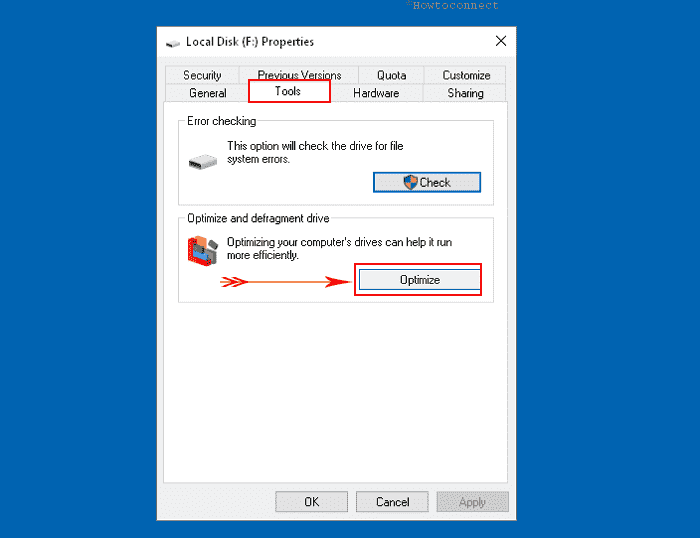
Step-2: Switch to Tools tab and perform a click on Optimize.
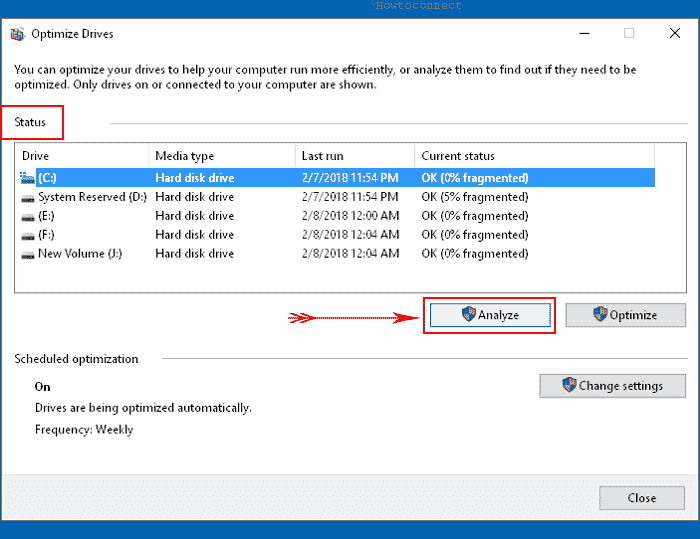
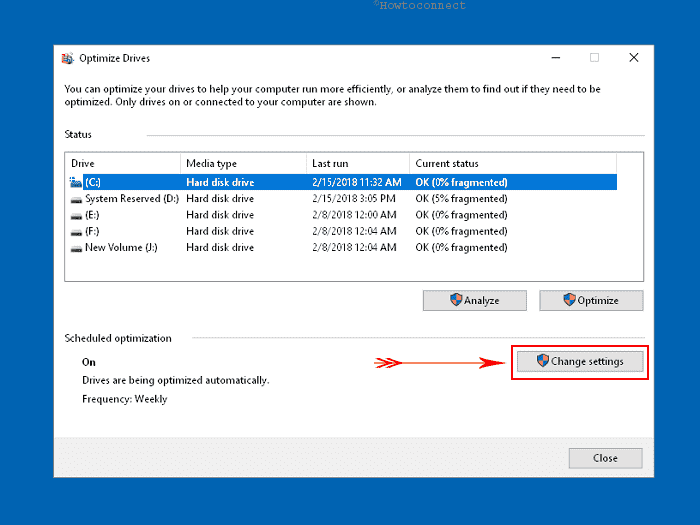
Step-3: Once the tool opens you see how much percent the hard drives are fragmented in the Current status column. Moreover, click on Analyze after selecting a drive to know the situation at present.
Step-4: Select a drive and press Optimize to begin the defragmentation.
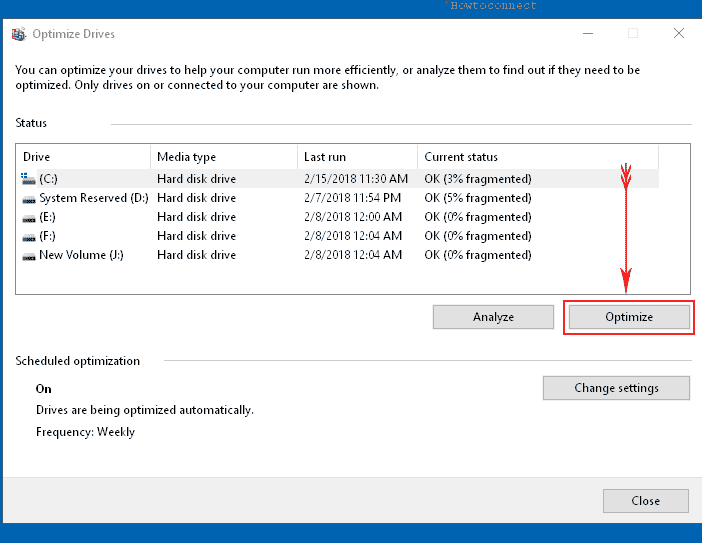
Step-5: Select “Close” once the whole process ends.
How to Optimize and Defragment Hard Disk Drive in Windows 10 via Command Prompt (Admin)
- Type in “Cmd” in the taskbar Search box next to Start button.
- In the “Best match” area, do a right click on “Command Prompt” (Desktop app) and choose “Run as Administrator”.
- Type following commands after the blinking cursor on the black command prompt and hit Enter button:
defrag /C
Note- If you need to defragment D, E, F or other dive replace with C.
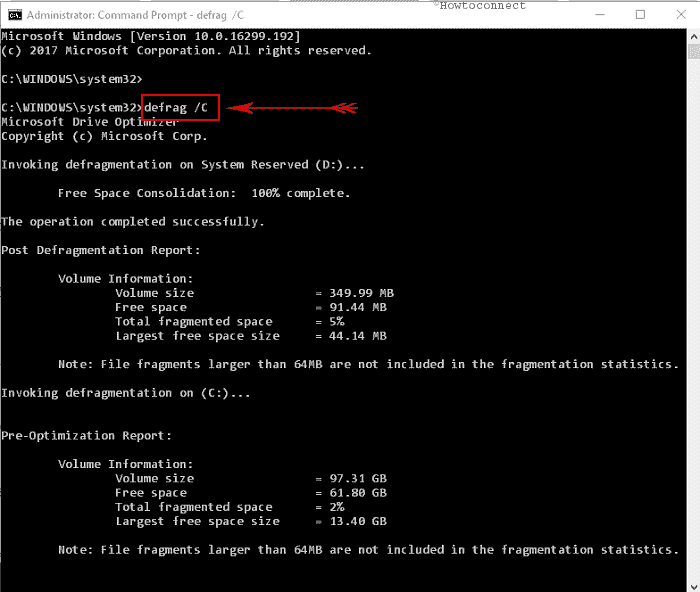
- In case of all HDDs and SSDs, type this command and press Enter:
defrag C: /O
- Ahead written Syntax will appear in the Command Prompt window:
defrag <volumes> | /C | /E <volumes> [<task(s)>] [/H] [/M [n] | [/U] [/V]] [/I n] Where <task(s)> is omitted (traditional defrag), or as follows: /A | [/D] [/K] [/L] | /O | /X Or, “to track an operation already in progress on a volume”: defrag <volume> /T
- Following table contains the Parameters present in the syntax. Representation Description<volume> Letter indicates Drive name or the mount point of the volume where you opt to run Defragment.
| Option | Explanation |
| /C | Defragment run on Local disk only. |
| /E | every local disk without specific one gets defragmented. |
| /A | Preview of analysis summary for any disk drive not being defragmented. |
| /X | Pictures Free-space Consolidation. This actually reduces the volume to a congested level so that to shorten the time of defragmenting in future. |
| /T | Tracks a running operation on a specific drive volume. |
| /H | This option is specified for an irregular PC. Represents running defragment at Normal priority rather than Default Low priority. |
| /M | Multitasking computers having SCSI or SATA-based disks instead of disks with an IDE interface that needs to run defragment parallel in various volumes. |
| /U | Command for printing a running operation report from the screen. |
| /V | Represents Verbose mode and offers additional statics and details of a Defragment. |
How to Optimize and Defragment Hard Disk Drive in Windows 10 at boot menu
Sometimes you might need to Optimize and Defragment Hard Disk Drive in Windows 10 when system refuses to boot in normal mode. Recovery environment lets open Command prompt using which you can run the defrag commands for the optimization.
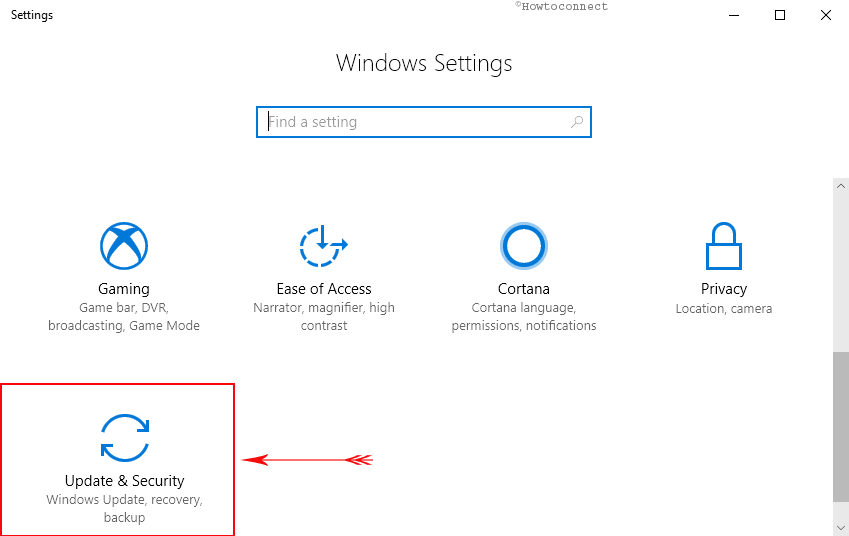
1) Open the Start menu and Select Gear icon to open Settings app. Alternatively, press Win+I to do the same. Move on to Update & security.
2) Select Recovery from the left pane and move aside to corresponding right. Press “Restart now” option beneath Advanced startup.
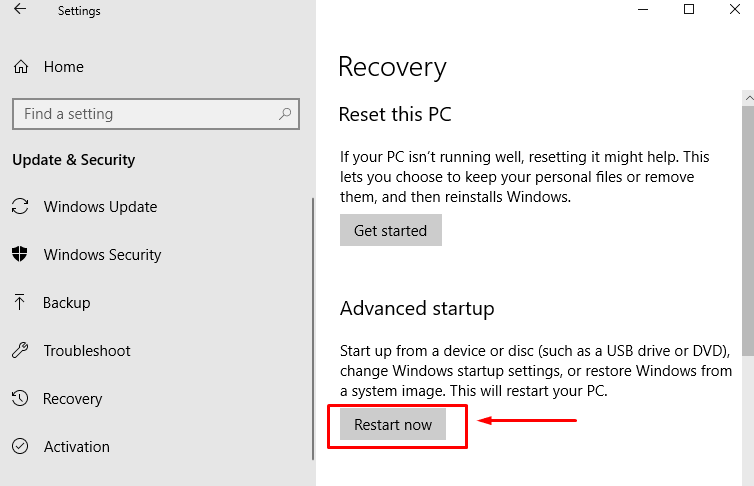
Important – This utility will not allow the windows to reboot normally rather will proceed to an advanced boot menu before starting. It may take some time to load the screen.
3) Choose Troubleshoot from the following screen.
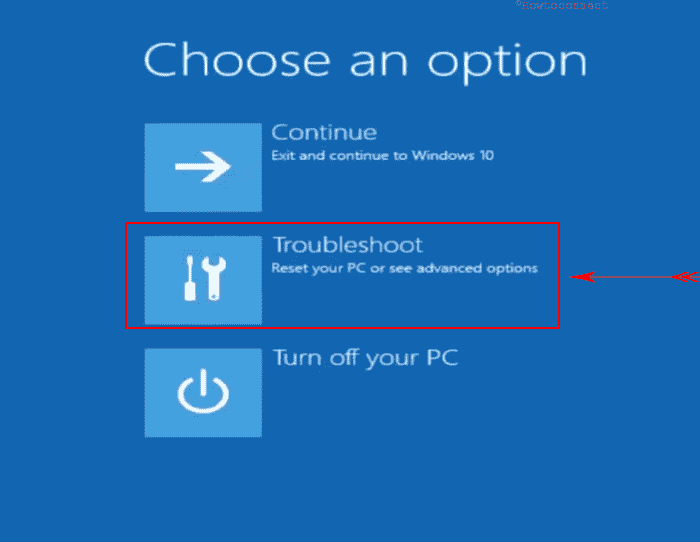
4) Select “Advanced options” from the left on next page.
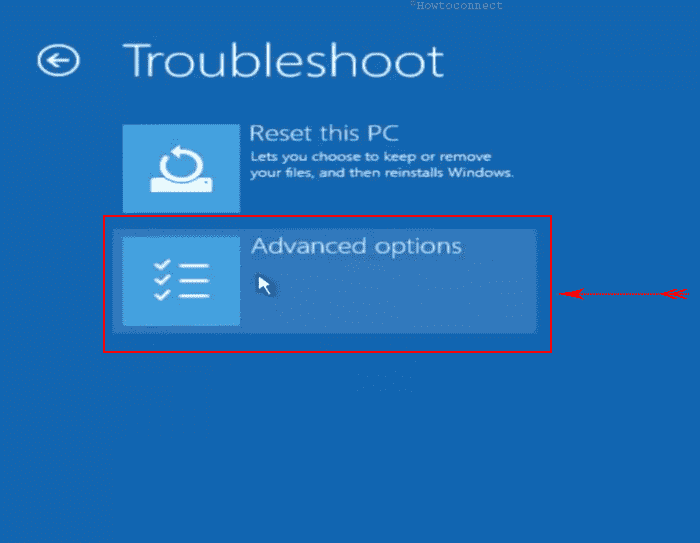
5) Make a click on “Command Prompt” from here.
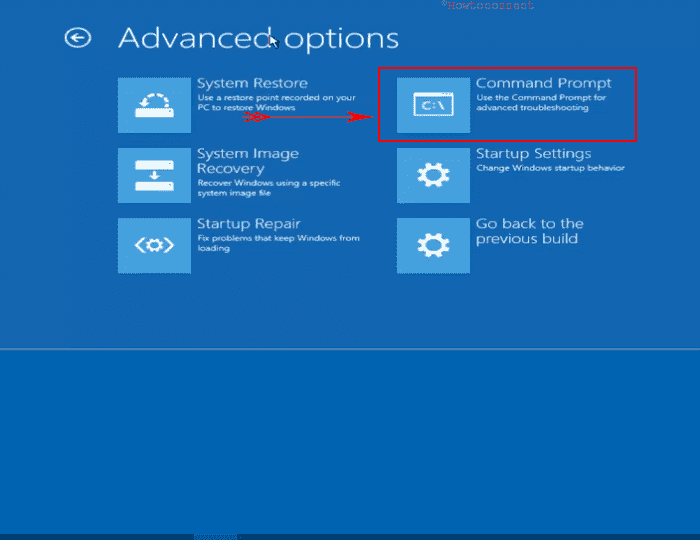
6) Once fully loaded, select “Computer” option from this screen.
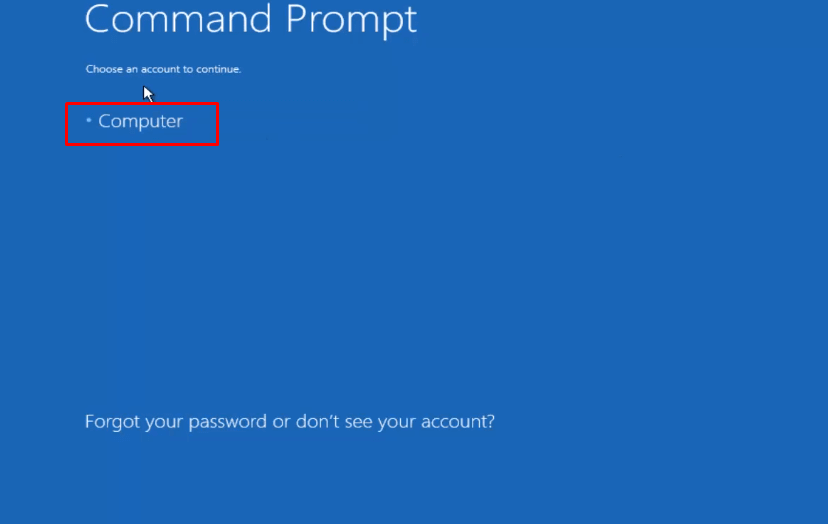
7) Provide your Windows 10 password when prompted and hit “Continue” button. After verification, the system will advance you to Command Prompt (Admin).
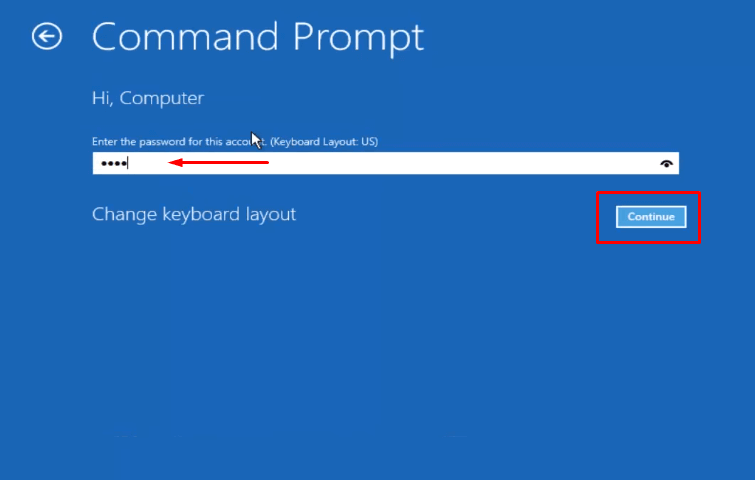
8) Now, either type or copy/paste the following commands successively and hit Enter button after each:
diskpart
list volume
exit
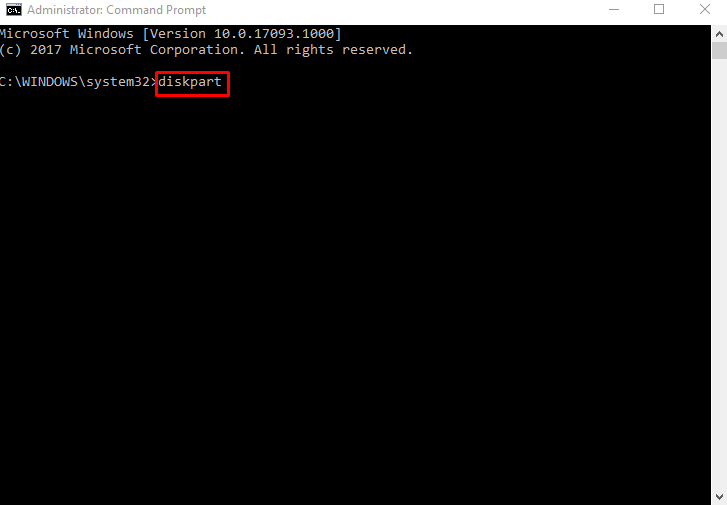
9) Now use defrag /C to defragment the partition according to the procedure we discussed in Step-3 of above method.
How to Optimize and Defragment Hard Disk Drive in Windows 10 using PowerShell
i. Press Win+X and select “Windows PowerShell (admin)” from the list. Now for various types of Defragment, you need to run different commands:
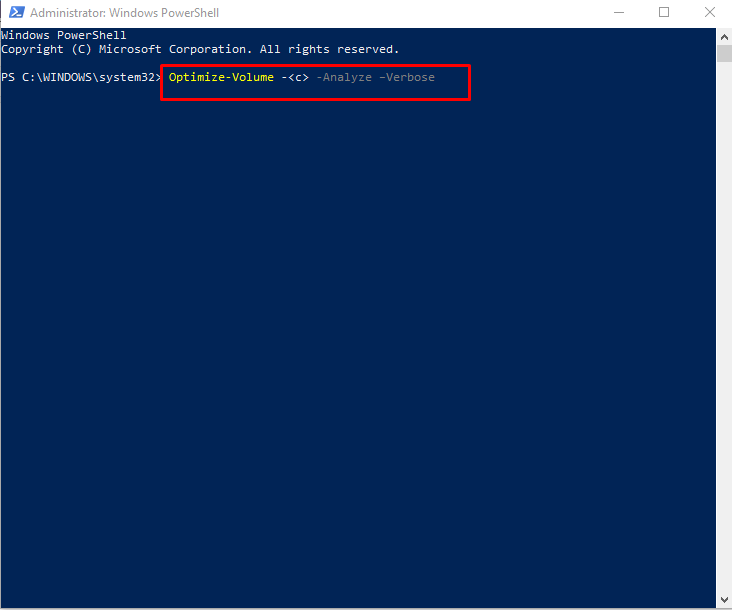
• First of all, Analyze present optimization of a specific disk drive:
Run the following command and hit Enter button
Optimize-Volume -<c> -Analyze –Verbose
Replace “c” with the Letter of a specific Disk drive on your system.
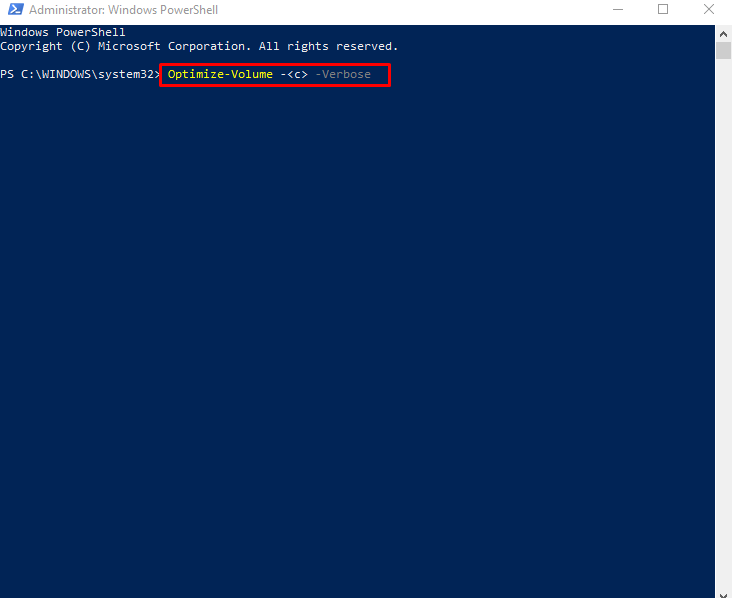
• Automatically run Defragment in the right way:
Type the below command and press Enter button
Optimize-Volume -<c> -Verbose
Note- Substitute “C” with Drive letter you want to defrag.
• Trim Solid State Drive (SSD):
Optimize-Volume -<C> -ReTrim -Verbose
Note – Replace “C” with original driver letter.
See the particular instructions on another location – How to Trim SSD on Windows 10 Using PowerShell.
• Defragmenting Hard Disk Drive (HDD):
Optimize-Volume -<C> -Defrag –Verbose
Put the Letter indicating Specific drive in place of “C”
Lastly, close PowerShell after finishing the whole process.
How to Change Defragment schedule
Previously you have already come to know that Windows 10 regularly does Disk Drive Optimization on a weekly basis schedule using built-in setting. However, if you are a heavy user, you can change this schedule on your own. Here is the process.
Type “Optimize drive” in Cortana Search box beside Start menu. Select “Defragment And Optimize Drives” from the Best match field.
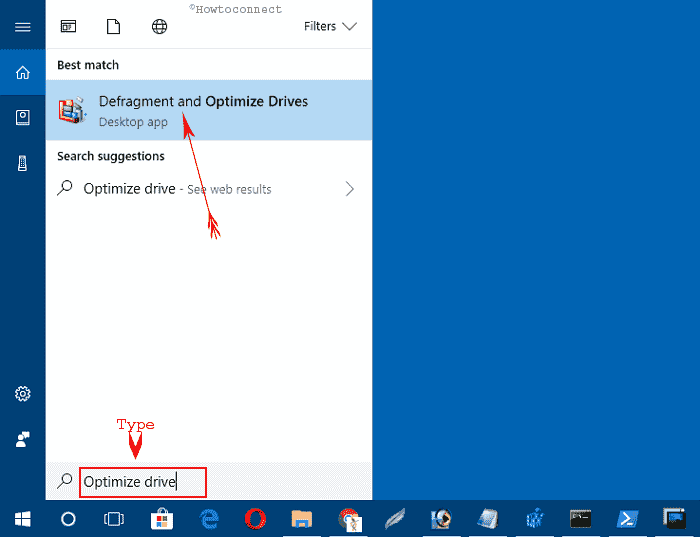
Hit “Change settings” below “Scheduled optimization” in the available window.
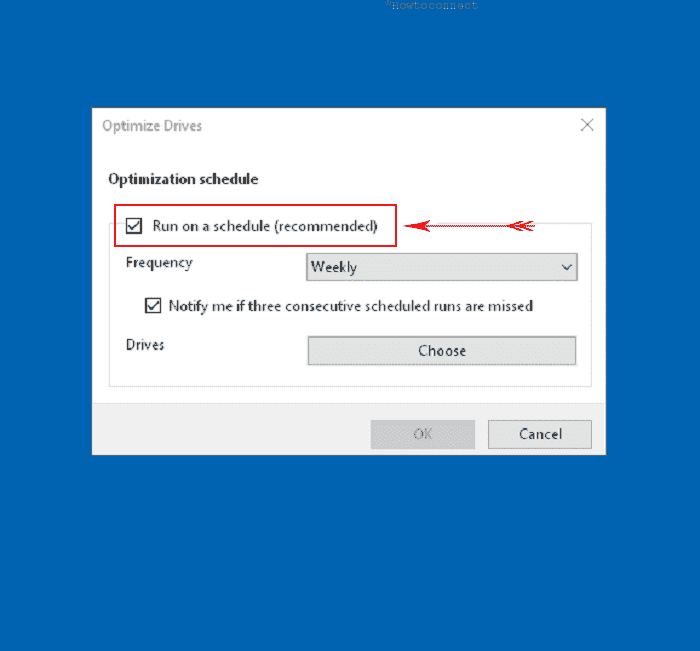
Make sure that “Run on a schedule (recommended)” option is ticked otherwise, all options will be grayed out.
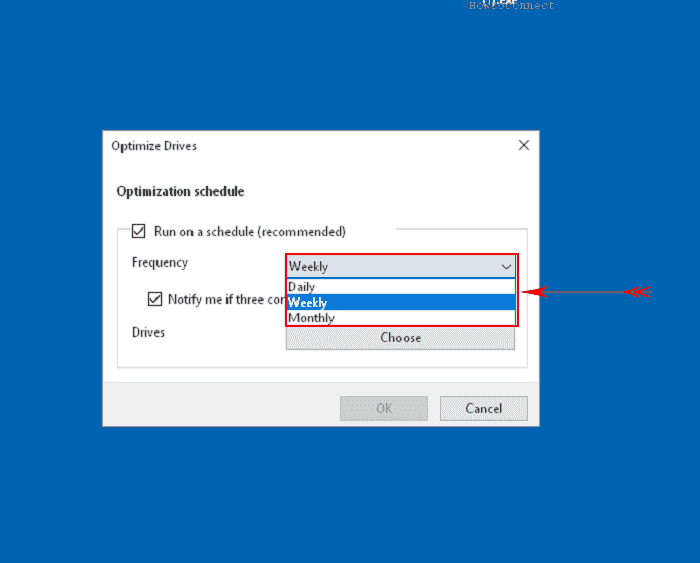
Pick one defragment frequency that suits you from the options “Daily”, “Weekly” or “Monthly”.
Proceeding forward, perform a click on “Choose” option besides Drives for optimization. Check “Automatically optimize new drives” options and select “Ok” option.
Note – Check “Select all” or choose one by one based on demand.
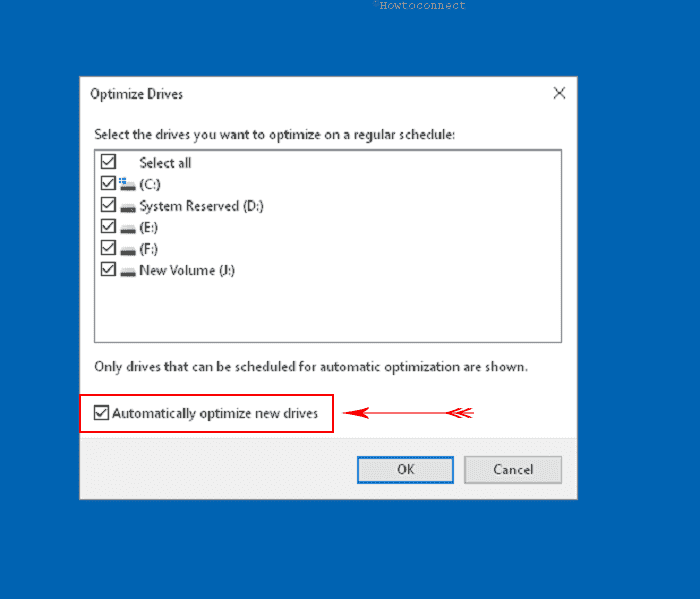
Finally hit click on “Ok” for saving the changes.
These are all about how to Optimize and Defragment Hard Disk Drive in Windows 10.