Windows 10 lets override System DPI Settings for Desktop App. Because of unchanged dot per scale of an application, it becomes incompatible and looks blurry. Now override setting will enable Windows to inform the current DPI of the monitor when the application opens. This change will solve visibility problem for an app interface or text automatically. You can see our previous article in this regard – Enable High-DPI Support For Application on Windows 10. Let’s see the way now:
Override System DPI Settings for Desktop App in Windows 10
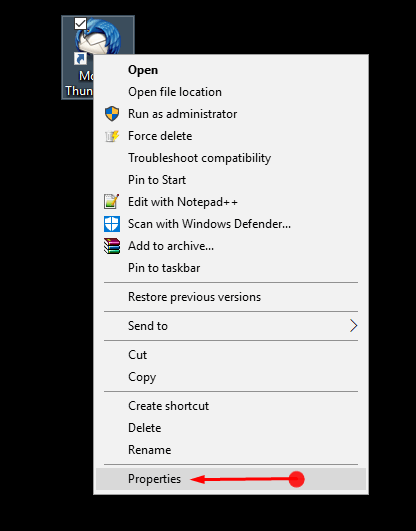
Step-1: Put a right click on any desktop app and select Properties from the list.

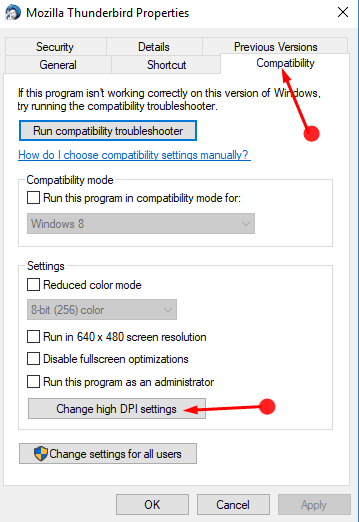
Step-2: On the Properties window switch to Compatibility tab and click on Change high DP settings.

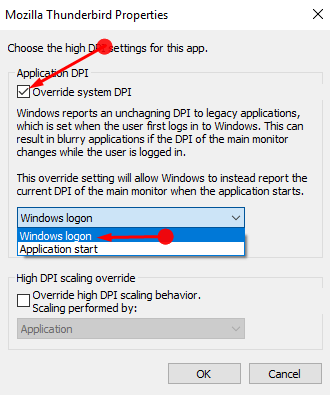
Step-3: Choose the high DPI settings for this app dialog will appear. Check the option Override system DPI. Click on the drop down highlighted under this setting and select Windows logon.

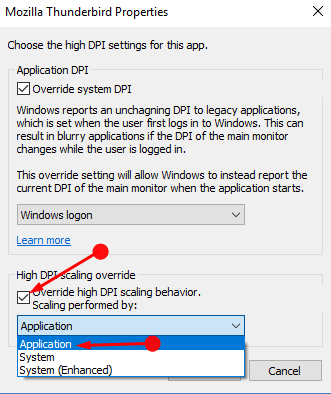
Step-4: Now go to High DPI scaling override section. Select the box located before Overwrite high DPI scaling behavior. Once the drop down under Scaling performed by; gets highlighted click on it. Select Application.

When Override System DPI Settings was not ready you needed to manually run compatibility troubleshooter when a third party app or truncated text blur. So Microsoft introduces this new setting option in their latest build 17063. Follow if you have a visibility issue How to Change Text and Apps Size on Windows 10 Creators Update.
Conclusion
An app appears fuzzy for inappropriate DPI settings. It makes the app complex as well as tough to run in the system for the users. Since Microsoft is dedicated to the users’ satisfaction most, they have introduces special feature to Change High DPI Settings. We have discussed the complete way in order to modify these settings so that you can run the desktop app easily. Read and apply the steps properly to Change High DPI Settings of an App in Windows 10 and do a comment if getting trouble
