The first major update of 2021 and 11th of Windows 10 is about to release in Spring if not, you will get it by fall. This version of Windows includes lots of new features and is more focused on stability. Some highlighted features of this build are the newly designed emoji panel, new icon theme, improved touch keyboard, and Windows Voice typing. In this version, some new options have been added to Windows settings such as DNS Configuration and Disk Management.
Windows 10 generally downloads available updates automatically and install them as well. But due to poor internet or metered connection, sometimes the system fails to download updates properly. As a result, you might need to Install Windows 10 21H1 manually. In the below section, we have listed 4 different methods to get the latest Windows update. Choose the one you prefer.
Install Windows 10 21H1
Here is how to Install Windows 10 21H1 –
1] Check for updates through Settings app
Microsoft often delays in providing new Windows releases. In such a case, Windows settings app is the most convenient way to check whether a new patch is available or not. To check for updates manually, here are the steps to follow –
- Press – Windows + I.
- Select – Update & Security.
- From the right pane, click – Check for updates.
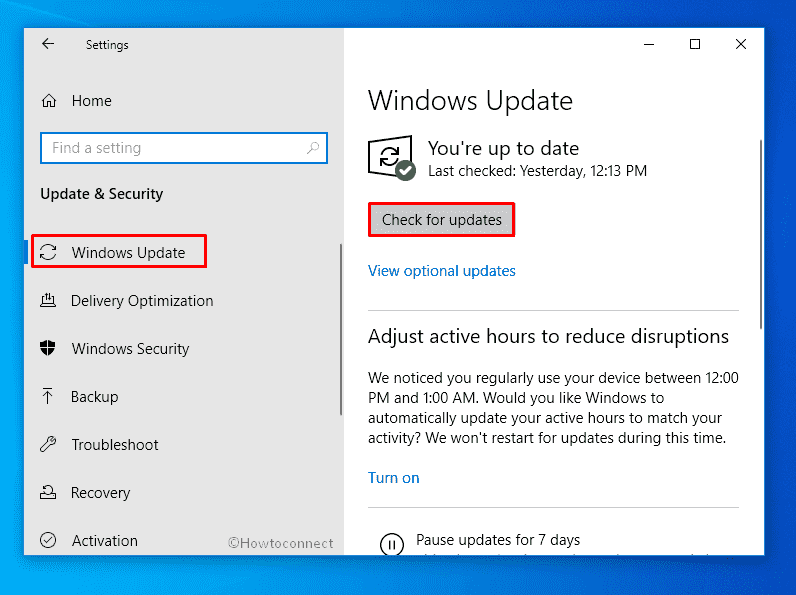
- If any newer patch is available, hit – Download
- After completion of the downloading process, click – Install now.
- In the end, hit – Restart now.
2] Use Windows 10 update assistant
If you didn’t get any updates available while checking through the Settings app, use Update Assistant to get it right away. It’s a very easy to use tool that let users upgrade Windows 10 to the latest builds. To make use of the assistant tool, follow the below way –
- Visit the Software download page of Microsoft.
- Click – Update now.
- Hit Save file if a pop-up appears.
- Go to the directory where the system saves downloaded files.
- Double-click Windows10Upgrade setup file.
- Hit – Update now.
- Comply with further instructions to finish the process.
3] Install Windows 10 21H1 with USB
To complete the smooth functioning of the update process, a good internet connection is a must. Due to poor internet, data transfer gets obstructed and the system fails to finish download or installation. In such a scenario, a bootable USB is the best option.
Using USB drive is pretty handy as it is compatible with almost every device. Also, you can use the same USB on multiple devices to Install Windows 10 21H1. This way, you don’t need to download the same installation file time and again. To make a USB stick bootable, follow the below steps precisely –
- Insert a USB drive into your Windows 10 PC.
- Visit the official webpage of Microsoft that offers to Download Windows 10.
- Click – Download tool now.
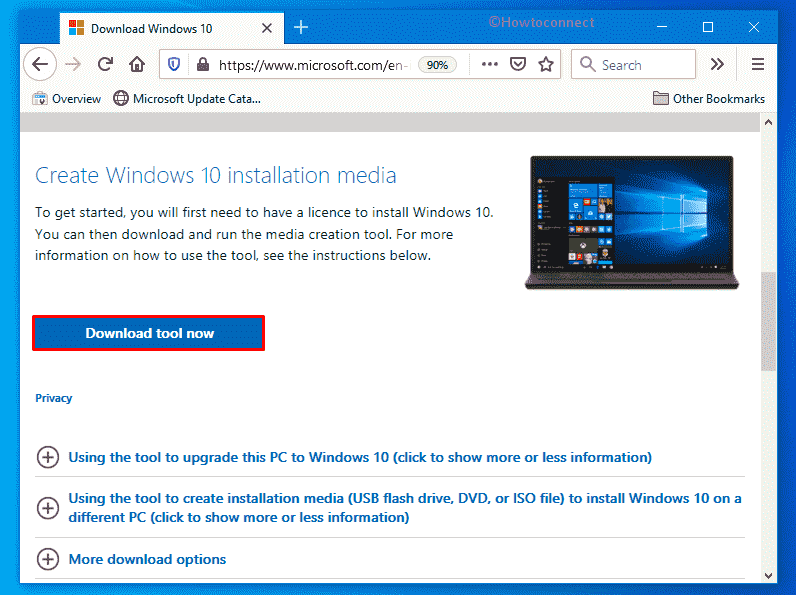
- Doble-click MediaCreationTool21H1.exe file you just got.
- To approve User Account Control, click – Yes.
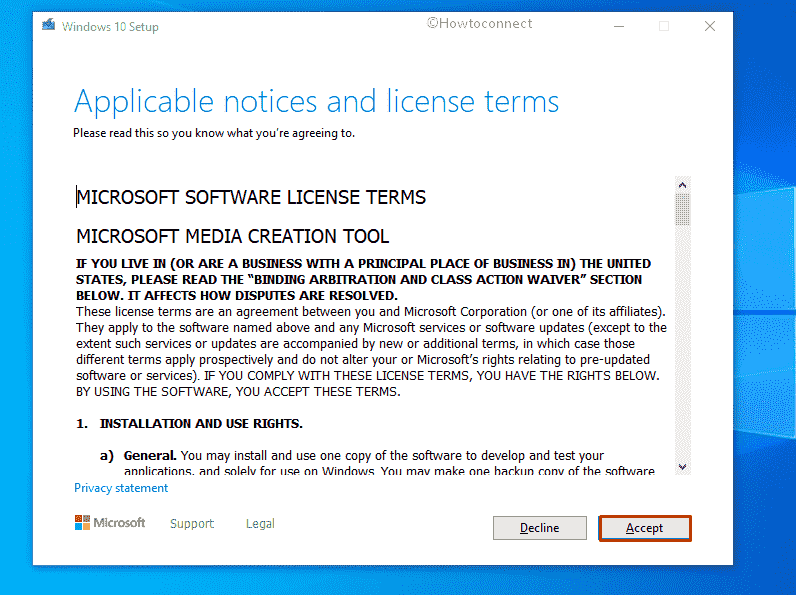
- When Windows 10 setup wizard turns up, hit – Accept.
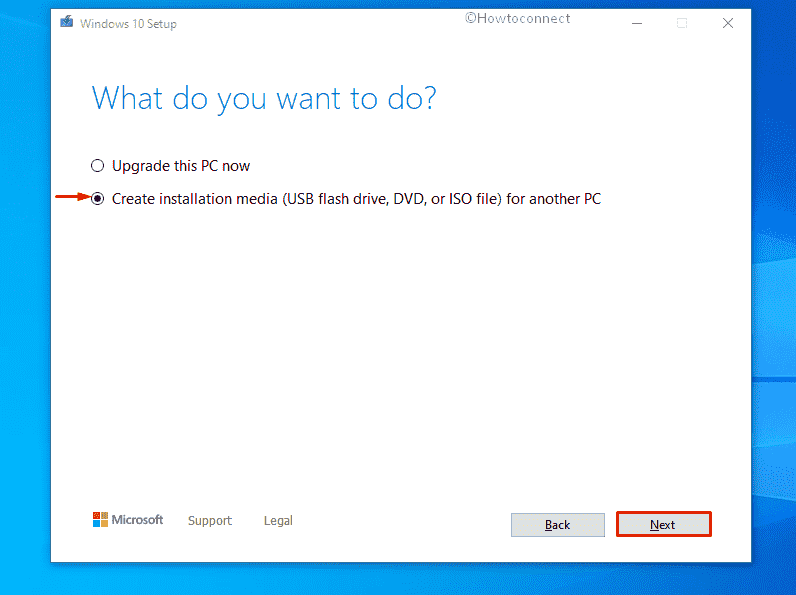
- Select the radio button set before Create installation media (USB flash drive, DVD, or ISO file) for another PC.
- Click – Next.
- Check whether Language, Edition, and Architecture are set correctly and then hit – Next.
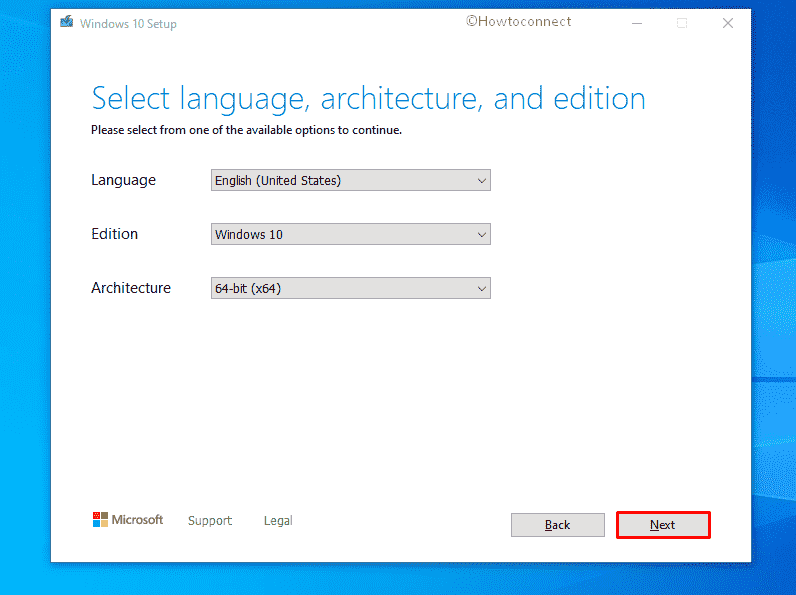
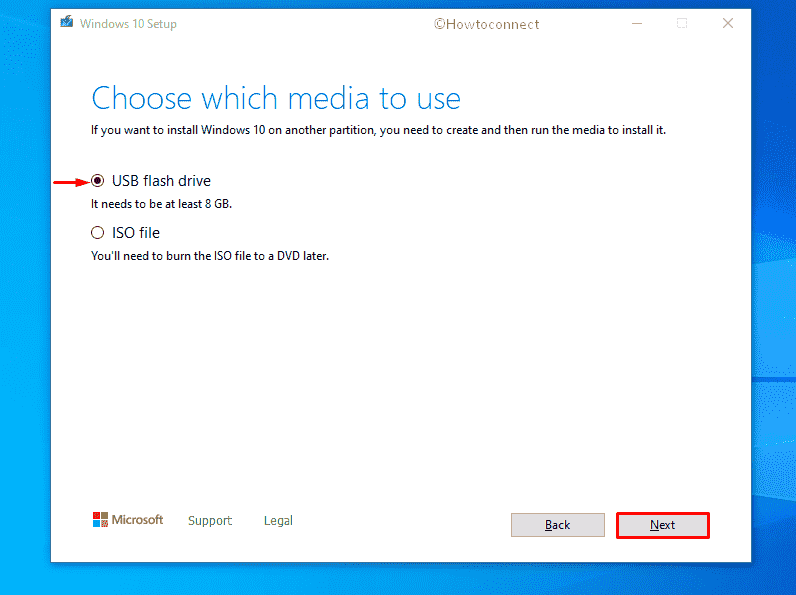
- From the next page, select – USB flash drive.
- Hit – Next.
- Opt for USB drive you inserted. If you don’t see the desired one, click – Refresh drive list.
- After choosing the right one, hit – Next.
- When downloading process ends, navigate to the USB drive and double-click the downloaded setup file.
- Follow the on-screen instruction to finish the procedure.
4] Perform Clean Install from ISO
If you want to start afresh, choosing Windows ISO file to install 21H1 will be the best choice. This procedure will wipe out the local disk and system settings will go back to the default state as well. To Install Windows 10 21H1 through ISO, imitate the below steps –
- Visit the official Microsoft webpage first.
- Click – Download tool now.
- Open the exe setup file you downloaded.
- When User Account Control appears, click – Yes.
- To agree on the terms and conditions, hit – Accept.
- Select – Create installation media (USB flash drive, DVD, or ISO file) for another PC.
- Hit – Next.
- Make sure that the Language, Edition, and Architecture are correct.
- Click – Next.
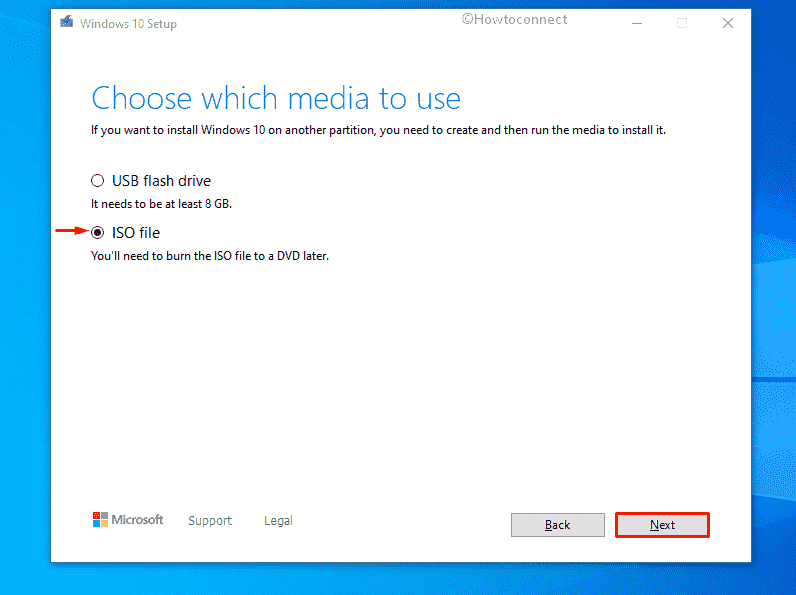
- Click the radio button set before ISO file.
- Hit – Next.
- Select a location where you want to save the ISO file.
- Click – Save.
- When the progress hits 100%, tap – Finish.
- To burn ISO, make Pendrive bootable.
- Later on, insert the same Pendrive into the PC where you want to Install Windows 10 21H1.
- Hit either ESC, Del, F2 or F12 what your device suggests to proceed with Boot options.
- Check if Language to install, Time and Currency Format, and Keyboard or input method are correct.
- Click – Next.
- Hit – Install now.
- Provide the digital product key in the specific bar. If you don’t have it, click – I don’t have a product key.
- Hit the checkbox set before I accept the license terms.
- Click – Next.
- Hit – Custom: Install Windows only (advanced).
- Select the drive you inserted click – Next.
- When a warning pop-up appears, click – OK.
- The further process is about to happen automatically.
- Still, be present in front of the PC to follow any prompted instructions.
- During the process, the PC may restart itself several times as a part of the installation.
- When the system powers up finally, either put your Microsoft email account, phone, or Skype identification in the given field.
- Proceed with Set up a PIN option.
- If you want to turn on Cortana, click – Yes.
- Set the Privacy settings as you like.
- Finally, click Accept to finish the process.
Update – You should also choose this – Universal MediaCreationTooL to download or Install Windows 10 Version 21H1.
Methods list
1] Check for updates through Settings app
2] Use Windows 10 update assistant
3] Install Windows 10 21H1 with USB
4] Perform Clean Install from ISO
That’s all!!
