If you create bootable USB Drive having Windows 8, Windows 7, Windows XP files it will be far better than these files are stored separately on different USB Drives. Everyone knows how to install Windows XP, 7, 8/8.1 separately. But, here we are providing tips for you on how to install Windows XP, 7, 8/8.1 from the same USB drive. There is a need for some Windows Files like Windows XP ISO file Or DVD, Windows 7 ISO file, Windows 8/8.1 ISO file, or 8GB+ USB flash drive.
Required Items:
- Win 8 or 8.1 ISO File,
- Win 7 ISO File
- Win XP ISO File,
- Flash Drive having more than 8GB space.
Recommended: How to Install and Access Pandora Windows App in Windows 8
How To Install Windows 8/8.1, Windows 7, XP From One USB Drive
Step 1: – You have to connect your 8GB + USB Flash drive to your PC/Laptop. Backup all data of USB driver before proceeding because it will be erased while making it Bootable.
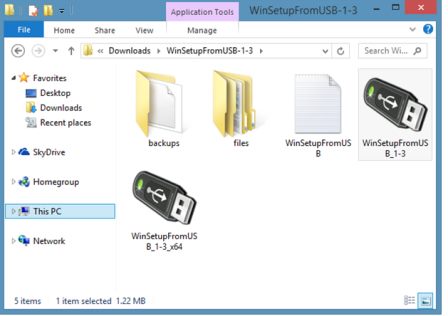
Step 2: – Download the newest version of WinSetupFromUSB zip file. Extract the zip file to get winSetup From USB folder containing separate files for x86 and x64 versions of windows.
Step 3: – Twice click on anyone of the WinSetupFromUSB.exe (x86) or WinSetupFromUSB.exe (x64) to access the software as your suitable windows is running.
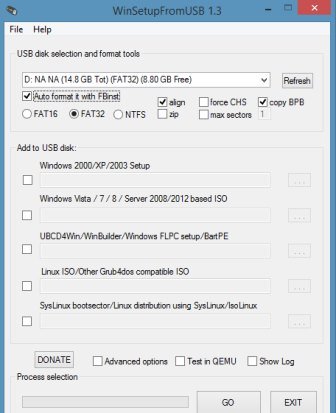
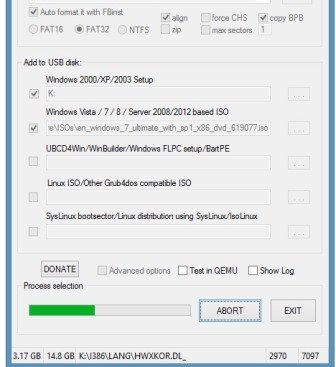
Step 4: – When WinSetup From USB is launched and installed then you have to Choose your USB pen drive under USB disk Selection and format tools section. Select Auto format it with FBinst option and also select FAT32 as file system instead of NTFS if you wish to multi-boot USB to be compatible with both BIOS and U/EFI.
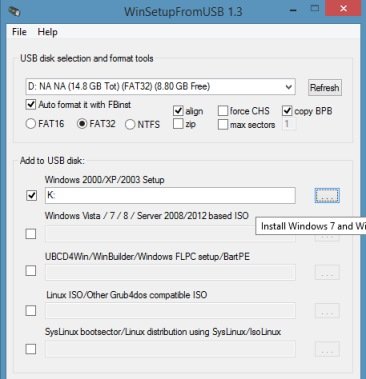
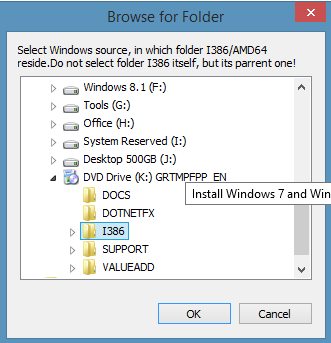
Step 5: – If you don’t want to add Windows XP files to the USB then you can skip this step. Select the checkbox under Windows 2000/XP/2003 setup and then tap the browse button to browse the i386 folder in your Windows XP DVD or ISO file. Please Note that if you have the ISO file then you have to mount the ISO file using a third party software or the built-in mount feature in Windows 8/8.1.
If you are on Windows 7 then you have to mount an ISO file in Windows 7. Please visit on How to Mount an ISO file in Windows 7.
Firstly you have selected the i386 folder then proceed to the next step.
Step 6: – Select the checkbox of Windows Vista/7/8/server 2008/2012 based ISO and Click on the browse button to browse the location where you have saved your Windows 7 ISO file. Choose the ISO file and click Open button.
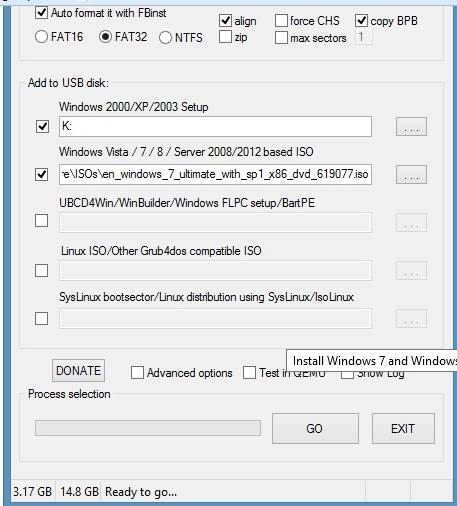
Step 7: – Now You have to choose Add Windows XP and Windows 7 to the USB Flash drive and make it bootable. check the advance option box to open Advance dialog box. Choose the option titled Custom Menu names for Vista/7/8/Server Source. This will enable you to add your own custom names to your Windows 7 and Windows 8 setups in the boot menu.
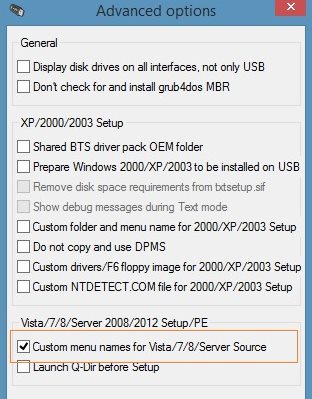
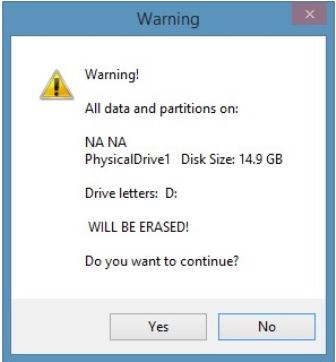
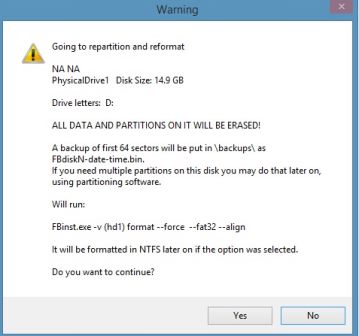
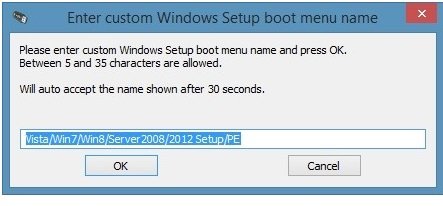
Step 8: – Close Advance Option Dialog. Finally Tap GO button. Click on the Yes button when you are viewing the Warning Message. If you have selected Custom menu names for Vista/ 7/ 8 then it may ask you to enter a custom name for widows Setup. You have to enter the name and click OK button for Allow WinSetupUSB to start the job.
Here we will add Windows 8/8.1 to the USB in the next step:
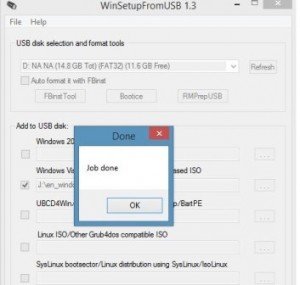
Step 9: – Lastly you can see there is a message of “Job Done”. If you want to add Windows 8/8.1 Installation files to the USB then don’t close it. But if you don’t want to Add windows 8/8.1 then you can stop by clicking on OK.

Step 10: – While your process is in adding Windows 8/8.1 installation file then select the option titled windows Vista/7/8/server 2008/2013 based ISO. Select Your Windows 8/8.1 ISO file. Note: Make sure that the same USB drive is selected.
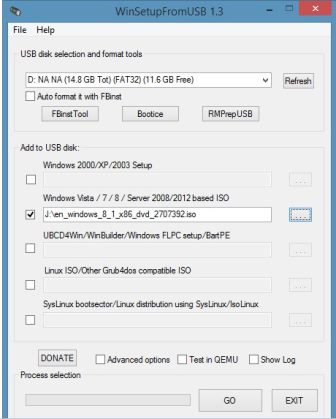
Step 11: – You have to Enable Advanced option and Choose Custom menu names for Windows Vista, Windows 7 Windows 8, or 8.1 server source.
Step 12: – lastly Click on GO button. Click Yes Button when you see warning dialogue boxes and enter the name of the setup when you will be asked to do. your Bootable USB containing Windows XP, Windows 7, Windows 8 or 8.1 may be ready in a couple of minutes.
Now You can connect the USB drive to your PC or any other PC and as your choice which OS do you want to install as Windows XP, 7, 8/8.1. You can see the below screenshot to select Windows setup you would like to start.
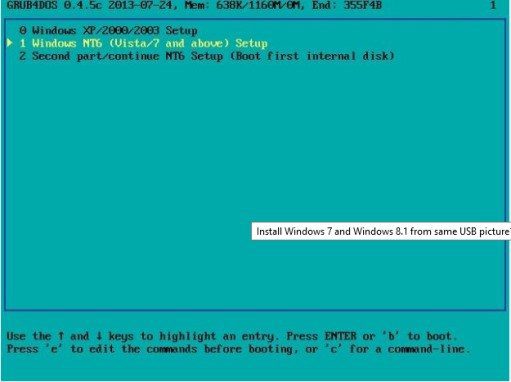
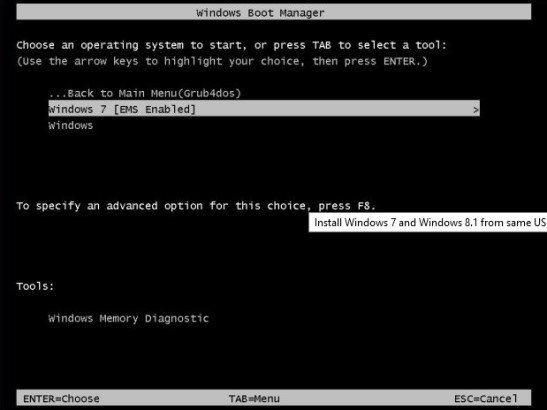
If your PC doesn’t support booting from USB then you have to go through How to Boot from USB even if your PC doesn’t support booting from USB.
sunita
says:https://social.technet.microsoft.com/Forums/windowsserver/en-US/4efa0611-7a7d-4306-b987-bf7d49b4d743/positionalparameternotfoundmicrosoftpowershellcommandsgetchilditemcommand?forum=winserverpowershell
ProDigit
says:Gives Invalid argument on surface 2:
Add-AppxPackage : A positional parameter cannot be found that accepts argument ‘C:\winjs.appx’.
At line:1 char:1
+ add-appxpackage c:\app1.appx-DependencyPath C:\winjs.appx
+ ~~~~~~~~~~~~~~~~~~~~~~~~~~~~~~~~~~~~~~~~~~~~~~~~~~~~~~~~~
+ CategoryInfo : InvalidArgument: (:) [Add-AppxPackage], ParameterBindingException
+ FullyQualifiedErrorId : PositionalParameterNotFound,Microsoft.Windows.Appx.PackageManager.Commands.AddAppxPackag
eCommand