Process and Steps to Connect JIO 4G Network to Windows 10. – Reliance Jio produces the fastest Internet access in India and people are open-heartedly admiring it. The Network accesses cellular data quite successfully working on all editions of Windows operating system. Besides, Windows 10 users are active to establish connections between this Reliance 4G Network and their PC. So we are here to present a step by step guide to Set up the connection.
This company claims to be the best 4G network with the cheapest rates globally. Currently, it is activated inbuilt in LYF devices whose price range is from Rs. 2,999/- to 9755/-. The activation of SIM is immediately processed on Aadhaar Number. Tariffs of JIO is so economical and no hidden telecom charges are included. JIO offers free of cost Voice calls and exclusive concession for students.
In addition, it benefits Enterprise-friendly solutions as well as plans. JIO is proud to be the first ever platinum 4G service in this country. The most advantageous thing regarding Reliance 4G Network is zero downtime as it emits data spontaneously 24×7.
Hence, if you are equally eager to connect JIO 4G Network to Windows 10, read further and follow each step carefully.
Connect JIO 4G Network to Windows 10
When you bring the JIO SIM, first of all, you need to stay calmly for its activation. Previous to the activation the company professional will verify the documents you have enclosed with the application form.
Activation of JIO 4G Network SIM
Step 1 – Once the company professionals verified documents in the office, they will forward a message to the alternative mobile number registered to obtain JIO SIM (or Device). The message is like this –
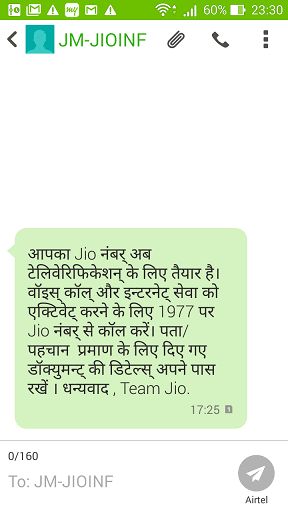
Step 2 – Take your Adhar card in your hand before making a call to 1977. When you call the on the stipulated number they will ask the ending four digits of Aadhaar number, hence, memorize it.
Step 3 – Call to 1977 with JIO Device
Dial to the advised number 1977 with the JIO Mobile phone (the handset loaded with SIM).
Step 4 – Chose appropriate language
Quickly you will hear automated computerized instructions. At first, it will ask you to choose a language from English and Hindi by pressing 1 or 2 respectively. So choose the language with which you are quite comfortable by either pressing one or two.
Step 5 – Type the Last 4 digit of Aadhar card
As soon as language selection completes, you will be asked to write the last 4 digits of Aadhar card. So type it on the mobile phone.
Step 6 – After the above proceedings finish, you listen to a message saying, “your verification is complete and the SIM will be activated in 10 minutes“.
Connect JIO 4G Network to Windows 10
Step 1 – Tap on Settings icon located on the home screen after the SIM gets activated.
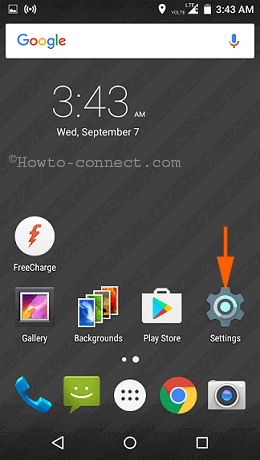
Step 2 – Tap on More On the next screen.
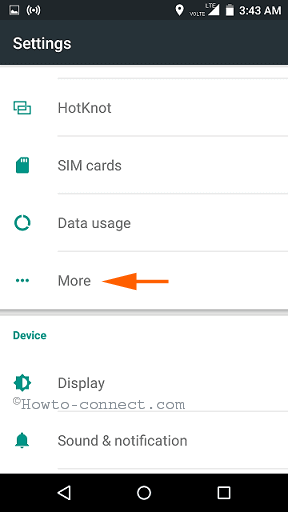
Step 3 – On the More page, gently hit on Tethering & portable hotspot situated in the middle.
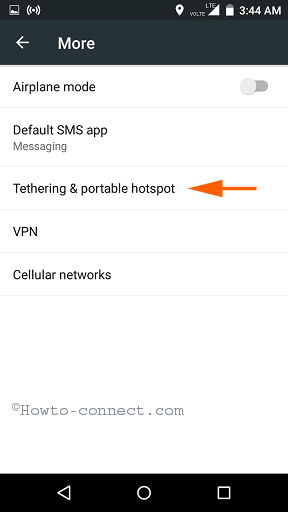
Step 4 – Hit Wi-Fi hotspot appearing at the top of the Tethering & portable hotspot page.
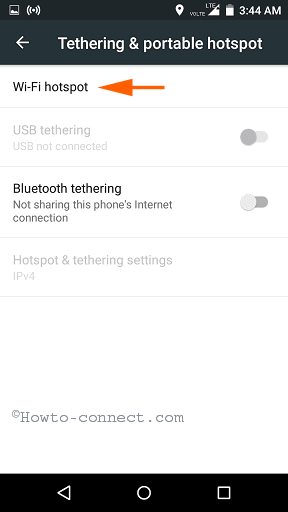
Step 5 – On the subsequent screen, tap on Set up Wi-Fi hotspot.
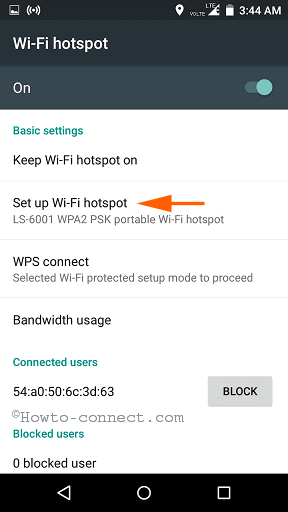
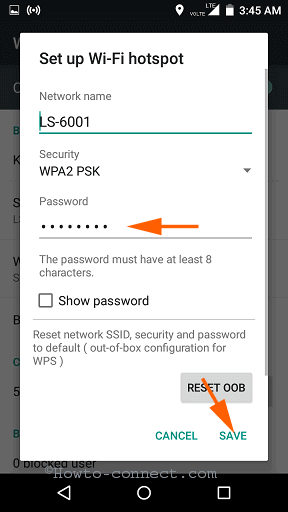
Step 6 – Finally, the Set up WiFi hotspot page comes. You notice a password is here for a specific Wi-Fi network name. Write a new Password and tap on the Save button at the bottom part. Leave the Network name as it is.
Step 7 – Power on Windows 10 PC and hit on the Network symbol placed on the taskbar.
![]()
Step 8 – Network flyout comes out, hence, identify the Reliance JIO Network name and click on it. It expands and shows a Connect button; click on this button.
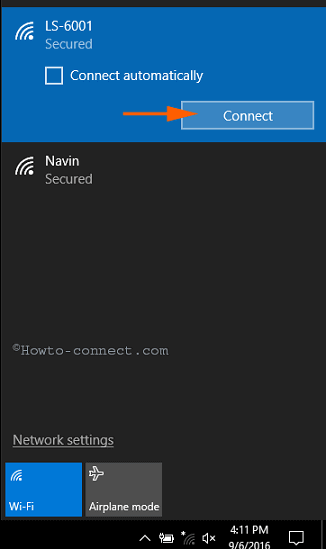
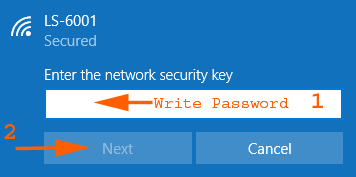
Step 9 – Write the password you have set in the JIO Mobile handset and hit Next.
Conclusion
Consequently, You become successful to Connect JIO 4G Network to Windows 10, the world’s fastest and cheapest Internet provider. Therefore, cheer up and enjoy furthermore if you face any trouble during following the steps allow serving you by writing a comment.

Jio 4G sim network settings