Method to Keep Notification Private on Lock Screen Windows 10 PC. Microsoft continuously adopting changes towards the improvement of Windows 10 OS. And one such improvement is the Settings program. In addition to lots of exciting features, Settings app bestows almost all the facilities that one would search for. At present, we well talk about notifications settings in the settings app.
One such feature Keep notification private on the lock screen has introduced itself. This setting is popular amongst the users of Windows Phone. Consequently, after enabling this setting, the particular apps whose notification has arrived, be unseeable on the lock screen. Hence, if you think you should Keep Notification Private on Lock Screen follow the below steps.
How to Keep Notification Private on Lock Screen Windows 10 PC
Step 1 – First of all, outspread Settings app. Therefore either by clicking the Settings gear icon on Start Menu or jointly hitting the sequence of Win & I keys.
Step 2 – Hit the System icon, the first one on the visible Settings app.
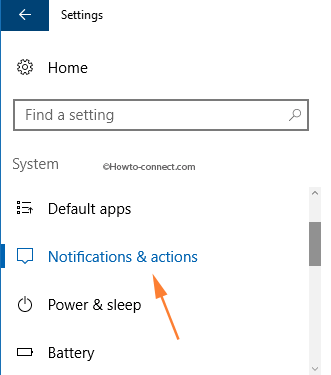
Step 3 – Tap on Notification & actions, visible at the left column.

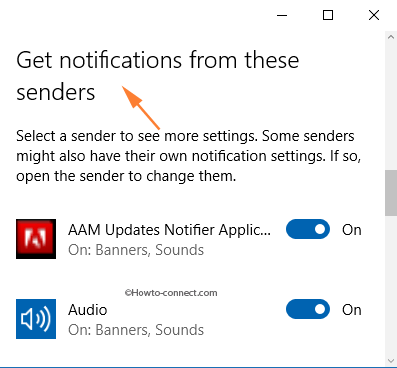
Step 4 – Look at the right panel, and travel down to the section named Get notifications from these senders.

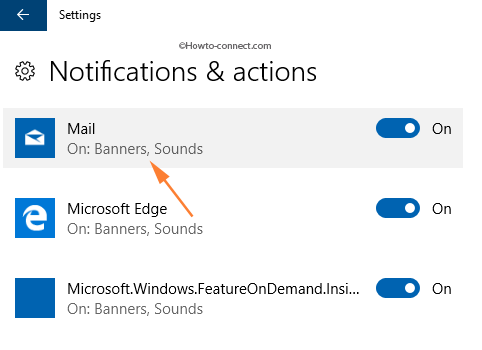
Step 5 – Click or hit an app whose notifications you desire to set private on the lock screen.

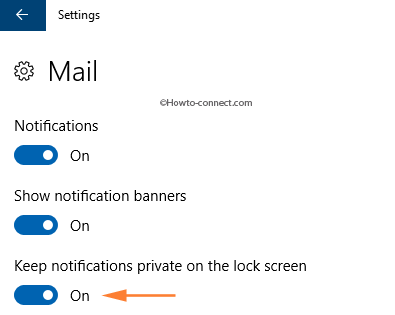
Step 6 – On the next page, trace out the option labeled Keep notifications private on the lock screen. As the last step, turn the slider to On position.

Since this feature might hold some bug and we need to wait for future updates for smooth functionality. If you hold some more information about this specific feature, enlighten us through a response in the comments below.
Once you enable this feature you will get notifications on the lock screen but it will be invisible. If you are eager to see the particulars you must use your password. This feature becomes advantageous especially to the users who remain alerted about privacy.