How to Print 4×6 and 5×7 Photos on A4 Paper in Windows 10 – When you start to take a copy of an image in a fixed size you often times experience troubles. But this is the super easy task if you have Windows Photo Viewer on your computer. You will read the methods to Print images in 5×7 and 4×6 sizes on particularly A4 sheet in Windows 10 in this article. In case, Windows Photo Viewer (inbuilt not existing on Windows 10) is not available, don’t take botheration a functioning link will exist.
Table of Contents
Tips to Print 4×6 and 5×7 Photos on A4 Paper in Windows 10
1. Activate Windows Photo Viewer
Before you initiate the Print regarding operations it is reasonable to obtain Windows Photo Viewer, hence, perform a click on -> WPV.
- After the downloading process ends up, make a right click and choose “Extract files”.
- Open the extracted folder, do a double-click on the item placed inside it and this will complete the rest job.
- Now copy the command written underneath –
rundll32.exe %SystemRoot%\System32\shimgvw.dll,ImageView_Fullscreen
- Strike the combination of “Win+R” at a time, paste the copied command into provided area and click on “Enter”.
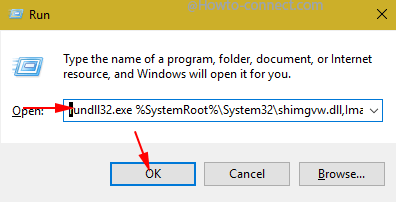
- You notice that the awaited Photo viewer has arrived on your Screen.
2. Make Windows Photo Viewer as Default
You require setting Windows Photo as Default if you are engaged in printing occupation and work with multiple pictures repeatedly. Apart from this, until you set it as default you may not find “Windows Photo Viewer” in the sub menu when you put your mouse pointer on “Open with” on right click context menu. See how you can do this –
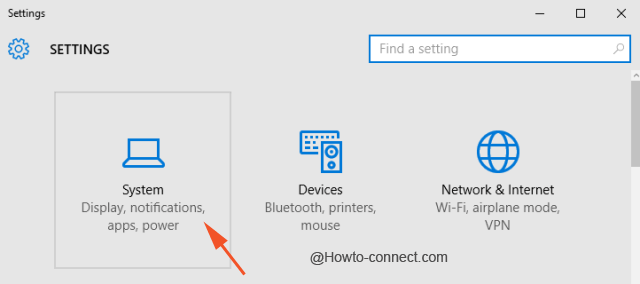
- Jointly hit “Win+I” and at the enlarged Settings app on the screen click on “System” block, the choice in the beginning.
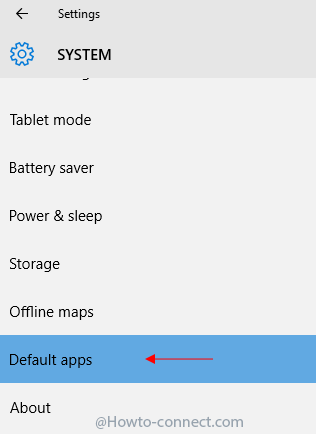
- In the left sidebar area of System, you require pressing “Default apps”.
- In the right segment, perform a click just below Photo viewer where you notice another app is existing
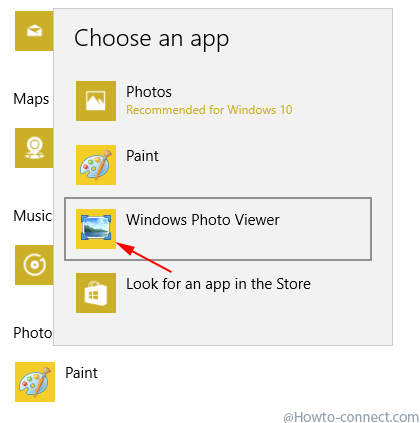
- Above action opens a pop up having a list of 3 or 4 apps, hit on “Windows Photo viewer”.
3. Start Printing Work
- We assume that you have powered on the printer, connected it to the PC and put the A4 size paper in the tray.
- Perform a double click on the Photo you are going to print.
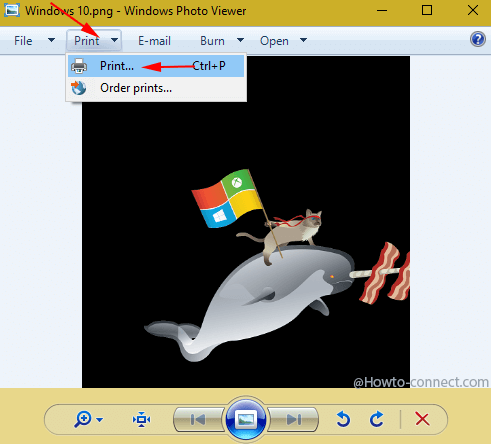
- Click “Print” tab on the menu bar located at the top and “Print icon” from the drop down on Windows Photo Viewer.
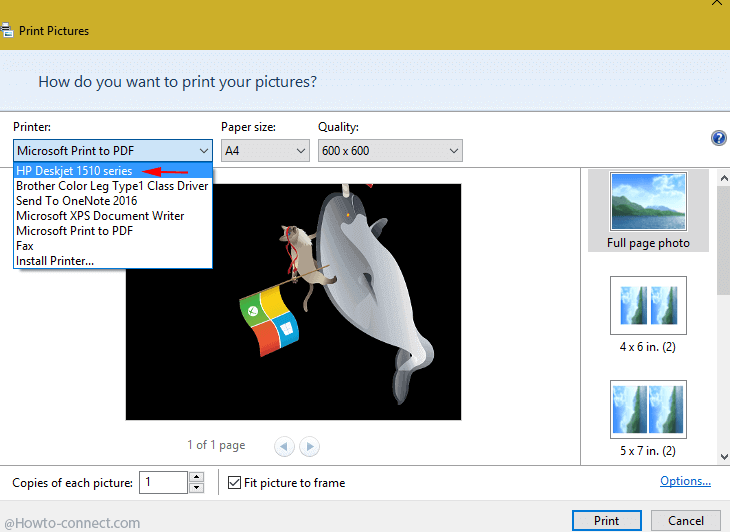
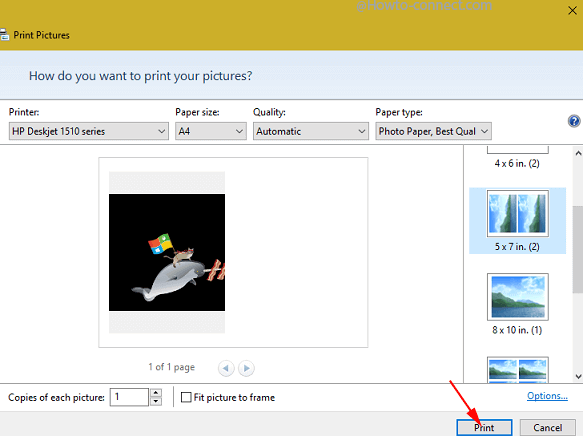
- Print Picture Window opens up, click the drop down below “Printer” and choose the one connected to the computer.
- Click the drop down below “Paper size” and then on “More…”. A very long list opens.
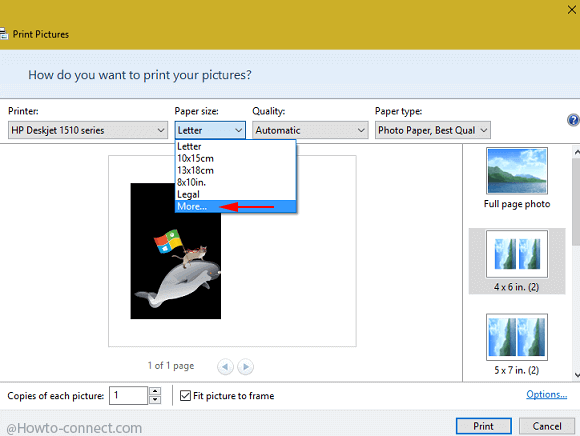
- You can choose any custom size from the various options but click on A4 from the list.
- In the right sidebar, click on the size either 4×6 or 5×7 whichever you need to print in the layout section.
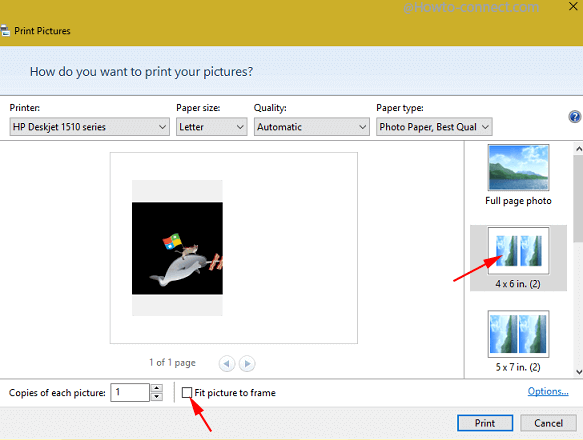
- Uncheck the box beside “Fit picture to Frame” and choose how many copies you need.
- Finally, click “Print” button situated at the bottom of the Print Pictures box.
- Move towards the printer, wait until the paper is ejected and gather your desired copies after you Print 4×6 and 5×7 Photos on A4 Paper in Windows 10.