In this article, we’ll walk you through the steps to reinstall Webcam driver on Windows 10 and 11. When you encounter issues such as laptop camera not working, keep freezing, blurry, or missing this method will help you to fix.
A webcam may not work in Windows 11 or 10 in situations when drivers are not regularly updated or antivirus or privacy settings restrict camera. Many times, a particular issue with the webcam may persist even after successful updating. Even roll back to a previous version or other workaround fails to help in some cases. In such a scenario, when you reinstall Webcam Driver it may resolve the discrepancy that you might be facing with the webcam. This is true for other drivers as well.
Ways to Reinstall Webcam Driver in Windows 11 and 10
Here is how to reinstall Webcam Driver in Windows 11 or 10 –
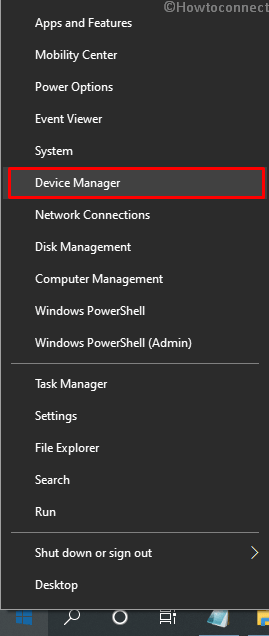
Step-1: Right click on Start from the bottom left of the screen and select Device Manager from the list.
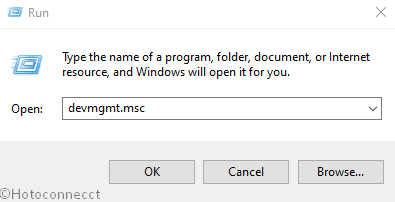
Alternatively, you can also press Windows + R to open the run dialog and then type devmgmt.msc. Then, press enters or click on OK to open the Device Manager directly.
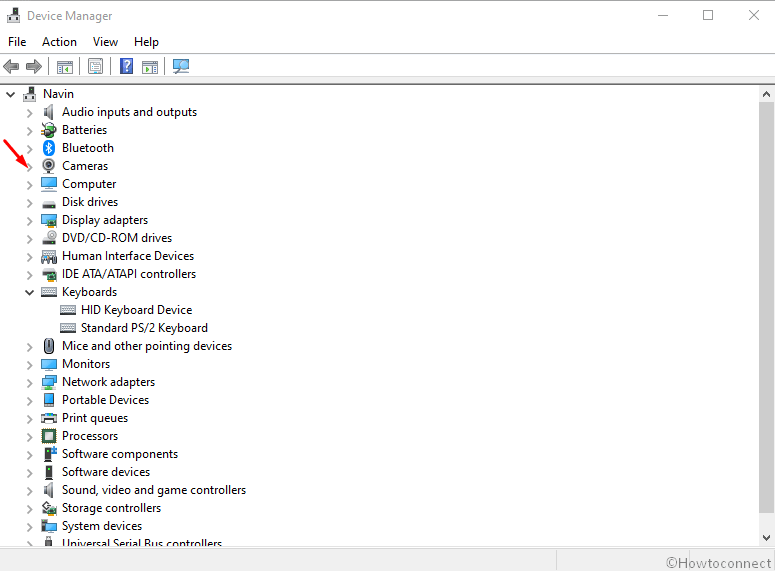
Step-2: Locate the webcam device whose driver you’d like to reinstall. It should be available under the head ‘Cameras’ or ‘Sound, video and game controllers’ or ‘imaging devices’. Double click on it to expand. Moreover, you can click on the arrow mark before the device name as an alternative way.
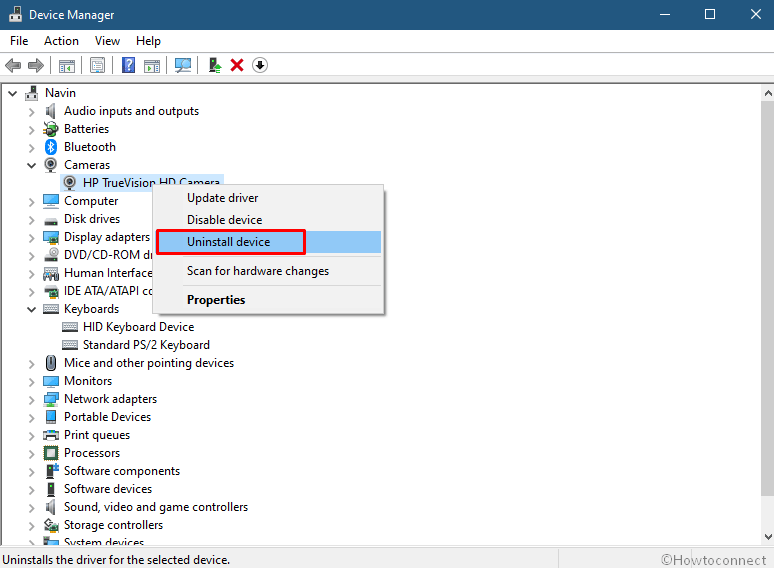
Step-3: Right click on the driver. Then, from the fly-out menu, click on ‘Uninstall device’.
Step-4: When you do so, a dialog box will appear warning and requiring confirmation for uninstalling. Click on ‘Uninstall’ button.
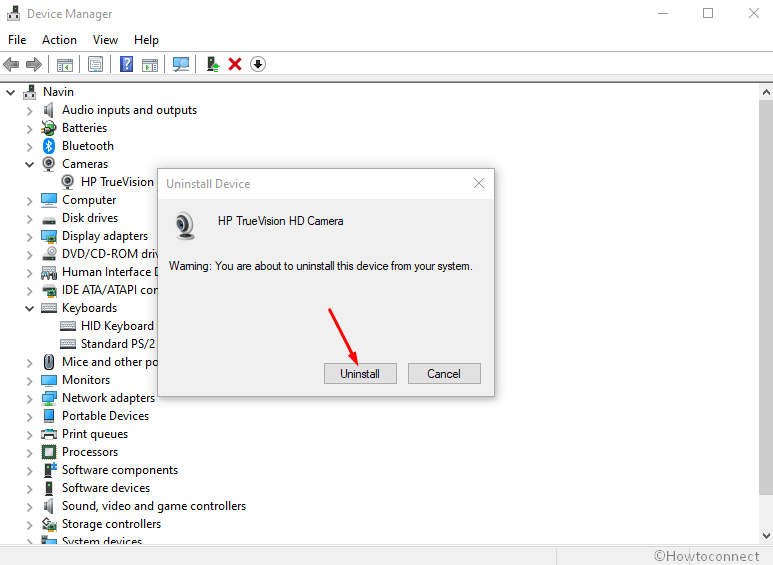
Step-5: Restart the system once the device is uninstalled.
Usually, the system automatically installs the drivers bringing out from system files once you restart.
That’s all!!!
Also, see the Instructions –
How to Turn off Webcam in Windows 10 Laptop.
Fix: Microphone or Camera Not Detected in Windows 10 2018 1803