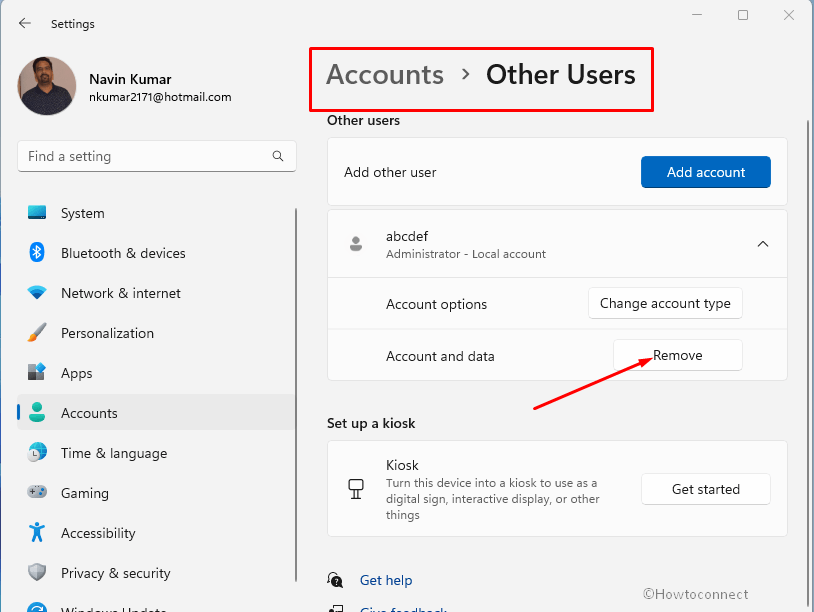
Signing into Windows 11 through a Microsoft Account gives Windows 11 users access to OneDrive and the Microsoft Store, which offer better security options and syncing features. Furthermore, the system allows creating a local account to provide entrance into a computer to Family members, employees, and other users. However, several people ask about methods for how to remove user account from Windows 11.
Multiple accounts have their own piece of data respectively so there is a chance of chaos and littering on the system. Additionally, in spite of being an outdated user, one can log in to Windows and try to have unauthorized access to administrator or sneak data. Although this is cumbersome because the administrator has enough power to restrict and block a user from using specific files, folders, Store, OneDrive, etc. But removing a user account can provide you extra safety as well as free space. See – How to remove Login Password in Windows 11.
Table of Contents
Remove Account from Windows 11
Here is How to Remove User Account from Windows 11 –
Way-1: Through Settings App
This is the quickest and easiest method to delete a user account by bringing the built-in Settings app into use –
- First of all, confirm that you are logged in having administrative privileges. Note that if have signed into Windows 11 using an email id (Outlook, Hotmail, or Gmail), PIN, Fingerprint, or Facial recognition then you are administrator.
- Now press – Windows + I.
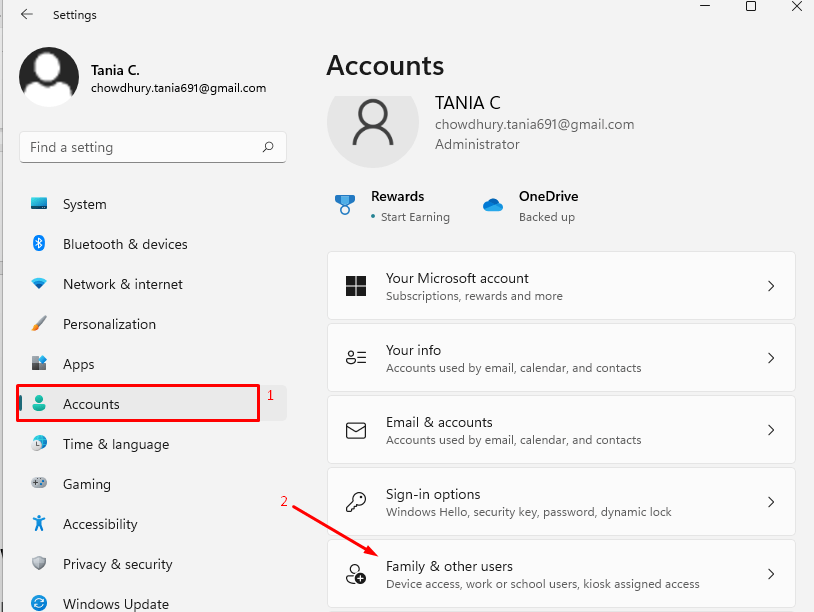
- Select – Accounts from the left pane of Settings.
- Go to the right and click – Family & other users.
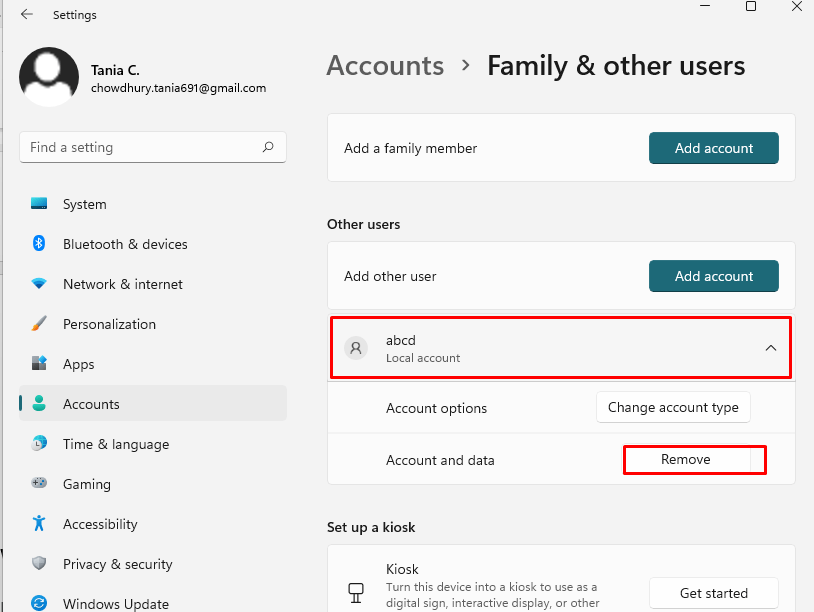
- Under Other users section, click on the account you want to delete.
- Click on – Remove.
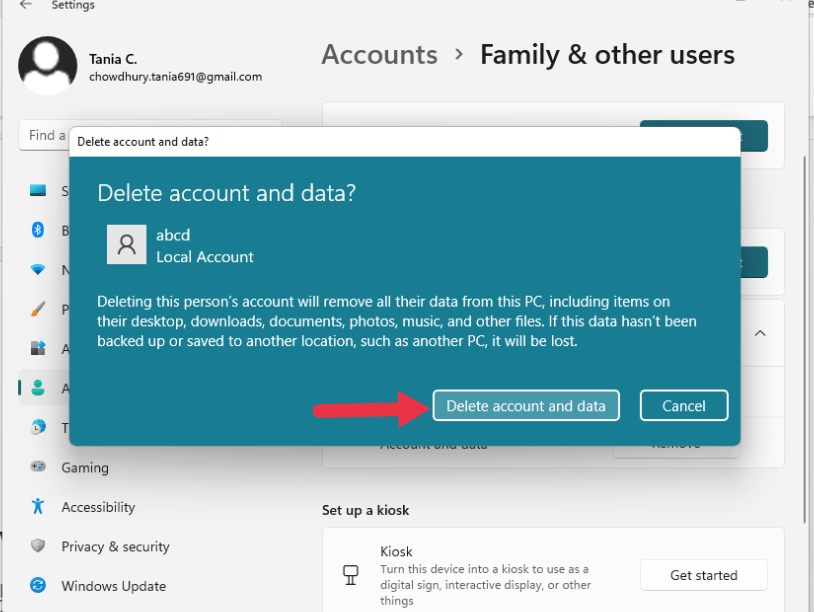
- Choose – Delete account and data.
Way-2: Via Control Panel
Control panel provides a classic way out when you are trying to remove user account from Windows 11 so follow –
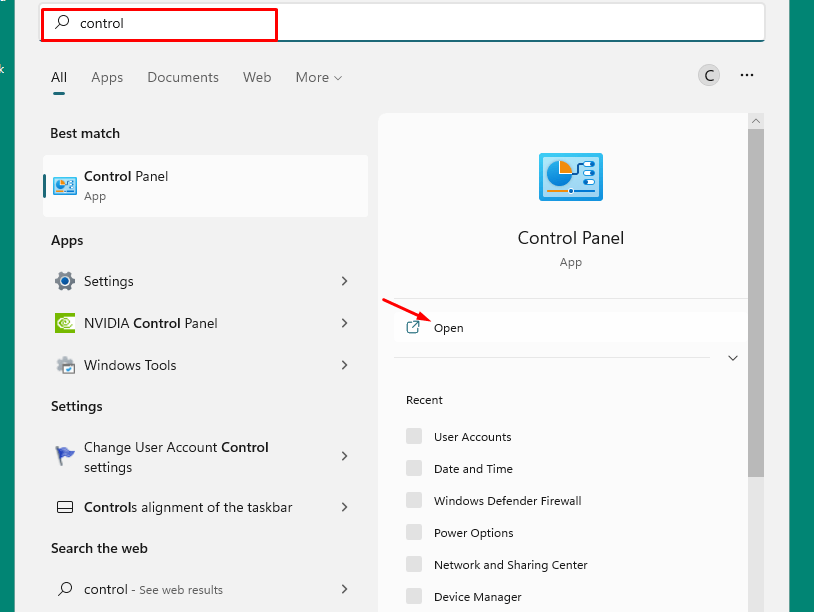
- Click on – Start.
- Type – Control.
- Select – Open.
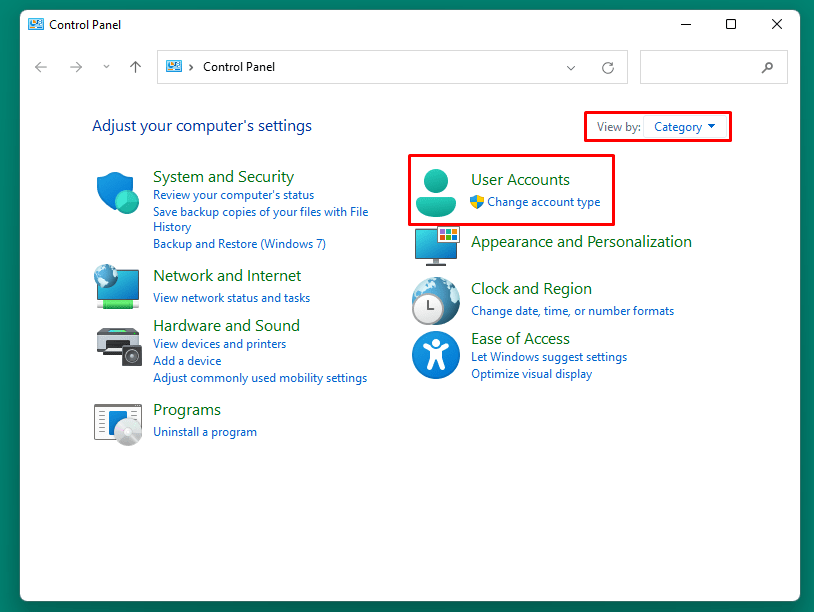
- Make sure the View by is set to category.
- Select – Change account type.
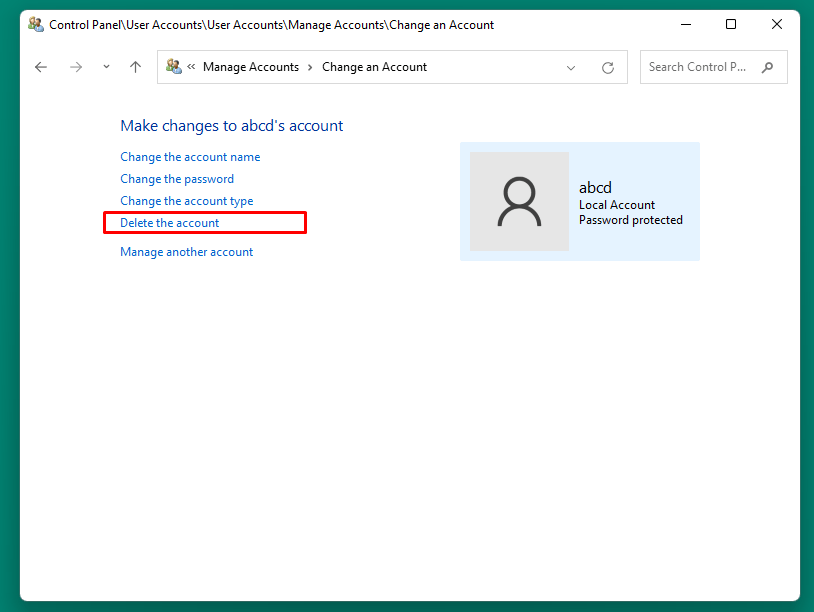
- Choose the user account you want to remove.
- Click on – Delete the account.
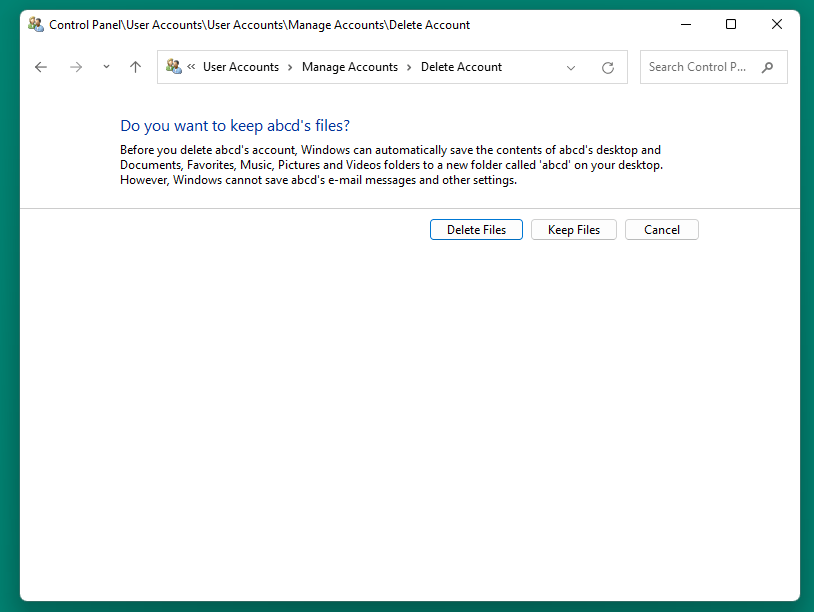
- Here, if you want to have the user’s data safe, choose – Keep Files. But if you want to remove the data associated with the account, then select – Delete Files.
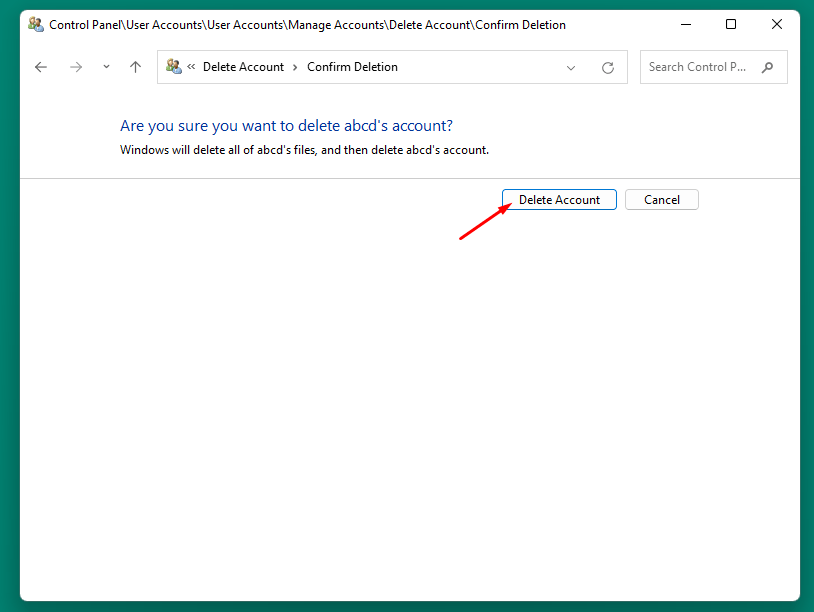
- When Confirm Deletion window prompts, click on – Delete Account.
Way-3: Using Computer Management
Computer management is the Windows tool consist of a bunch of default utilities including Local users and Group which you are able to easily use to remove account from Windows 11. Let’s proceed –
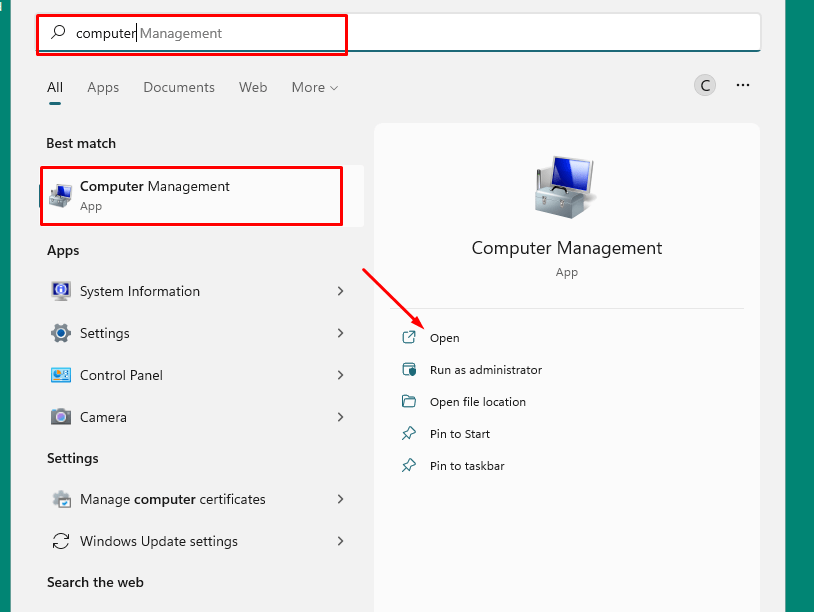
- Click on – Start.
- Type – compmgmt.msc.
- From the right, select – Open.
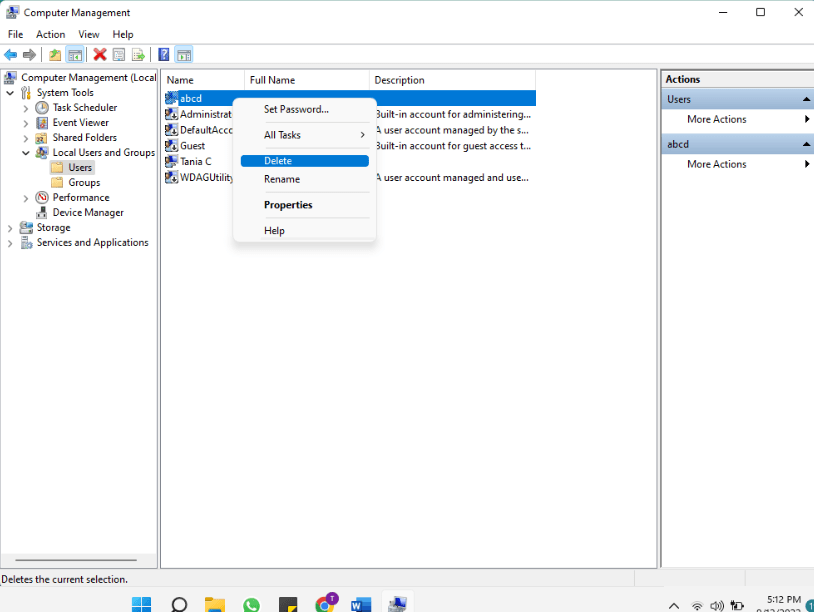
- Navigate to the following path:
Computer Management => System Tools => Local Users and Groups => Users- Right-click on the user account you want to remove and select – Delete.
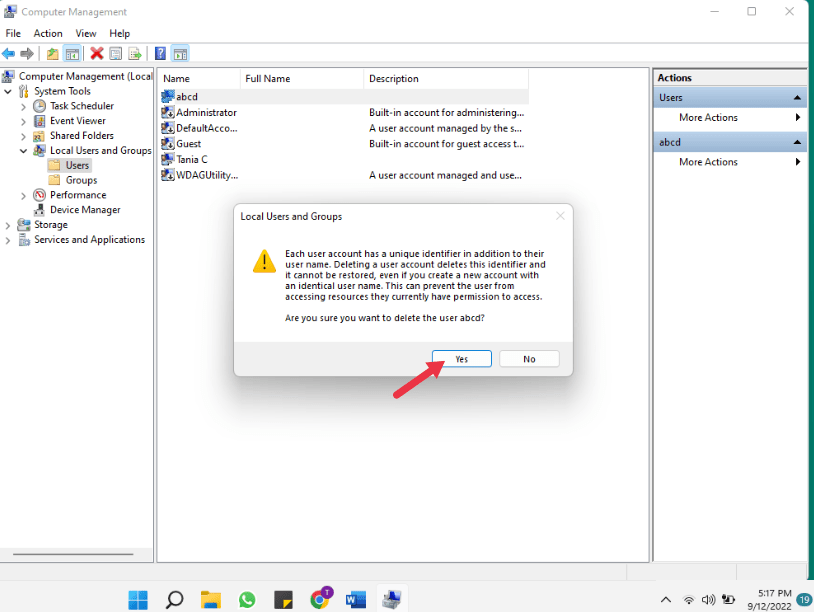
- When the confirmation window pops up, click on – Yes.
Way-4: Via the User Accounts Panel
User accounts bestow a platform to grant and deny users access to your computer to change password and other settings. When it is a question of How to Remove User Account from Windows 11 this is the best tool to use –
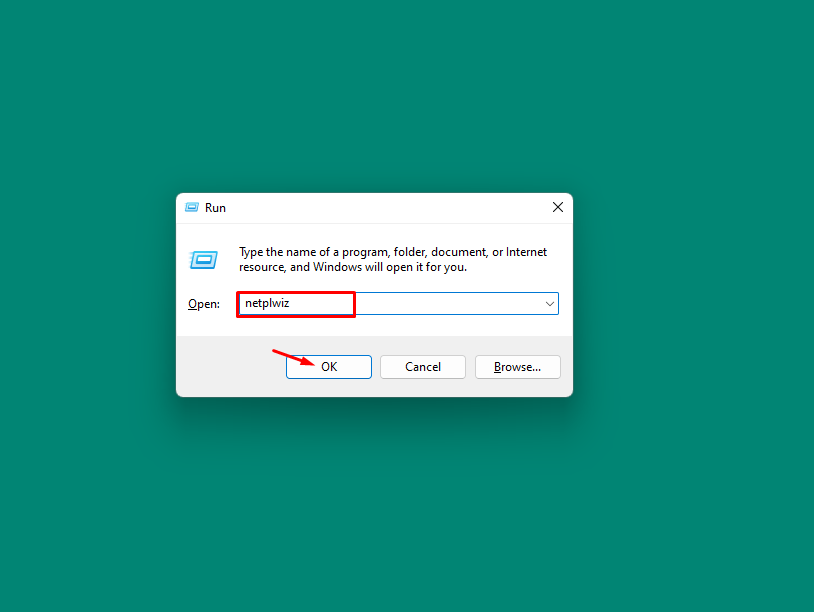
- Press – Windows key + R.
- Type – netplwiz.
- Click – OK.
- From the Users tab, select the account that you’d like to remove by clicking on it.
- Choose – Remove.
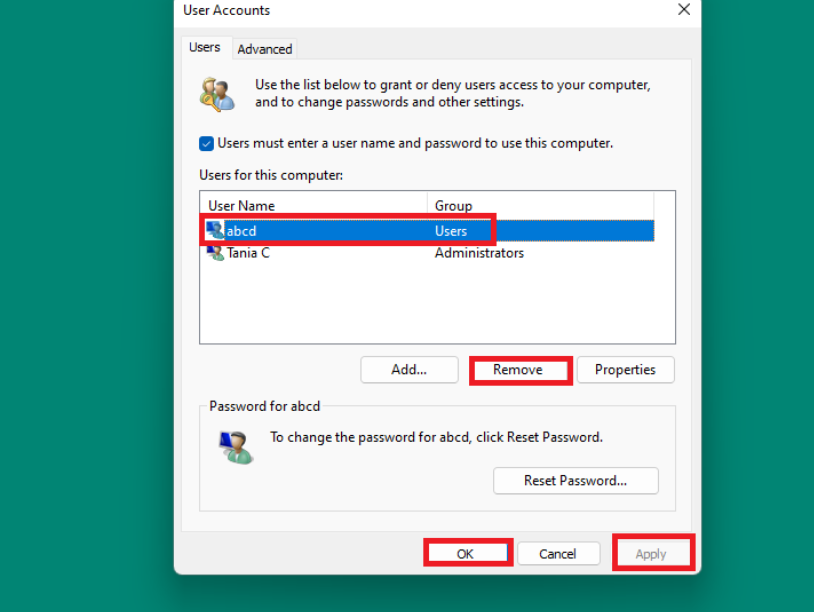
- When prompted, click – Yes.
- Select Apply and OK.
Way-5: Through cmd Command
Advanced users can practice cmd command to delete an account fast from Windows 11 –
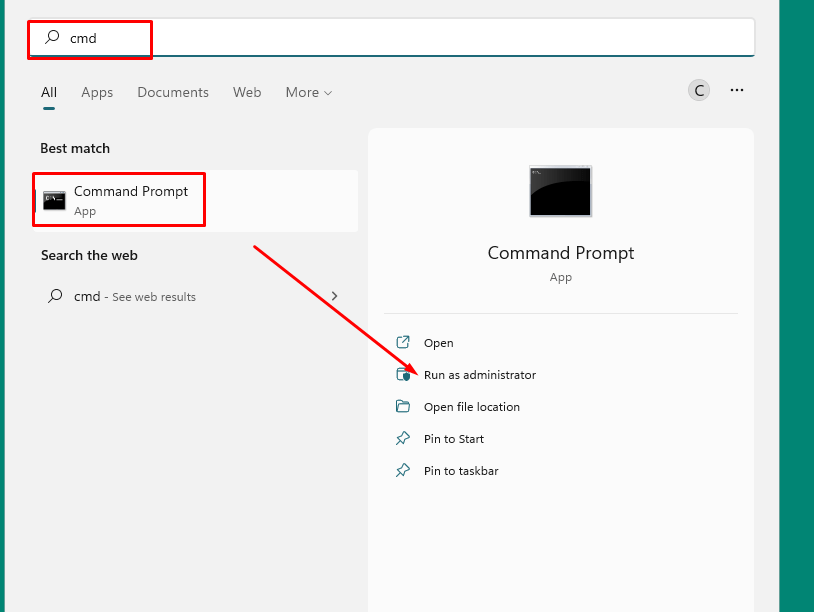
- Click on – Start
- Type – cmd.
- From the right pane, select – Run as administrator.
- When user account control prompts, click on – Yes.
- Type the following command to see all the user accounts:
net user
- Hit the – Enter
- Type the following cmd command to delete the user account from the desktop:
net user theusername /delete
In the command, replace theusername with the account you want to delete.
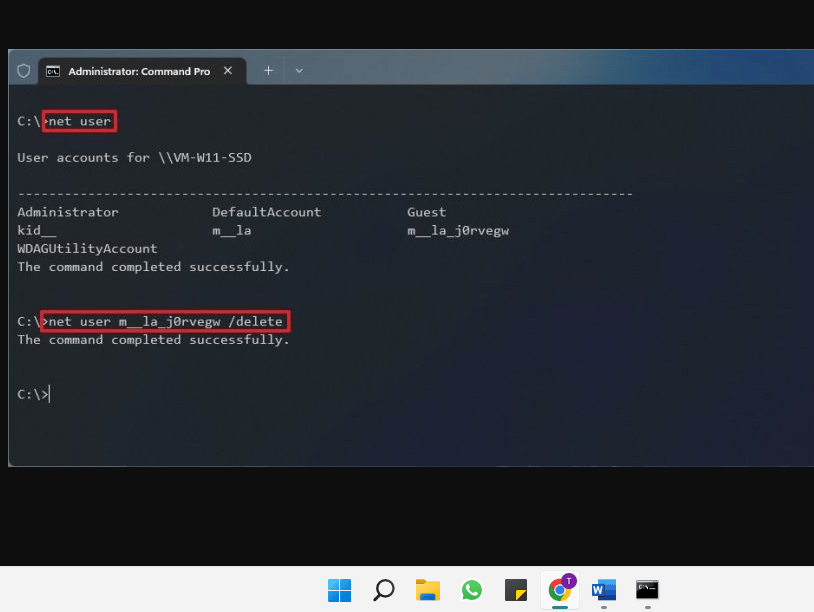
- Finally, hit Enter to remove the account.
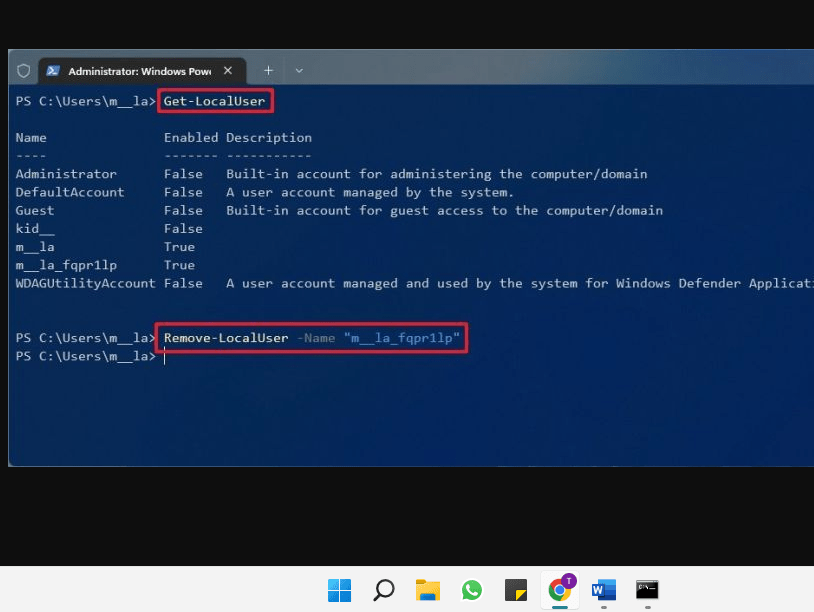
Way-6: Remove Account using PowerShell
- Press Winkey+S.
- Type – PowerShell.
- From the right pane, choose – Run as administrator.
- Type the following cmdlet to see all the available user accounts:
Get-LocalUser- Press – Enter
- Type the following PowerShell command to delete the user account from the desktop:
Remove-LocalUser -Name "THEUSERNAME"In the command, replace “THEUSERNAME” with the account you want to delete.
- Hit Enter to remove the account.
Methods:
Way-1: Through Settings App
Way-2: Via Control Panel
Way-3: Using Computer Management
Way-4: Via the User Accounts Panel
Way-5: Through Command Prompt
Way-6: Remove Account using PowerShell
That’s all!!
