How to Resolve Path Beyond 260 Characters in Windows 10 – You have certainly confronted with Destination Path Too Long disturbing occurrence during the job like copy and paste of stuff on your machine. And also known to the embarrassment suffered to overcome the issue. Thinking about one of the long term issues of Windows, Microsoft has finally added a new feature in the current preview of Windows 10 which will eventually settle the long-term issue of 260 character limit.
Until now, the only rescue that one could think of was to lessen the path from the boundary line of 260 chars so that the problem can be avoided. But it is the time to relax as Microsoft has added the policy setting to Resolve Path Beyond 260 Characters in Windows 10.
How to Resolve Path Beyond 260 Characters in Windows 10
Group Policy Editor
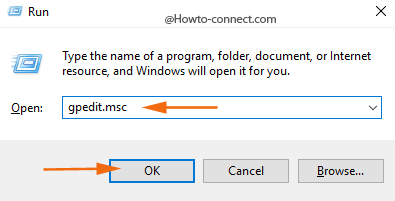
Step 1 – Strike Win logo and R keys altogether and in the launched Run box, write the code gpedit.msc, click or tap the Ok button to proceed further.

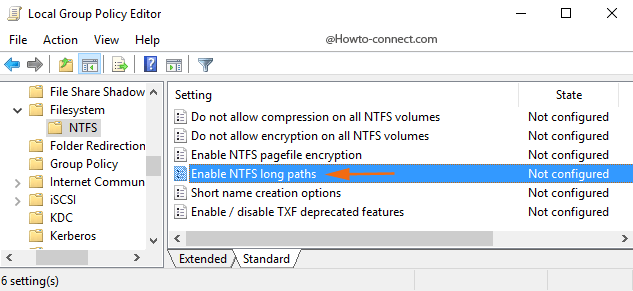
Step 2 – In the console tree, travel through all these folders to reach the required policy and its related settings in the right pane – Computer Configuration -> Administrative Templates -> System -> Filesystem -> NTFS.
Step 3 – Look at the opposite portion and find out the setting entitled as Enable NTFS long paths.

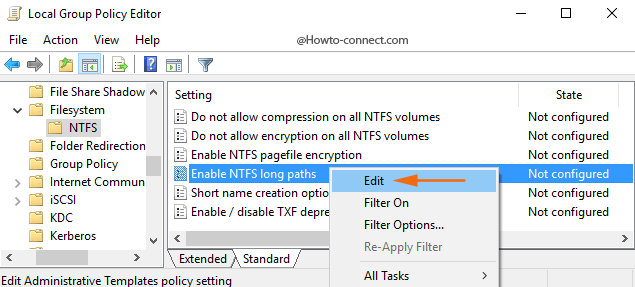
Step 4 – Right-click on Enable NTFS long paths setting and click or hit the choice Edit.

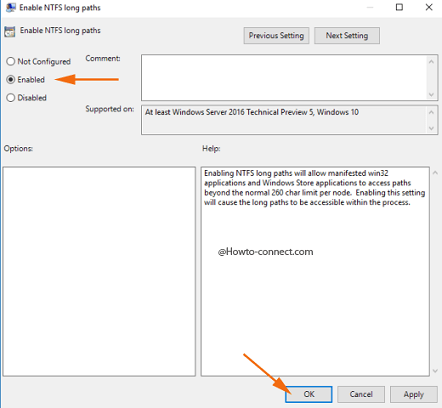
Step 5 – Click or hit Enabled round cell in the popped up NTFS long paths settings box.

Step 6 – Click or hit Apply and Ok buttons to implement the alteration.
Registry Editor
Step 1 – Strike the combination of Win & R keys and in the appeared box, write the code regedit followed by a click or tap on Ok button.
Step 2 – If you witness the UAC prompt, agree with it by tapping Yes button.
Step 3 – Travel to the following key – HKEY_CURRENT_USER -> SOFTWARE -> Microsoft -> Windows -> CurrentVersion -> Group Policy Objects -> {48981759-12F2-42A6-A048-028B3973495F}Machine -> System -> CurrentControlSet -> Policies
Step 4 – Underneath Policies, check if there exists a key entitled as LongPathsEnabled.
Step 5 – If not, right-click on Policies, point New and then Dword (32-bit) Value and assign LongPathsEnabled as its name.
Step 6 – Double-click on it and in the arrived Edit box, write 1 in the Value field and click or hit Ok button to enable this feature.
For the time being, this feature is for the members of the current build, however, the team will likely make it accessible for all the users in the coming Anniversary Update that is scheduled for this summer.

In Win 10 Pro Creators Edition group policy editor, it’s under Filesystem, not NTFS, and it’s called Enable Win32 long paths.
In Regedit, LongPathsEnabled is under HKEY_LOCAL_MACHINE\SYSTEM\CurrentControlSet\Control\FileSystem
I’m translating so may not be the exact wording.
I have used “long path tool”, it is very useful and easy to use. It helps for deleting the long file, renaming the error file,etc…
I tried Long Path Tool and it helped me a lot.
I suggest you to try Long Path Tool Program ,It should solve the problem.