Procedure to Run Program Compatibility Troubleshooter on Windows 10 After Creators Update with steps. – Multiple programs that are designed for the previous edition of Windows works perfectly even on Windows 10. But you might be having certain applications that fail to run in this latest operating system. So, if you also encounter issues with older programs running on Windows 10, then modify their compatibility mode. You can verify your computer state pursuing the guide – Check Whether your PC is Compatible with Windows 10.
Hence, in this guide, we present you with the directions to Run Program Compatibility Troubleshooter on Windows 10. Program Compatibility Troubleshooter was previously located deep inside Control Panel. But now, with the arrival of Creators Update, you will find this built-in tool in the Settings application only.
Program Compatibility Troubleshooter will scan for all the programs on your PC and moreover, will ask you to pick the defective one. After selecting the problematic program, the troubleshooter will settle the compatibility settings of it.
To know more about troubleshooting, read Use Common Windows Update Troubleshooter on Windows 10, 8.1, 7.
Table of Contents
Ways to Run Program Compatibility Troubleshooter on Windows 10 After Creators Update
Step 1 – Start the process by launching Settings app and to do so, press the key combinations Win&I. As an alternative, you can open Start Menu and select the tiny gear Settings icon also.
Step 2 – Once the Settings app appears on the PC screen with few categories, find and click Update & security.
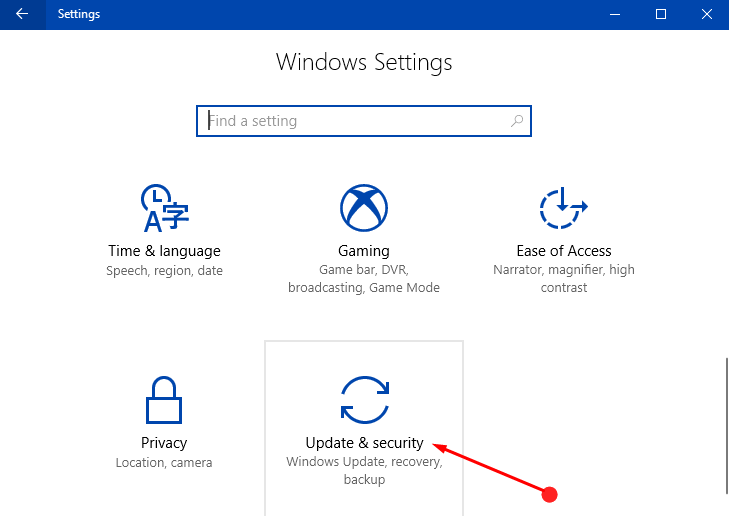
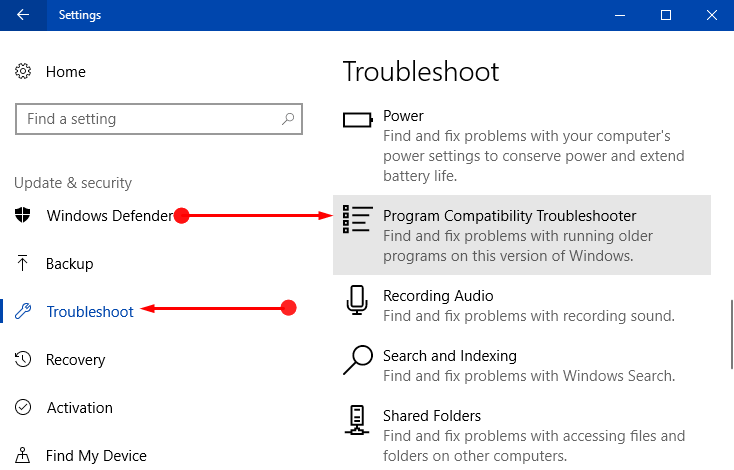
Step 3 – On the Update & security page, various segments are present on the left sidebar of the page. So, go through the list and select Troubleshooter.
Step 4 – Moving ahead, shift to its right panel and search for Program Compatibility Troubleshooter. You will find this troubleshooter underneath the title Find and fix other problems. Once the Program Compatibility Troubleshooter is visible on the list, select it.
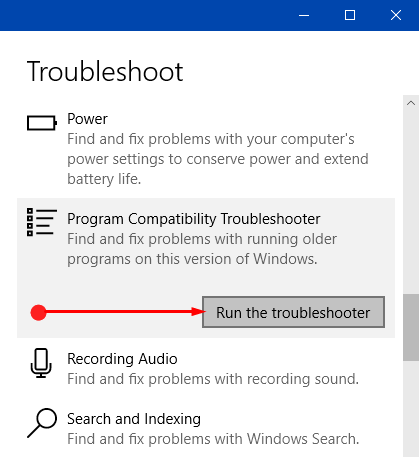
Step 5 – Now, Run the troubleshooter button will appear, click on it.
Step 6 – The Wizard will start detecting the issues. Next, the wizard will list down all the applications that are currently installed on your Windows 10.
Step 7 – So, browse through the list of applications and select the application you are having a problem with and click Next.
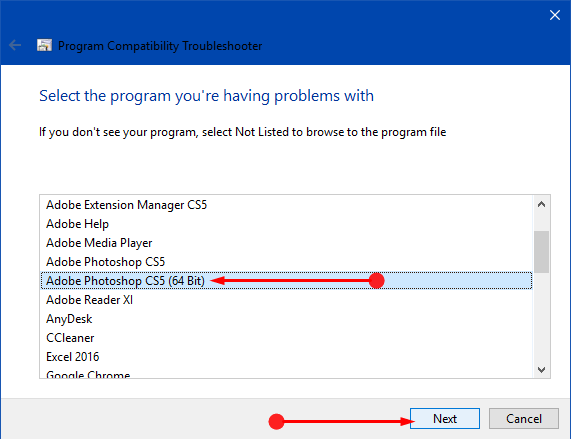
Note – In case, you don’t see your program, click Not listed option on the wizard and browse the problematic program file manually.
Step 8 – Now, the wizard will provide you two troubleshooting options. The first one is Try recommended settings and the second one is Troubleshoot program.
Try recommended settings – This first option will experiment and run the program by implementing recommended compatibility settings.
Troubleshoot program – It lets you pick up compatibility settings based on problems you notice.
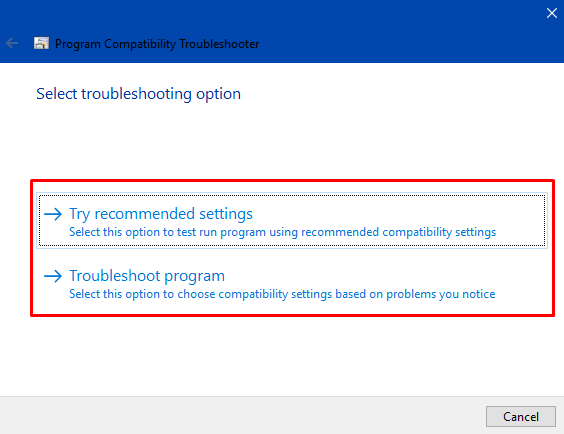
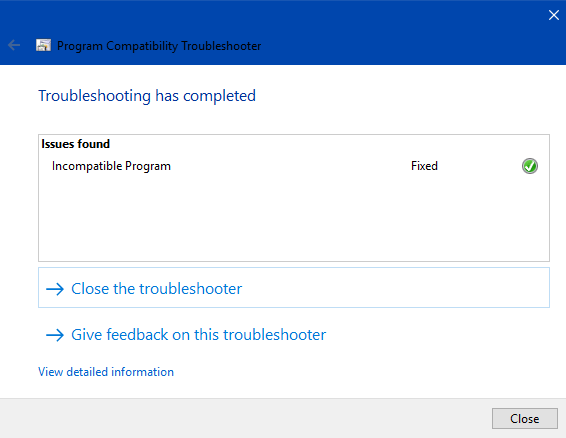
Step 9 – Follow the directions on the wizard and successfully Run Program Compatibility Troubleshooter in Windows 10. After the troubleshooting is over, the wizard will apply the fix and settle the compatibility issues of the selected program.
Conclusion
Completing the above guidelines will pretty much easily run Run Program Compatibility Troubleshooter in Windows 10 whenever there are issues with programs not running properly. This specific troubleshooter is very helpful, especially for the older programs. If you know more about this troubleshooter, please do write about it on the comments form.