Are you wondered to Run SFC /SCANNOW from desktop in Windows 11 or 10 directly? This built-in command line utility gives you the ability to scan and restore corrupt, faulty Windows system files. As using this tool rescues your device from various bugs and problems, you need to access it quite frequently.
The conventional method to run SFC /SCANNOW is somewhat lengthy. You need to open elevated Command Prompt manually and type the syntax and hit Enter. As an alternative, you are able to just create a batch file, save it on the desktop and run it using admin right. This may be the easiest way to run System File Checker on Windows 10 or 11 including previous versions.
Run SFC /SCANNOW from Desktop in Windows 11 and 10
Here is how to run SFC /SCANNOW from desktop in Windows 11 or 10 –
Way – 1
Step-1: Go to taskbar search and type notepad. Once you see Notepad Desktop app as the best match, click on it.
Step-2: Type in or copy-paste the below-mentioned two statements in separate lines.
sfc /scannow
pause
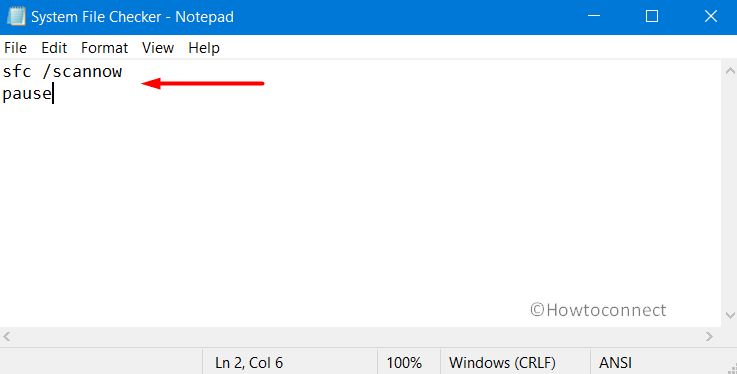
Note – Here, you need to input the “pause” statement so that you can get a chance to read the output message. Otherwise, the Command Prompt window will simply close down after the scan is over.
Step-3: Click File on the menu bar and choose Save as from the list of options.
Step-4: Select Desktop as the location to store the file. In the File name, type SystemFileChecker.bat. Then, click the Save as type drop-down and choose All Files. Also, ensure to choose ANSI option as the Encoding.
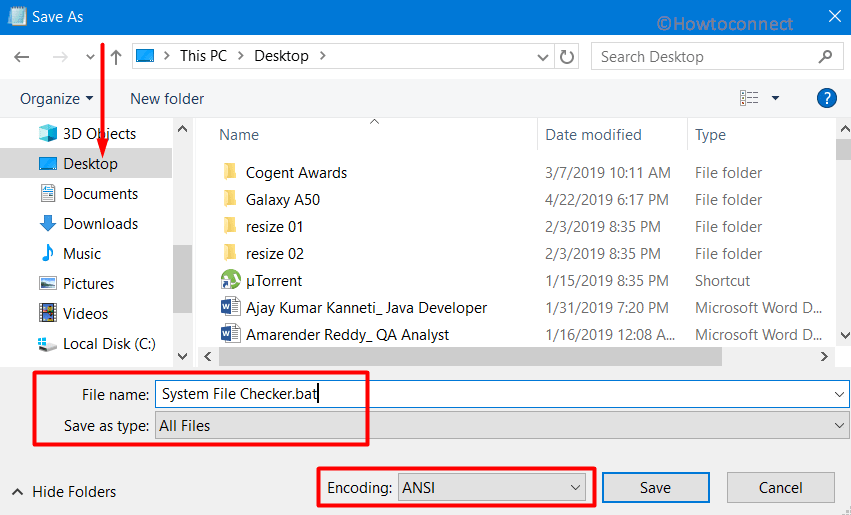
Note – You can provide any name to the file but ensure to add the .bat extension to it.
Step-5: Click the Save button.
Step-6: Head to the desktop, right-click the newly created batch file. Select Run as administrator.
Step-7: Upon the prompt of UAC, hit Yes button and it will directly Run SFC /SCANNOW from Desktop.
Way – 2
The 2nd way to Run SFC /SCANNOW from Desktop in Windows 11 or 10 provides you admin right.
- Here, also again open Notepad and input the same aforementioned statements in two separate lines.
sfc /scannow
pause
- Now, click File from the menu bar and select Save as option.
- Choose any location of your choice, for example, Documents to store the batch file. However, ensure to add .bat extension to the name of the file, like sfc.bat.
- Then, choose All Files and select ANSI option for Encoding. Hit Save button.
- Head to the location where you have saved the batch file such as Documents and do a right-click on it. Moving ahead, hover the cursor over Send to and select “Desktop (Create Shortcut)” as shown in the below picture.
- Press “Win logo + D” hotkeys and navigate to the desktop. Execute a right-click on the newly created shortcut and click Properties.
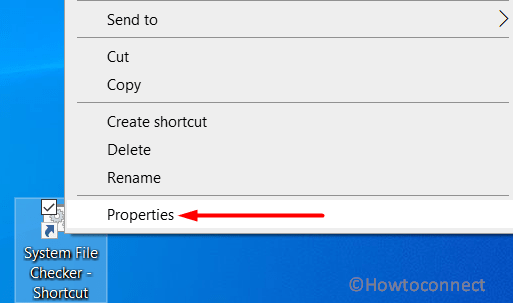
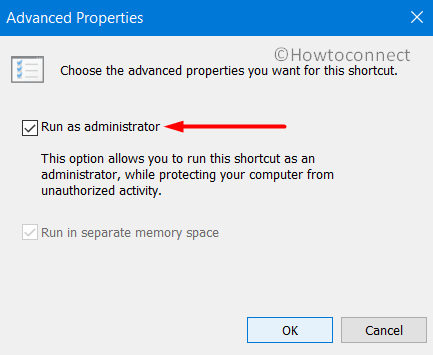
- Go to the Shortcut tab and click the Advanced button.
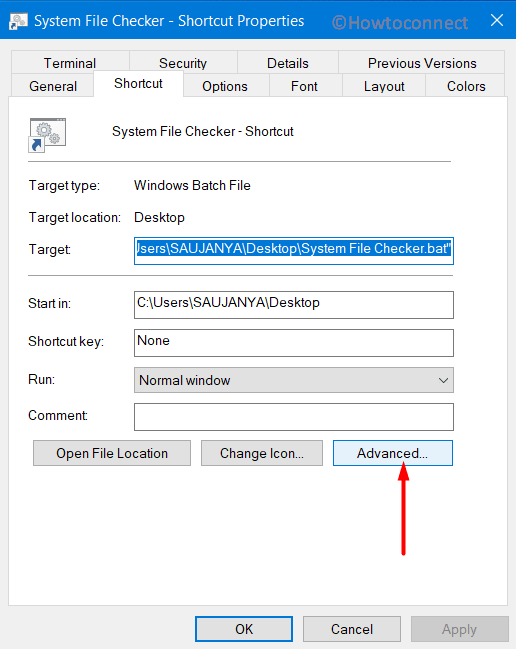
- When a small popup will appear, tick mark the box against the option namely Run as administrator, click OK. Click Apply and OK buttons as well on the Properties dialog to implement the modifications right away.
- Finally, double-click the shortcut and when UAC (User Account Control) prompt will show up, click Yes. Command Prompt with admin rights will immediately start detecting the faulty files and components on the system. This is the simplest way to Run SFC /SCANNOW from Desktop in Windows 10 or 11.
That’s all!!!

Thank you, this is what I was looking for.!!! Is there a way to schedule this command to execute automatically, without clicking UAC (User Account Control) prompt will show up, click Yes?