When you Set up Power Plans in Windows 10 you consider your system that consumes power which might turn out to be expensive for you sometimes and hence to manage it you take help of the Power Plan of Windows. This is an old feature being shipped in Windows 10 also. So, focusing on the users who prefer to manage their power plans we thought to share this article How to Set up Power Plans in Windows 10. See: How to Create a Custom Power Plan in Windows 10
Well, power plan is not new to anyone, especially for Windows users. The compilations of system and hardware settings are known as power plan. It includes settings like turn off of screen when you are away, adjustment of screen brightness, setting time for sleep and stuff like that. You might now consider what is the need of customizing power plans? These plans help you out in many ways. You can save a good quantity of power aka energy, improve your system’s potential or even can maintain a stability between the two qualities. So, let us head towards the simple steps and see How to Set up Power Plans in Windows 10.
Set up Power Plans in Windows 10
- To Set up Power Plans in Windows 10, You need to be into the Power Options to select a proper or suitable plan for yourself.
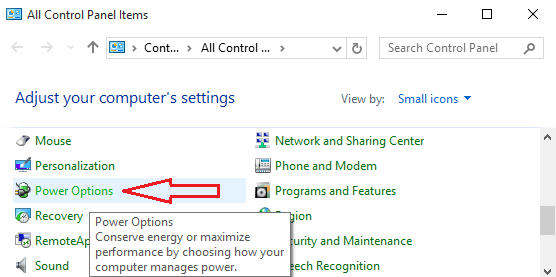
- Expand Control Panel in the small symbols view and click Power Options.
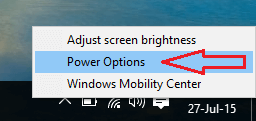
- Or right click on the battery bar that you can see on your Windows 10 Taskbar and click Power Options.
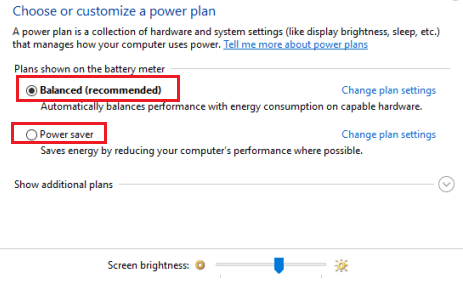
- The Power Plan window displays you two plans: Balanced and Power Saver.
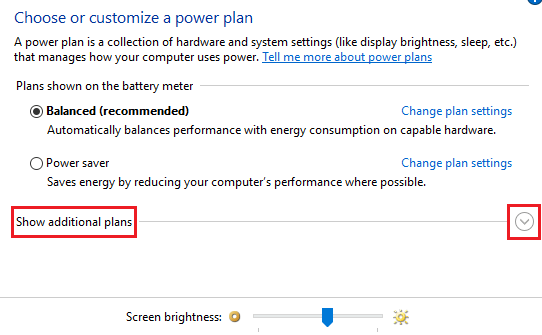
- A downward arrow of Show additional plans after the the Power saver displays you the third plan.
- You can now see three plans. Balanced, Power saver and High Performance. Let’s take a look at each of the plan –
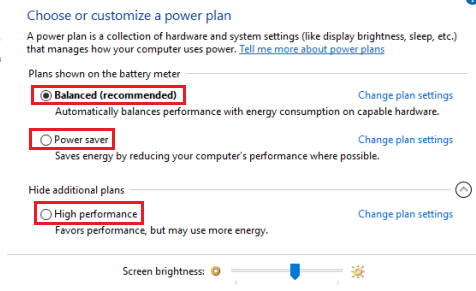
Balanced: This plan is apt for most of the general users. It keeps stability between your system’s potential and its energy. The system will give its best performance when you need it and conserve energy when you don’t need it. Windows suggest you go with this plan.
Power saver: If you want your laptop’s single charge to run for a longer time, go with this plan. It retains your laptop’s energy by minimizing system’s performance and display brightness.
High Performance: This option is suggested for those users you want the best performance from their system. This plan although diminishes the display brightness and gives high performance, but it cannot retain the laptop’s battery for long between charges. So after you Set up Power Plans in Windows 10 for getting better performance of your PC this will suit you.
- A radio button is available with all the options. Choose your preferred one.
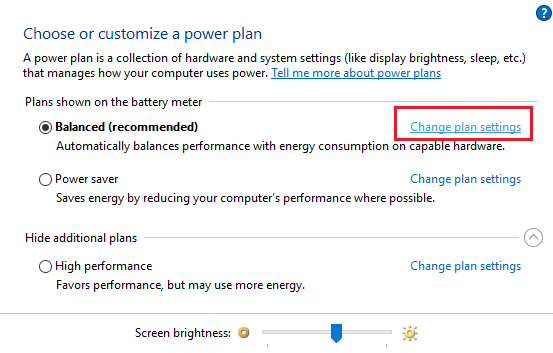
- Now, a Change plan settings link is attached with all the three options. For more customized settings, click Change plan settings link of your selected plan.
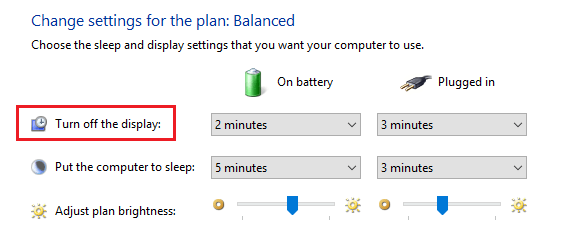
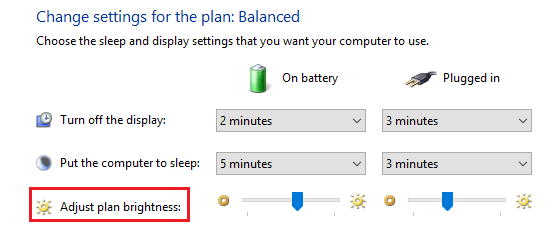
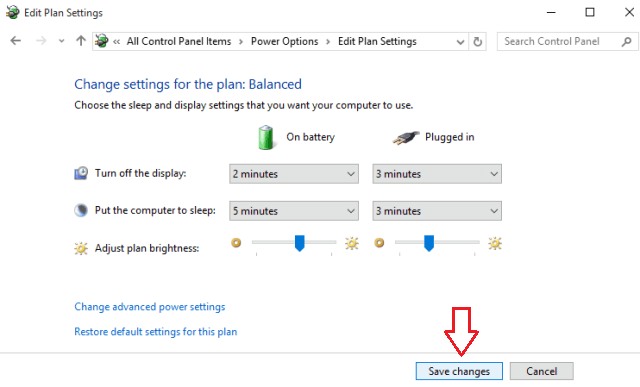
- Here, you can see three options, Turn off the display, Put the computer to sleep and Adjust plan brightness.
- Turn off the display has two drop-down menus, one for On Battery and the other for Plugged in. Use the drop-down menus and choose a time after which your display will turn off when you left your system idle.
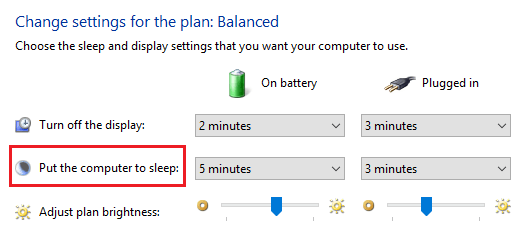
- You can even put it into sleep mode by using the drop-down menus of Put he computer to sleep. The time set for On battery will work when your laptop is on battery and you left it idle. The Plugged in will send your system to sleep mode when you don’t use it for sometime while it is on charge.
- Use the slider of Adjust plan brightness for battery and plugged in situations.
- Well, these changes are also available in the System category of Settings app.
- Make sure to click Save changes button to apply the changes.
- That’s it!!!
The Power Plan offers three varieties and each is suitable for different kind of users. Select the one that suits you better for the best performance of your Windows 10. So Set up Power Plans in Windows 10 which suits your condition.