Fix Sleep Enabled but Missing from Start Menu Windows 10 – When you open power menu you assume to see all the options in arranged way, but few users are are unlucky and experience the absence of sleep options. Few of them have written in Microsoft community that on their PC, Sleep has disappeared from the Power tile on start menu though it is enabled. When the machine is quitted for the duration determined to go to sleep it directly hibernates rather than sleep.
Table of Contents
How to Fix Sleep Enabled but Missing from Start Menu Windows 10
System File Checker Tool (SFC.exe)
- Launch Command Prompt (Admin) by collectively hitting its shortcut keys Windows & X and further hit it on this choice listed on the emerged Power user menu.
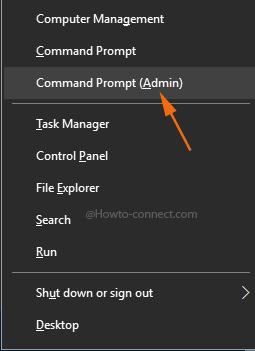
- You need to run System file checker tool (SFC) primarily which will test all the files and restore the appropriate one if required. So copy the code
sfc /scannowfrom this location, paste into the elevated Command Prompt expanded on the screen and strike Enter.
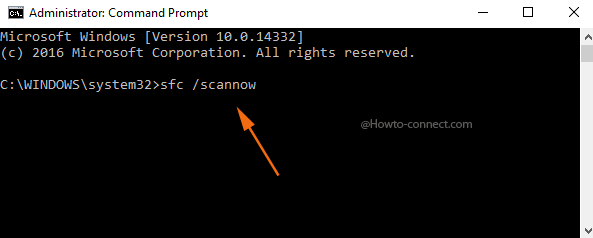
- All protected system files will be examined by this code and if found any, it will substitute the corrupted files; however, ensure that you don’t close command prompt console till the verification gets 100% completed.
- The results will be shown after the scan procedure is completely over. After a quick reboot locates Sleep option on Start menu and reaffirm if it is restored.
2. Set up a New User Account
You need to establish a new user account to fix the flaw Sleep Enabled but Missing from Start Menu in Windows 10; pursue the method carefully –
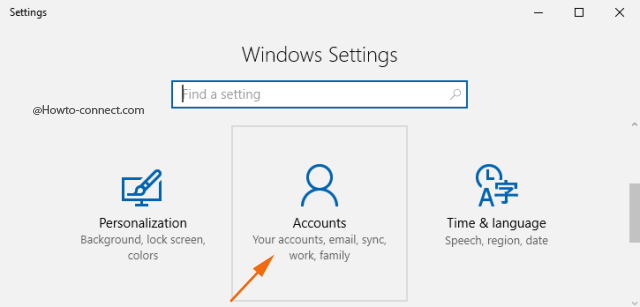
- Settings program is necessary to execute this method so, to bring it into appearance tap on its shortcut Windows & I keys jointly. Now click or hit on Accounts block.
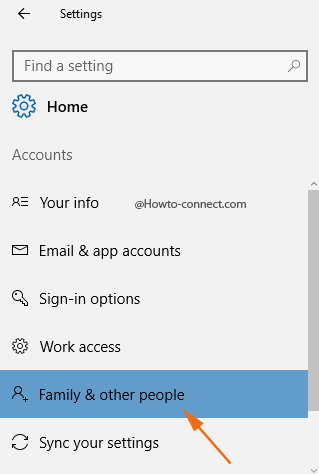
- Select Family & other people option which is present on the left flank of the consequent Accounts settings interface.
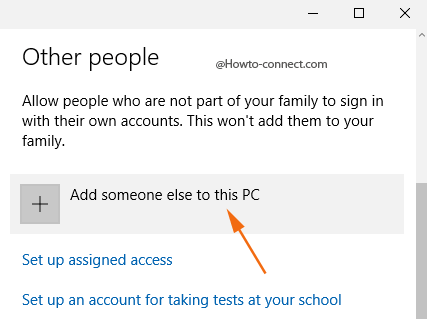
- Underneath the Other people title in the right flank, locate + button beside which written as Add someone else to this PC, put a click on it.
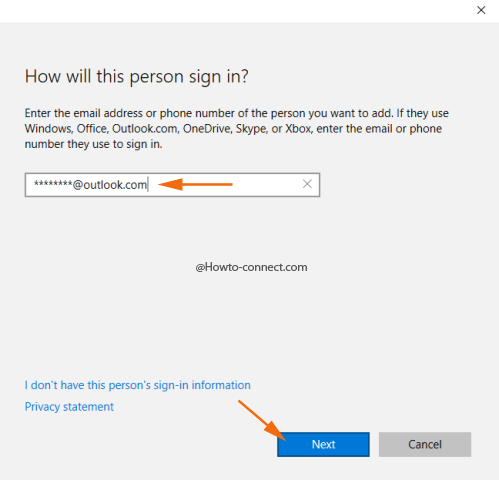
- If the account you are adding holds up a Microsoft account, render its email particulars in the box and click or hit Next button and obey the on-screen guide to finish the setup.
- Subsequent to you have accomplished to create a new account, sign into it and ascertain if you are able to restore the Sleep option on the Start inexactness.
3. Power Options
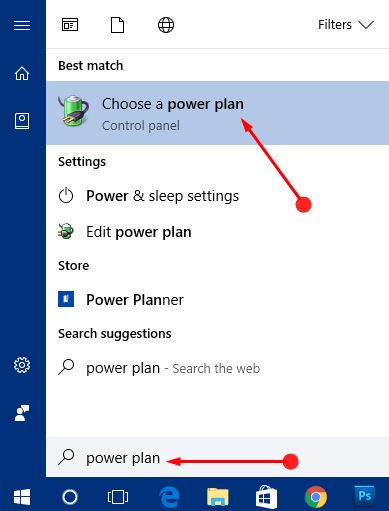
- Launch Cortana, type power plans and select Choose a power plan that shows up as the Best match.
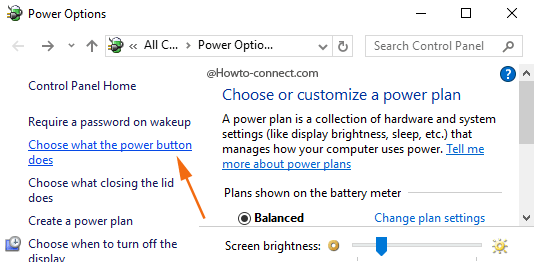
- “Choose what power button does” link will be noticeable on the left portion, click on it.
- The next page will showcase three sections, where the last two ones are grayed out and hence to unlock them, click or hit the only visible link Change settings that are currently unavailable.
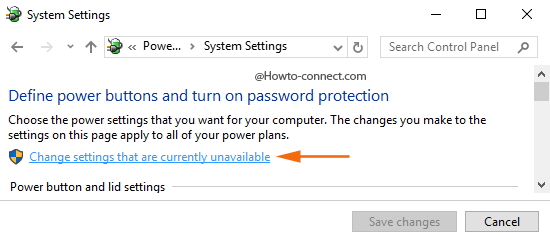
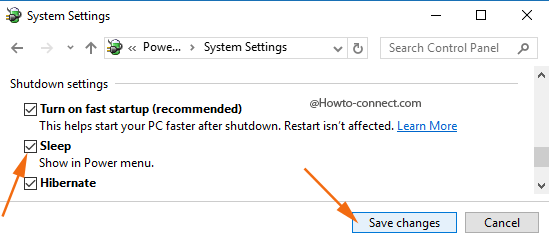
- Shutdown settings is the last segment and underneath it place a tick mark the square shaped box before Sleep option and then strike on Save changes button.
4. Update Display Driver
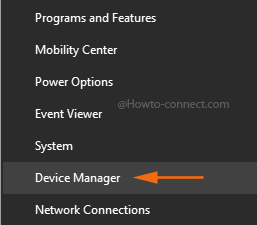
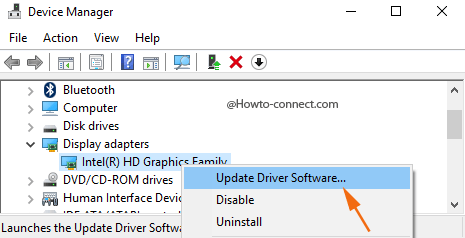
- Launch Device Manager by jointly hitting Windows +X keys and then opt the choice labeled as “Device Manager“.
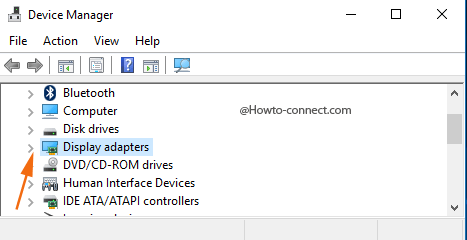
- Maximize Display Adapter by clicking its arrow mark located adjacent to it.
- Perform a Right-click on your display driver, for instance, in this case, it is Intel(R) HD Graphics Family then click Update Driver Software from the emerged tiny menu.
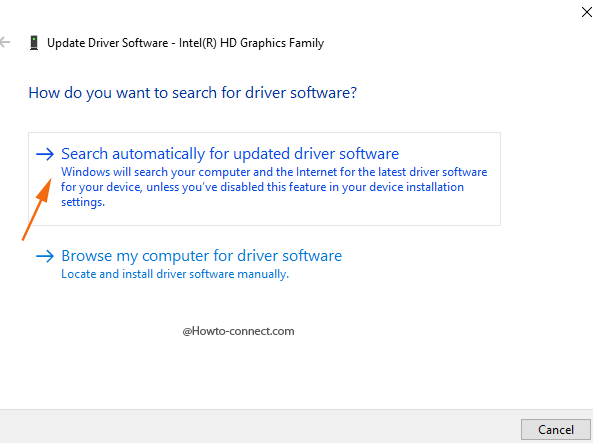
- In the subsequent dialog box, you notice two choices Click the prime one which says Search Automatically for Updated Driver Software“.
- Reboot machine and determine the sleep option in Start and hopefully, it will be visible.
If you are struggling with Sleep Enabled but Missing from Start Menu Windows 10, pursue the above procedures and scrutinize which one works wonder for your machine.