Multi-monitor feature is so useful when working from home. It lets create a workspace where employees of the corporate world are able to handle various tasks. Workers can access files, and folders provided by seniors or chairpersons and complete the order staying in front of his computer in a house. So here you will find How to Split Screen Laptop and Monitor in Windows 10 step by step.
To improve productivity while multitasking with different applications, a multi-monitor set up is also important so that you can switch between moreover access the apps easily. Fortunately, Windows 10 let you use multiple monitors at once that too without taking any help from third-party software. However, this feature will only work if you configure it correctly through Settings app.
Split Screen Laptop and Monitor in Windows 10
Here is how to split screen laptop and monitor in Windows 10 –
- Connect the external monitor to your Windows 10 PC by inserting necessary cables to ports.
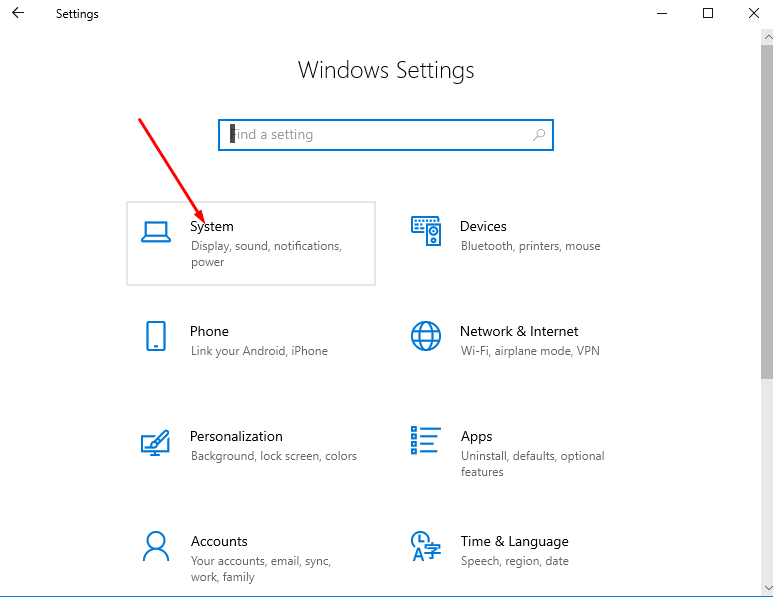
- Press Win key and I on keyboard to open Windows Settings.
- Click on System.
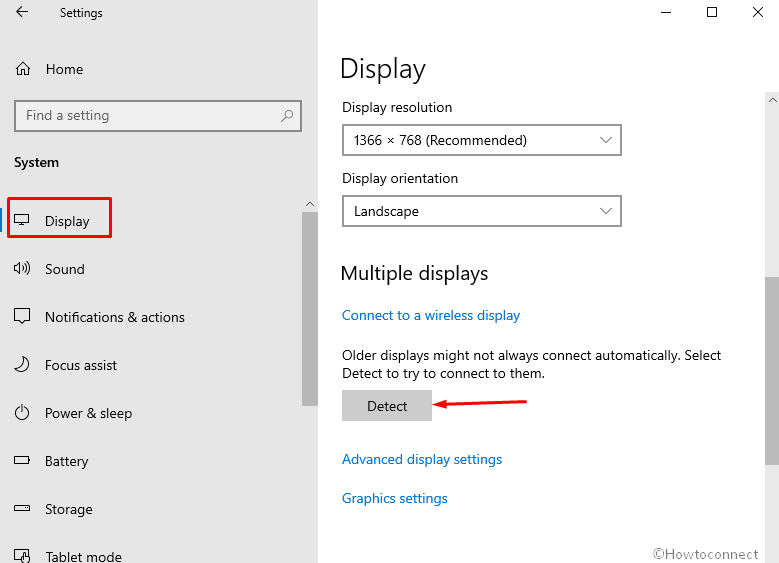
- Select Display.
- Go to the Multiple display section from the bottom of the right pane.
- If you’re first time using the Split Screen Laptop and Monitor then click Detect.
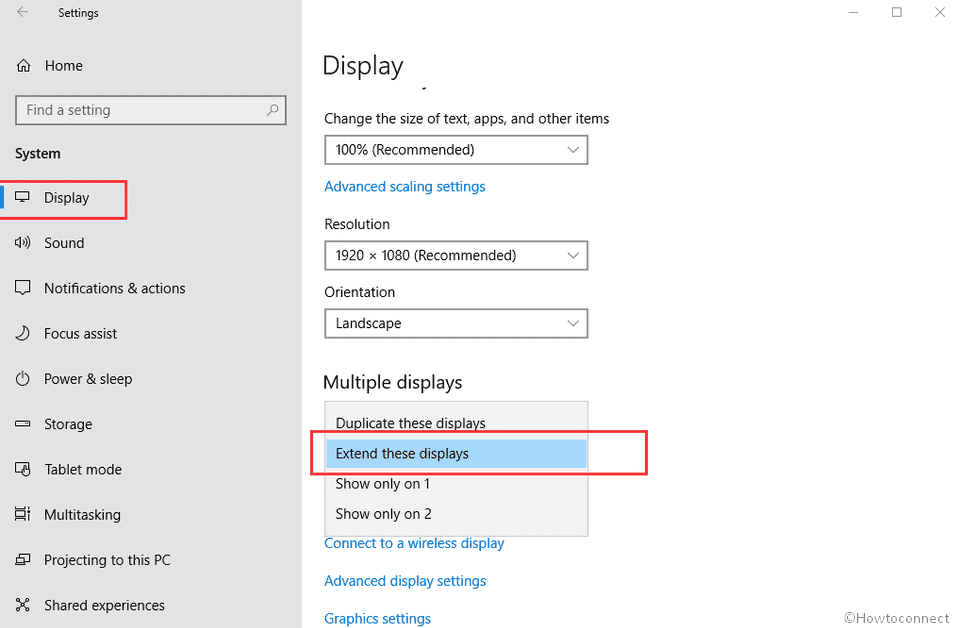
- But in case you have connected the device previously then you will come across a dropdown. Click on it and select Extend these displays.
- Once a pop-up prompts, click the option Keep changes.
Bonus tips
When you Split Screen Laptop and Monitor in Windows 10 whether it is 1, 2, 3 or more, you can set the main display according to your preference. To do so, follow the steps –
- Reach the Multiple display section check the box set for Make this my main display.
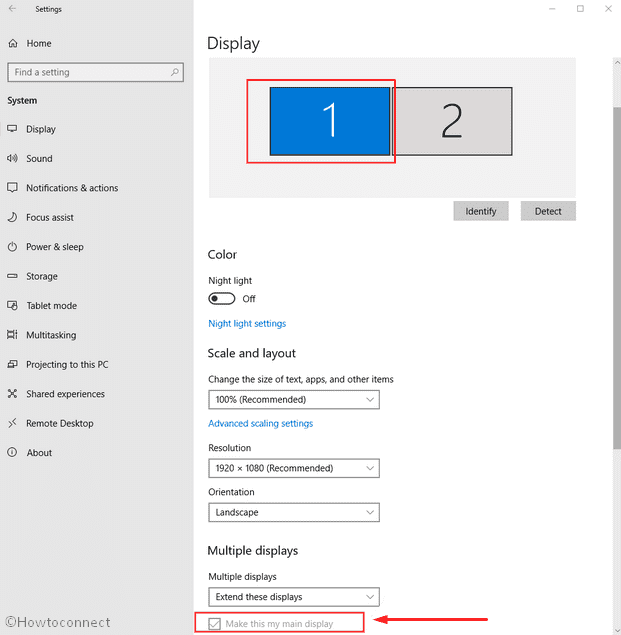
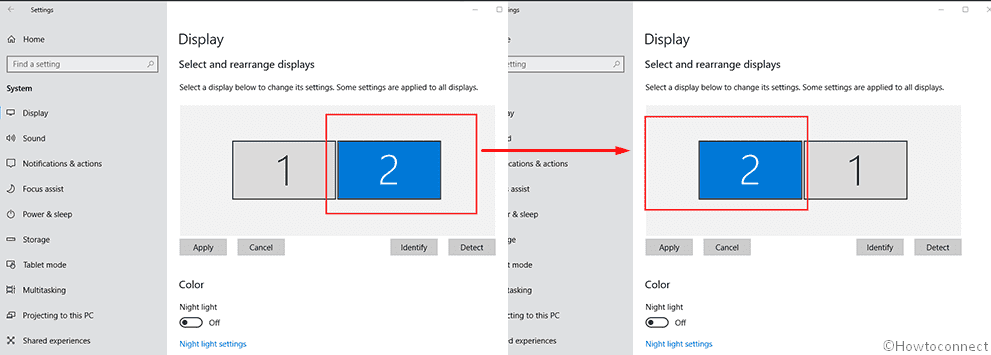
- To rearrange the displays, you can select one and drag and drop the same on the desired side.
Additional relevant posts on Multi monitor in Windows 10 –
1] How to Use SensorExplorer 2.0 to Check Dual Screen in Windows 10
2] How to Fix Windows 10 Second Monitor Not Working
3] How to Use Multi Desktop on Windows 10
That’s all!!!
