The frequent prompts of Avast while you play a game, watch a movie, or chat with a friend is annoying. In such scenarios, you must feel the need to Uninstall Avast in Windows 10. There can also be many other reasons for you to remove this software. You may prefer to get rid of this security service in case you want to go for any other antivirus, or you may simply want to re-install it. So, today we are going to describe the steps to completely and properly remove Avast in Windows 10 using different ways.
How to Properly Uninstall Avast in Windows 10
To protect your computer from malicious attacks and threats, a good antivirus is necessary. Avast is a pretty stubborn antivirus solution that refuses to remove completely from the PC when you compare it with others. But many users complain that Avast won’t uninstall on different forums. Unable to uninstall it properly can cause trouble in installing new a security software. However, by following the below sequence of steps, you can make sure that no traces of the tool remain on the PC.
We are going to discuss different ways to uninstall Avast in Windows 10, which will allow you to choose the most convenient one for you. These ways are:
Way1: Uninstalling Avast using standard way.
Way2: Uninstalling Avast using control panel.
Way3: Uninstalling Avast using AVAST Software Uninstall Utility.
How to Properly Uninstall Avast in Windows 10 using Standard Way
Step 1: If you are using a laptop, ensure that the battery charge is more than 15%. Otherwise, plug the charger, to make sure the process gets complete without any low battery interruptions.
Step 2: Save any open files and disconnect the internet from your system.
Step 3: Perform a right-click on the Avast icon that appears on the taskbar. Hover the mouse over the option namely Avast shields control and click Disable permanently. Disabling the software before uninstalling is very important to do.
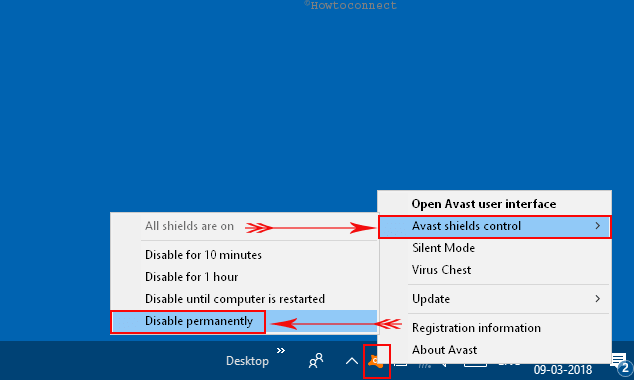
Step 4: A pop-up message will appear, with a warning and asking if you want to proceed, click “Yes“.
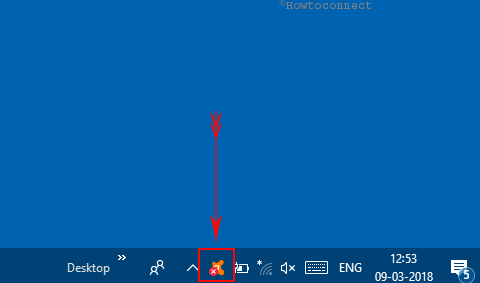
Step 5: After this step, the Avast antivirus will be turned off as it displays a cross sign on its icon on the taskbar. The screenshot shows the disabled program.
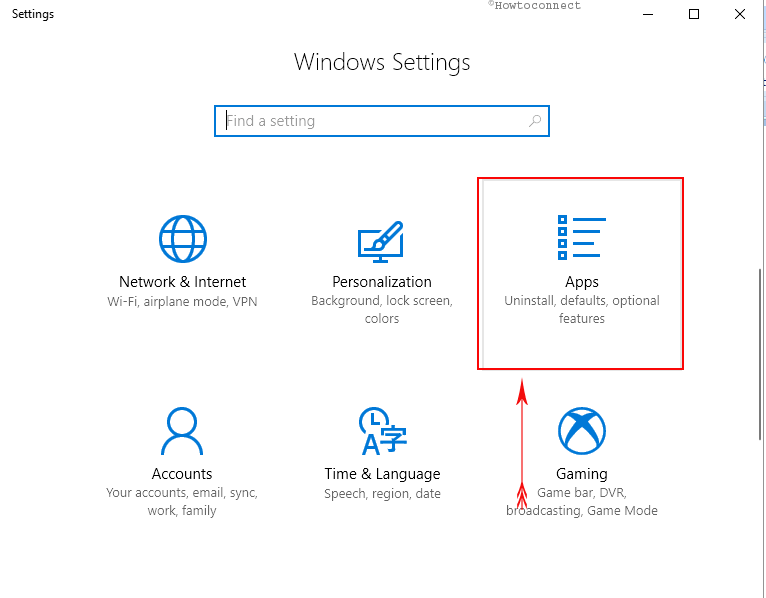
Step 6: Now access Windows Settings by hitting Win + I hotkeys and select Apps category.
Step 7: A list of installed apps on your system will come into view, locate and select Avast Free Antivirus. Two buttons will appear, make a click on Uninstall.
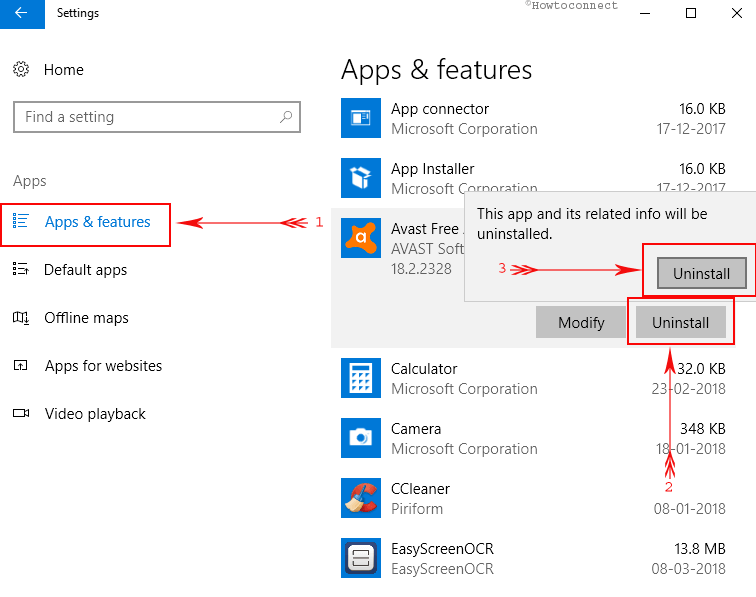
Step 8: On the pop-up, again click on the “Uninstall” button.
Step 9: A confirmation message regarding uninstalling Avast will appear. Click on Yes to affirm.
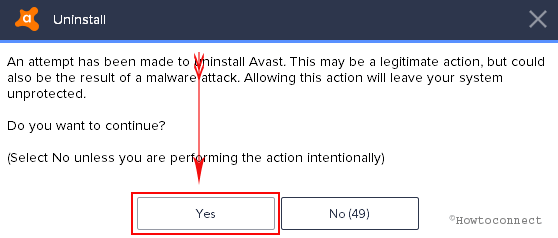
Step 10: The tool will ask you certain survey questions during the uninstallation process. Select the options accordingly and then click on Continue every time.
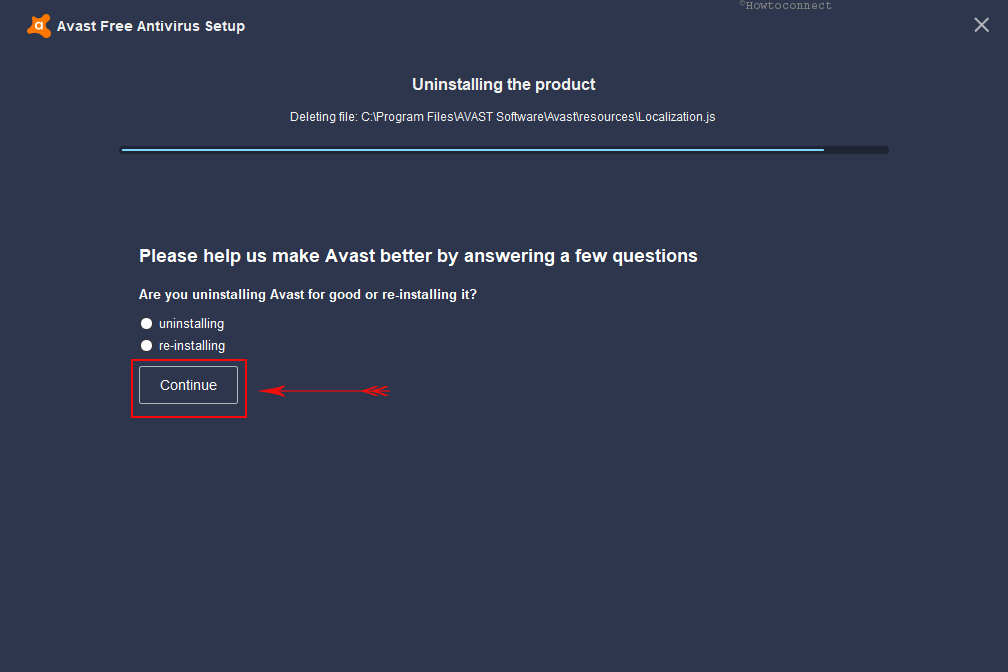
Step 11: Finally, it will show a message “The product was successfully uninstalled” and will ask you to reboot your system. So, click on Restart Computer button.
Now you are completely done with uninstalling Avast.
Uninstall Avast in Windows 10 through Control Panel
There is news around the corner about shifting Control Panel items to the built-in Settings app. However, this component of Windows still contains the settings that let you manage the operating system. Therefore, you can still uninstall Avast using Control Panel.
I. Type cp in Cortana search and click on Control Panel that appears under Best match to launch it.
II. Keep the items into small view and click on Programs and Features applet. In the next window, locate Avast Free Antivirus and select it.
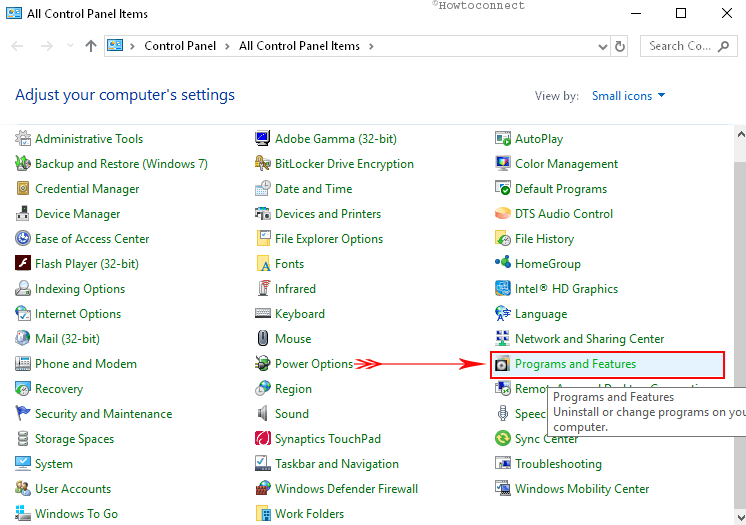
III. Hit Uninstall button at the top.
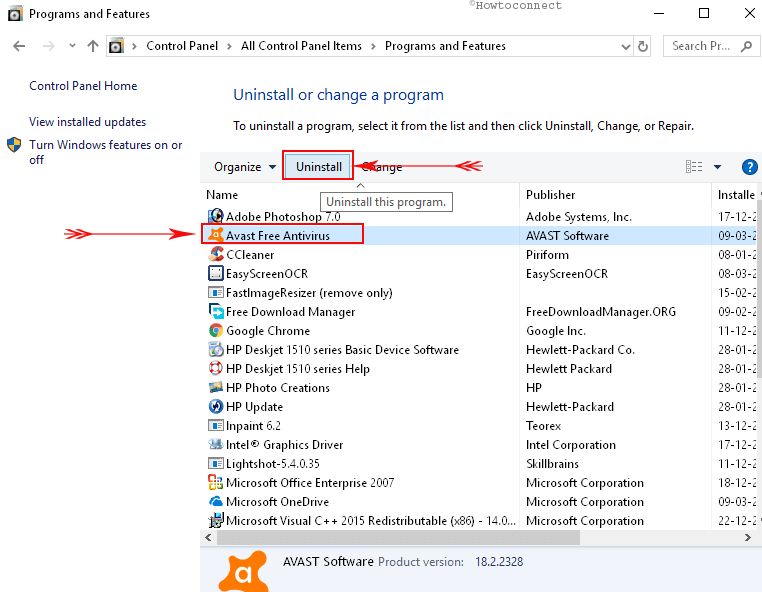
IV. This will immediately open Avast setup menu on the screen. Click on Uninstall tab at the bottom and then click on Next.
V. It will prompt a warning message with a quote, “An attempt has been made to uninstall Avast!” Confirm that you want to uninstall it and let the uninstallation process start.
It will take few minutes and at the completion of the process will show the message: “Uninstall finished”. The utility will ask you to reboot the system, select Restart and click on Finish.
Use AVAST Software Uninstall Utility to Properly Uninstall Avast in Windows 10
Many a time, it becomes difficult for you then you can use Software Uninstall Utility from Avast. Anti virus remover uninstalls Avast completely in the safe mode. This works as Avast cleaner on your system.
A. Download the “AVAST Software Uninstall Utility” from its official site.
https://www.avast.com/en-in/uninstall-utility
B. Select a familiar location to save the downloaded file.
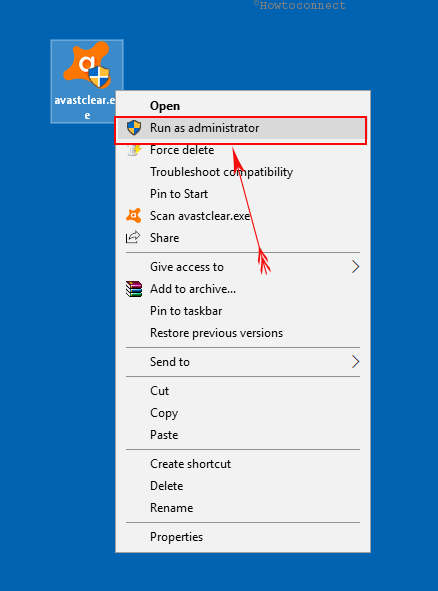
C. Find the downloaded avastclear.exe file and do right-click on it and select Run as administrator.
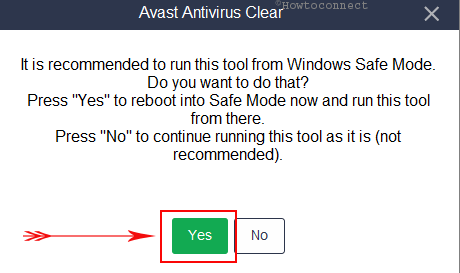
D. “Avast Antivirus Clear” dialog box will appear. It asks you to restart the operating system in Safe Mode, click “Yes“.
E. After reboot, Windows will be in Safe Mode. On Avast screen, select the location of the Avast program files, the product edition and henceforth click on Uninstall.
The progress screen should remain open during the uninstallation process. After the procedure is completed, a confirmation dialog will appear, click on Restart computer.
The system will reboot and you are done with properly removing the Avast.
Tip: Sometimes, while using “AVAST Software Uninstall Utility”, an error message may appear saying self-defense module is preventing uninstallation. In that case, launch Avast, go to the Settings and navigate to the Troubleshooting tab. Here, deselect the option “Enable avast! self-defense module” and click on Ok. Finally, you can uninstall Avast in Windows 10 using its utility.
How to Properly Uninstall Avast in Windows 10 via Registry Editor
It is necessary to backup of the registry before going ahead with the steps. If you accidentally delete any other important file, you can recover it easily from the backup.
Read the detail process from here – How to Import and Export Registry Editor on Windows 10.
i. Click on Start and open the Run. In the Run dialog, type regedit and hit OK to access “Registry Editor”.
ii. The Registry Editor will open up. Navigate to the below-given key to remove all the remnants of Avast for the current user account.
HKEY_CURRENT_USER/Software/Avast Software
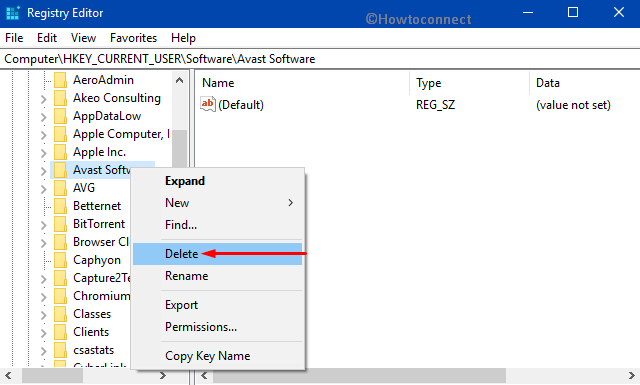
iii. Once you reach Avast Software key, do a right-click on it and hit Delete.
iv. Now, you have to delete its residuals from the machine also. So, go to the following path on its left sidebar.
HKEY_LOCAL_MACHINE/SOFTWARE/Avast Software
v. Here also, conduct a right-click on Avast Software and choose Delete. Finally, click Yes to affirm the removal process.
You have to restart your machine to complete the removal process. When the device reboots, every bit of this security service will clear off.
Use Revo Uninstaller to Properly Uninstall Avast in Windows 10
When Avast uninstall stuck this tool is of great use. You can easily delete Avast using “Revo Uninstaller” in just 5 simple steps:
Download and install the latest version of Revo Uninstaller.
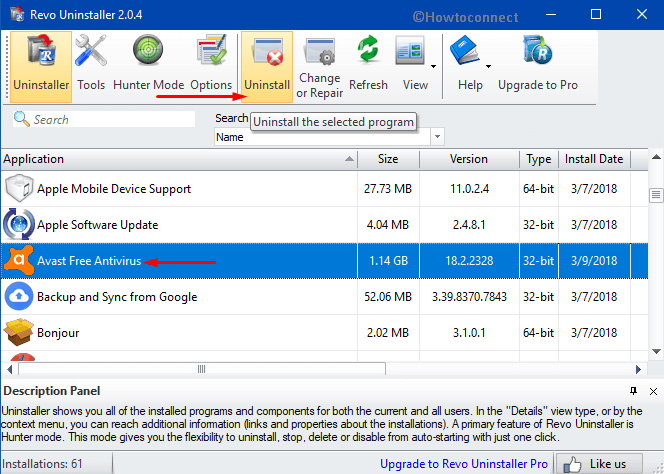
Once the installation is over, launch the tool. On its main interface of Revo Uninstaller, locate Avast Free Antivirus and select it.
Click Uninstall button on the toolbar as depicted in the below snapshot.
• It will deep scan the PC for all the remnants including registry files. Moreover, it will also dig out and remove the files that get store somewhere on your hard drive.
For more information on this software, read Use Revo Uninstaller On Windows 10 to Force Uninstall Stubborn Programs.
It will complete the uninstallation process within few minutes.
Hopefully, by now, you will be familiar with different ways to properly uninstall Avast in Windows 10. completely and can easily uninstall it. If your Avast installation is stubborn or there is any other issue faced in traditional ways of uninstalling it, we recommend using AVAST Software Uninstall Utility by following its steps above.

Have you Disabled Avast Shields Control permanently. If you don’t disable none will be working.
Well, I have used all 3 recommendation and not one has worked.
Keep on searching for another solution.