Are you finding yourself unable to uninstall McAfee Livesafe from Windows 11 or 10? This antivirus is quite popular among users but its removal is no less than a challenge.
The free version of this tool causes vulnerabilities like trialware after the expiration of the trial period. In addition, in most of Windows 10 Laptops, whether it is Dell, Lenovo, Dell, Asus this antivirus comes pre-installed which users might not like.
Ways to Uninstall McAfee Livesafe From Windows 10
McAfee uninstall stuck commonly when you try to remove the tool from Programs & Features, the traditional method on Windows 11 or 10.
We will guide you here with the ways to force McAfee to uninstall dividing the process into 3 parts. All you need is to follow the instructions carefully for a successful antivirus removal.
- Part-1: From Apps and features in Settings Application
- Part-2: Using MCPR tool
- Part-3: Remove Traces and leftovers of the McAfee Livesafe antivirus
Part-1: Using Apps & features in Settings Application
For Preinstalled devices
If you have either of Dell, Lenovo and Asus Laptops powered with Windows 11/10 pre-install with McAfee antivirus then you will have to first activate it for the dismissal. Don’t worry because you will not need to pay for the subscription.
If you haven’t got pre-installed and downloaded on your own instead, then directly follow the next method – “Uninstall McAfee Livesafe using Apps & features”.
Step-1: Open the software and select Your subscription.
Step-2: Click on Edit profile and go to the McAfee site through automatic navigation.
Step-3: It is the time to register on Mcafee, so type your Email address and choose Next.
Step-2: Give a password according to the suggestion here and click on Next. Now your software is activated.
For both users (Preinstalled or Post-installed) – Uninstall McAfee Livesafe using Apps & features
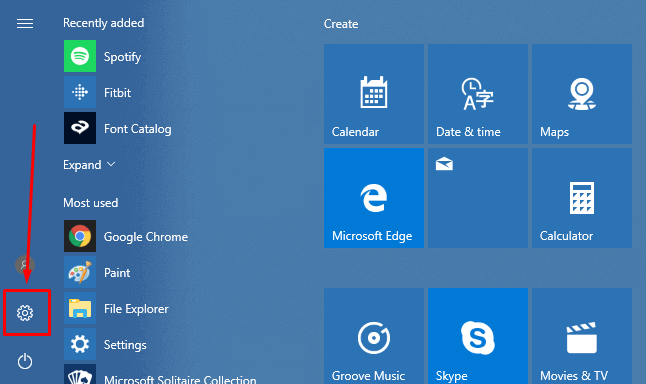
Step-1: On Start Menu, click the small gear icon to access the Settings program. Else, you can also launch the same pressing Win+I hotkeys.
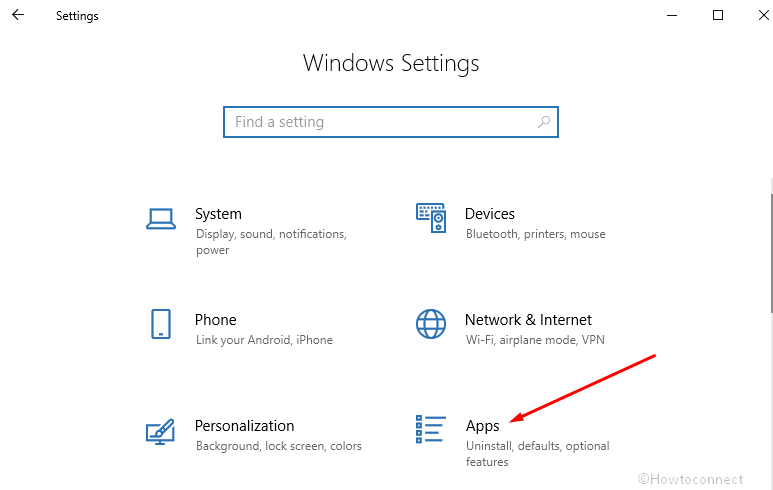
Step-2: Click on Apps.
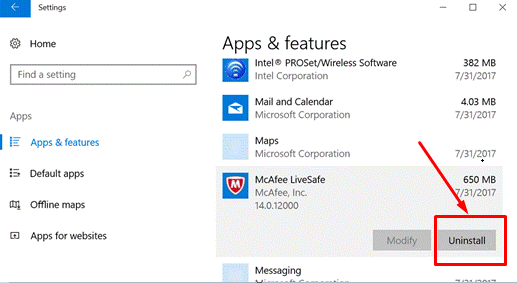
Step-3: Scroll down and find McAfee Livesafe in the right pane. Click on it. You will see an extended view where two options namely Modify and Uninstall are available. Select Uninstall.
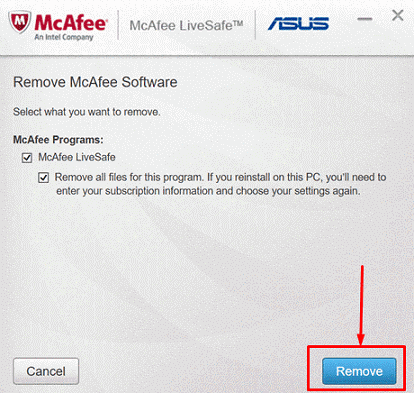
Step-4: Check both the following options –
1. McAfee LiveSafe
2. Remove all files for this program. If you reinstall on this PC, you will need to enter your subscription information and choose your settings again.
Now click on Remove on the dialog “Remove McAfee” in order to wipe out the tool.
Step-5: Once the uninstallation ends up, select Restart Now.
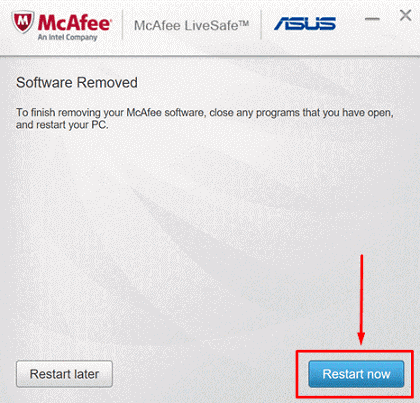
The task is not accomplished yet. You have to visit its official website to get “McAfee Consumer Products Removal Tool” (viz. MCPR). This is an essential utility in order to remove McAfee entirely from your system. Let’s see the guidelines to do further:
For general software or applications follow – How to Uninstall Software From Windows 10 After Creators Update.
Part-2: Using MCPR tool
Step-1: Download the official MCPR tool. Extract MCPR.zip, access, and double-click the .exe file.
Step-2: Select Yes on the User account control pop up and click Next on Mcafee Software Removal interface.
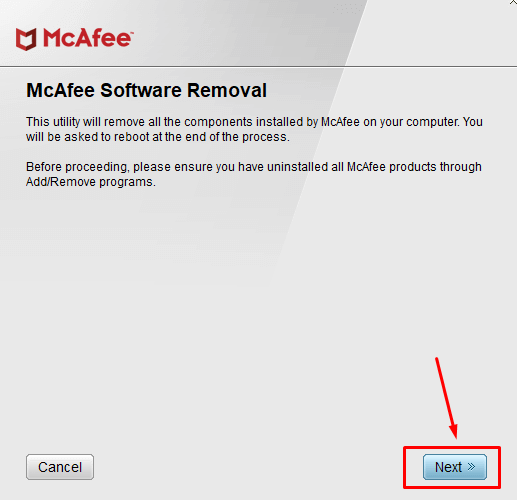
Step-3: Select Agree on the End user license agreement and again click on Next.

Step-4: Fill up the captcha box correctly and then select Next.
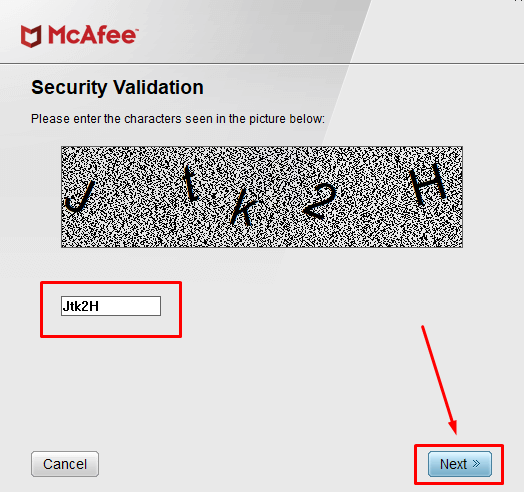
MCPR will detect the installed program all by itself on your computer as well as trigger the uninstallation.
It might take a couple of good minutes to finish the process. Be a little patient and wait until it completes and restart the Windows 10 system once MCPR finishes the Uninstallation. Before proceeding to Reboot, finish or save your pending task to avoid losing any important item.
Part-3: Remove Traces and leftovers of the McAfee Livesafe Antivirus
For a complete elimination, you need to delete its traces and leftovers from registry entries and system files. Before starting we recommend taking backup of your Registry so that you could revive the same in case of a misoccurance. You can follow – How to Import and Export Registry Editor on Windows 10.
You can read our another article for the same circumstance – How to Remove Traces of Uninstalled Programs in Registry on Windows 10 or 11.
From Registry Editor
Step-1: Click on the Search icon from the taskbar, write regedit and then hit Enter.
Step-2: Select OK from the UAC warning prompt.
Step-3: After the registry editor appears, navigate to
Computer\HKEY_CURRENT_USER\Softwareand
Computer\HKEY_LOCAL_MACHINE\SOFTWAREStep-4: Look for the keys termed as or having the prefix McAfee in both of the strings.
Step-5: Once you find it, right-click on them and select Delete successively.
From System files
Step-1: Open Run dialog (Win+R), type Command %programfiles%, and press Enter. Locate all the folders having the name Macefee and delete them.
Step-2: In the same way, type %appdata% and Hit Enter. Find the items titled Mcafee and remove them.
Delete Temp and recent files
Step-1: Copy each of the following commands in sequence, paste into the Run box and press Enter every time
%temp%
recent
temp
Step-2: As the folders open, select all the items and delete them. Follow the same for all the 3 shortcut commands.
To wipe out the items without effort see – How to Delete Temp Files at Every Startup in Windows 11 or 10.
In this way, you will successfully Uninstall McAfee Livesafe From Windows 10 and 11.
The important thing is you can uninstall the other segments of this antivirus using the same ways. So if you have McAfee Total Protection or McAfee Windows Security there will be nothing change in the procedure. The only difference is you will find the other name in Apps & features area, registry keys, and system files.
Winding Up
We have discussed the entire procedure to uninstall McAfee Livesafe From Windows 11 or 10 and delete the tool and its residuals. Windows 11 and 10 comprise a convincing built-in anti-malware tool Windows Defender. This is so effective and strong that you really don’t need a third-party tool to defend against malware. At last, With proper application of each step, you will be able to remove it and can have a hassle-free time with Windows 11/10.
