Methods and Steps to Whitelist and Blacklist Partners on Teamviewer. – Security concerns recommend establishing remote connections with only trustful people. Teamviewer helps numerous admins remotely inclose others but this process also creates risk. Thanks to the application that it makes arrangements to avoid the security threat and allows users to prepare Blacklist and Whitelist. Blacklist helps you to prevent suspicious users from connecting and oppositely whitelists permit good partners to connect without any hindrance.
You can Blacklist and Whitelist Partners on Teamviewer very effectively and easily. When you include anyone in the blacklist, neither he can remotely access you nor you can using the application. Teamviewer Denies connect to the account. Adversely when you exclude a user from blacklist he becomes available to be connected.
Similarly, when you add a user to whitelist he becomes always accessible and you ensure unavailability by removing him. It allows list contacts you connect.
Whitelist and Blacklist Partners on Teamviewer enable you to access only those users remotely whom you understand secure. So, on one side, the list lessens the safety threat and in another helps to simplify the connecting process for whitelist users. We are providing here a step by step guide, so follow.
Table of Contents
Whitelist and Blacklist Partners on Teamviewer
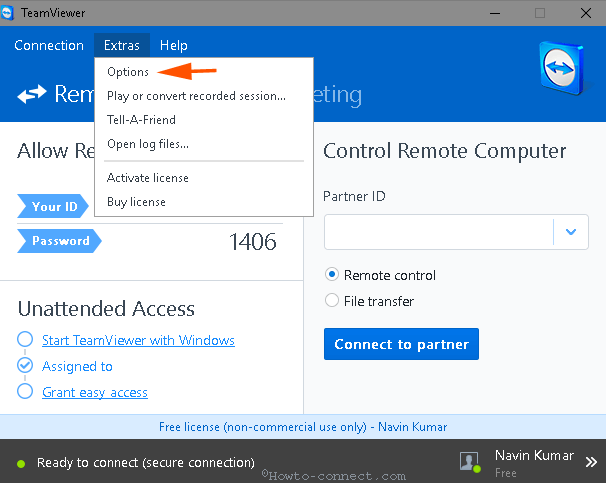
Step 1 – Open Teamviewer and click the menu Extras. Once the dropdown appears, Select Options.
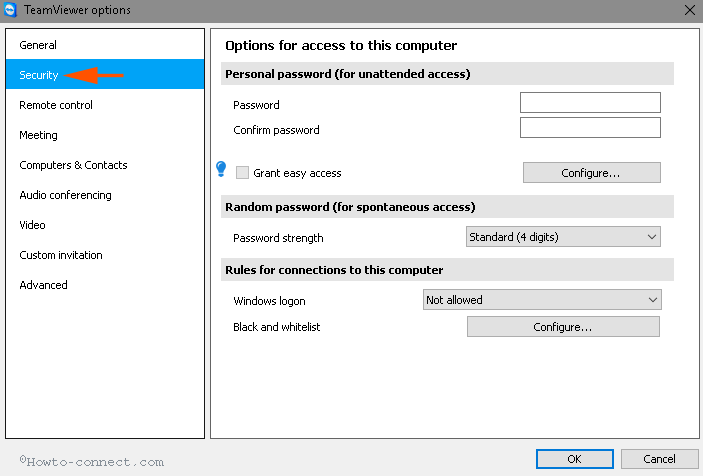
Step 2 – Click Security on the right Pane of Teamviewer options.
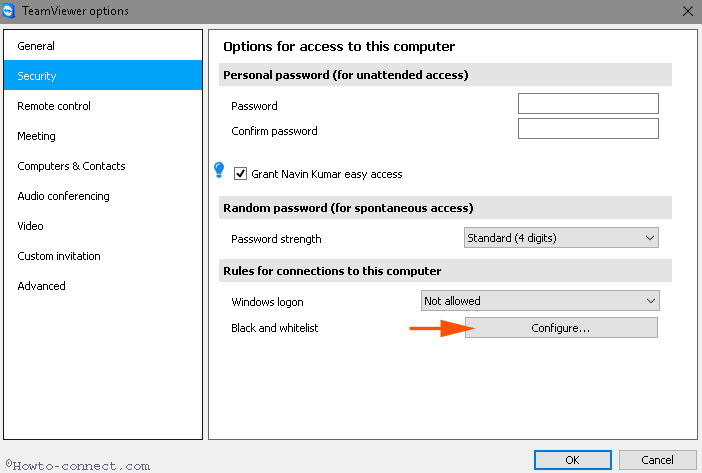
Step 3 – In the right pane, click Configure.
Add a Partner to Blacklist
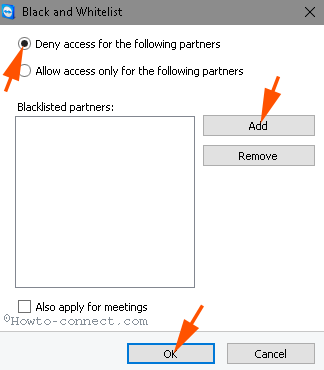
Step 4 – Now Black and Whitelist pop up opens and by default Deny access for the following partners is checked. So click Add.
Step 5 – In the next pop up Add contact to Blacklist, write Teamviewer email address and password and click Finish.
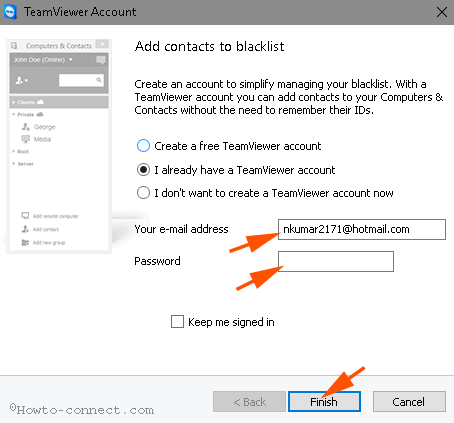
Step 6 – If you have not Teamviewer account then check the option – Create a free Teamviewer account.
Step 7 – Once perform the creation of the account, verify it by pressing the link reached to your Email from Teamviewer.
Step 8 – Now Add the contact you have just created and click Add.
Step 9 – Repeat the same process to prepare a complete list.
Add a Partner to Whitelist
Step 1 – Check the option Allow access only for the following partners and click Add.
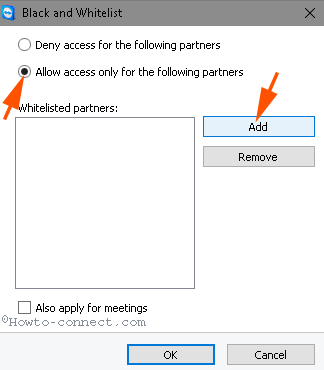
Step 2 – On Add contacts to Whitelist pop up, select the contact you want to add. Finally, click Add button. Remember that you can add only those users to this who has Teamviewer account.
In this way, prepare a list for the users you connect to make him remotely accessible and inaccessible.
Conclusion
So these are the steps for How to Whitelist and Blacklist Partners on Teamviewer. In addition, you can grant easy access to the users in the whitelist, allow them to connect without entering a password, and a lot more. So, create the lists and be safe.
Steven James
says:Really helpful to use TeamViewer