Tired of the recurring Windows Update Error 0x8024a22d? Don’t worry; we’ve got the answers you’re looking for. This problem is usually caused by corruption in two key areas: your system files and Windows Update components. System file corruption can occur as a result of viruses, ransomware, system failure, or unexpected shutdown. While safeguards such as avoiding unsafe downloads and shutting down properly are critical, the good news is that these corruptions may be repaired.
Barring the two aforementioned reasons, corrupted updates are another typical reason for causing this error and displaying this message: “There was some problem installing updates, but we’ll try again later. If you keep seeing this and want to search the web or contact support for information, this may help: (0x8024a22d)”. We’ll go into each underlying cause in this detailed tutorial, presenting practical methods to remove this error from your Windows Update routine.
Table of Contents
Windows update Error 0x8024a22d
Here is how to fix Windows update error 0x8024a22d:
Check Internet Connection
Before getting into typical troubleshooting, the simplest fixes can occasionally rescue the day. It is critical to have a reliable internet connection in order to resolve Windows Update Error 0x8024a22d. A broken or poor connection might impede the seamless download and installation of updates. In these steps, we’ll teach you how to test your internet connection to ensure that updates are error-free:
- Switch off the router and stay for 10 or more seconds.
- Turn on the device, connect to the internet again, and then check for updates.
If the internet connection is not working or creating any severe issues then reset it:
- Press Win key + I.
- Click on Network & Internet.
- Go to the right side of the Settings page, scroll down, and click on Advanced network settings.
- Select Network reset.
- From the next screen, click on Reset now.
- A confirmation dialog will be shown; select Yes.
- After the process is completed, try to install it once again.
Run Windows Update Troubleshooter
Fixing Windows Update Error 0x8024a22d may be as simple as running the Windows Update troubleshooter. The most frequent update-related problems may be identified and resolved with the help of this useful Windows fix-it tool. Follow these steps:
- Click Start and type Troubleshoot.
- Hit the Enter key to open Troubleshoot Settings.
- Select Windows Update and click Run.
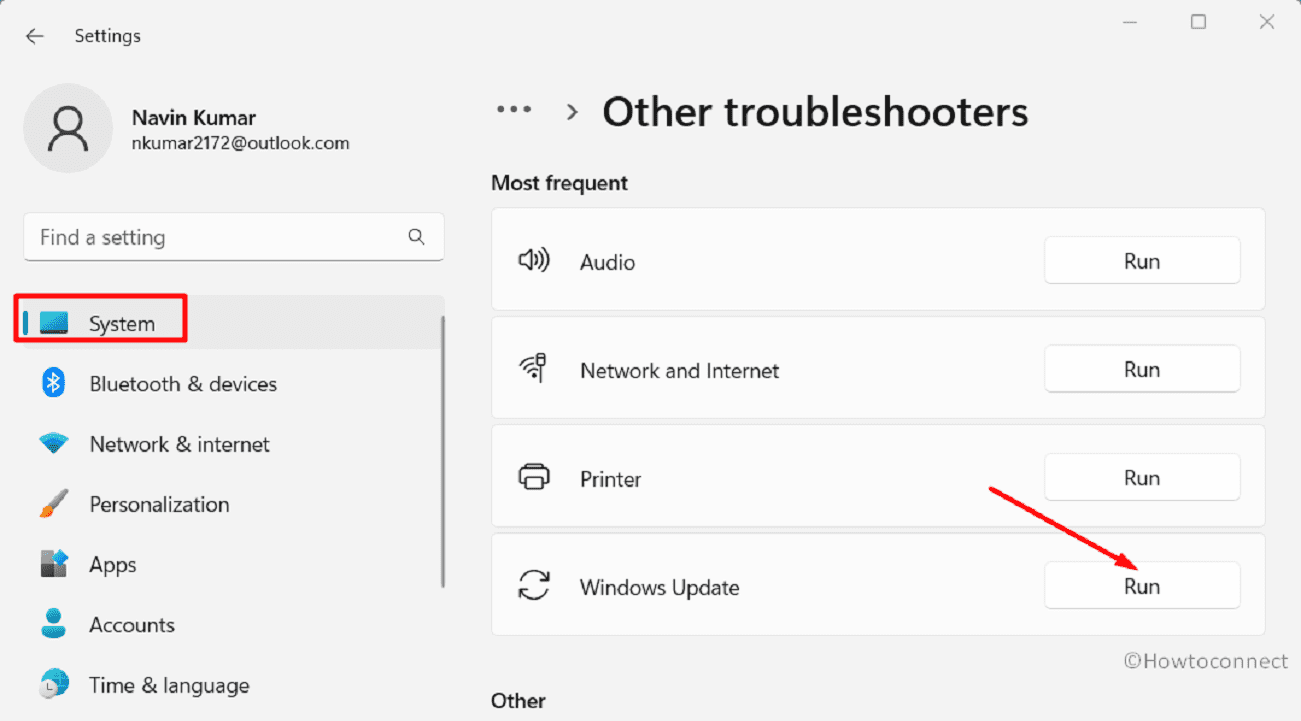
- Wait for diagnosis and follow any suggestions if given.
- Finally, restart your system.
Use Common Windows Update Troubleshooter on Windows 11, 10, 8.1, 7
Clean Up Windows Update Cache
Another probable way to fix the concerned error in your Windows is by clearing the Windows Update files. This process includes resetting important parts that might be broken and causing the mistake. But please be careful, because you will need some technical knowledge. Follow these steps or get help from a professional to be sure of success:
- Press Windows + R to open Run dialog box.
- Type services.msc and press Enter.
- Scroll and find Windows Update.
- Right-click on this service and select Stop.
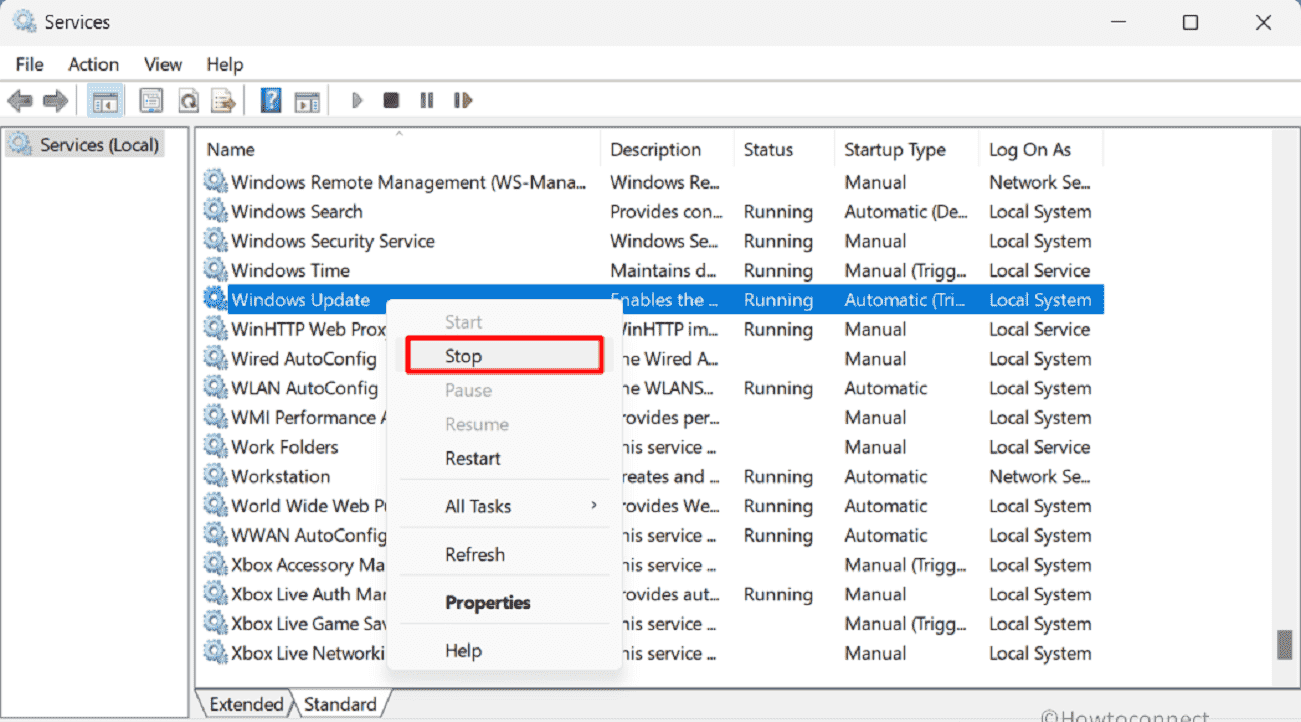
- In the same way, stop Background intelligent transfer service and Cryptographic Service.
- Navigate to C:\Windows\SoftwareDistribution.
- Delete all contents in this directory.
- Start the Windows Update, Background intelligent transfer service, and Cryptographic Service.
Reset Windows Update Components
Lastly, issues with Windows update components are the second most common reason for causing this error within your PC. Resetting it can untangle the web of issues that may be hindering your updates and offer a clear path to solve it:
- Click on Search and type cmd.
- Select Run as administrator.
- When User account control appears, click on Yes.
- Copy and paste the following commands, one at a time, then press Enter for each:
net stop bits
net stop wuauserv
net stop appidsvc
net stop cryptsvc
Del “%ALLUSERSPROFILE%\Application Data\Microsoft\Network\Downloader\*.*”
rmdir %systemroot%\SoftwareDistribution /S /Q
rmdir %systemroot%\system32\catroot2 /S /Q
regsvr32.exe /s atl.dll
regsvr32.exe /s urlmon.dll
regsvr32.exe /s mshtml.dll
netsh winsock reset
netsh winsock reset proxy
net start bits
net start wuauserv
net start appidsvc
net start cryptsvc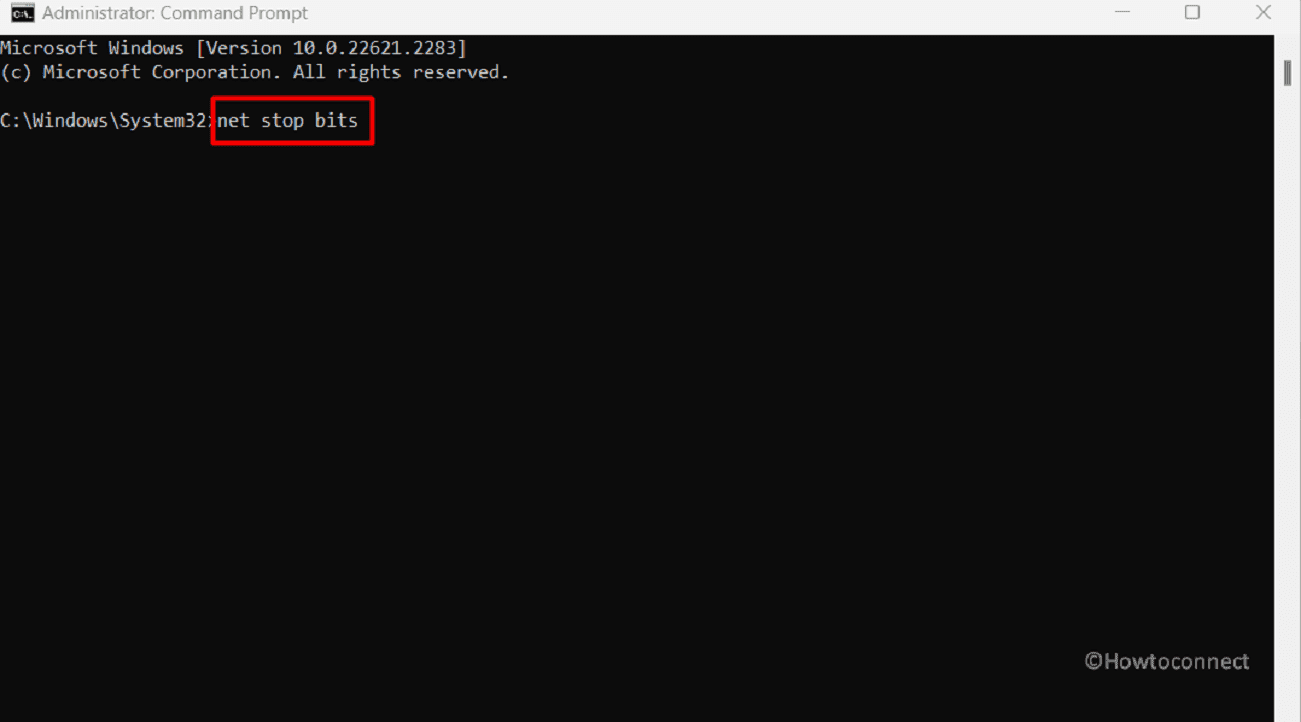
- Restart your PC.
Run SFC and DISM Commands
While the Windows Update Error 0x8024a22d may be a constant source of frustration. We’ll show you how to use the System File Checker (SFC) scan and the DISM (Deployment Image Service and Management Tool) commands, which together form a potent troubleshooting combo.
These powerful tools can investigate potential system file problems and fix them. Here, we’ll show you how to execute these instructions one by one, getting you closer than ever before to fixing this error:
- Open Command Prompt as administrator.
- Type the below command and press Enter:
SFC /SCANNOW - Wait for completion.
- Execute the following command lines sequentially.
DISM /Online /Cleanup-Image /CheckHealth
DISM /Online /Cleanup-Image /ScanHealth
DISM /Online /Cleanup-Image /RestoreHealth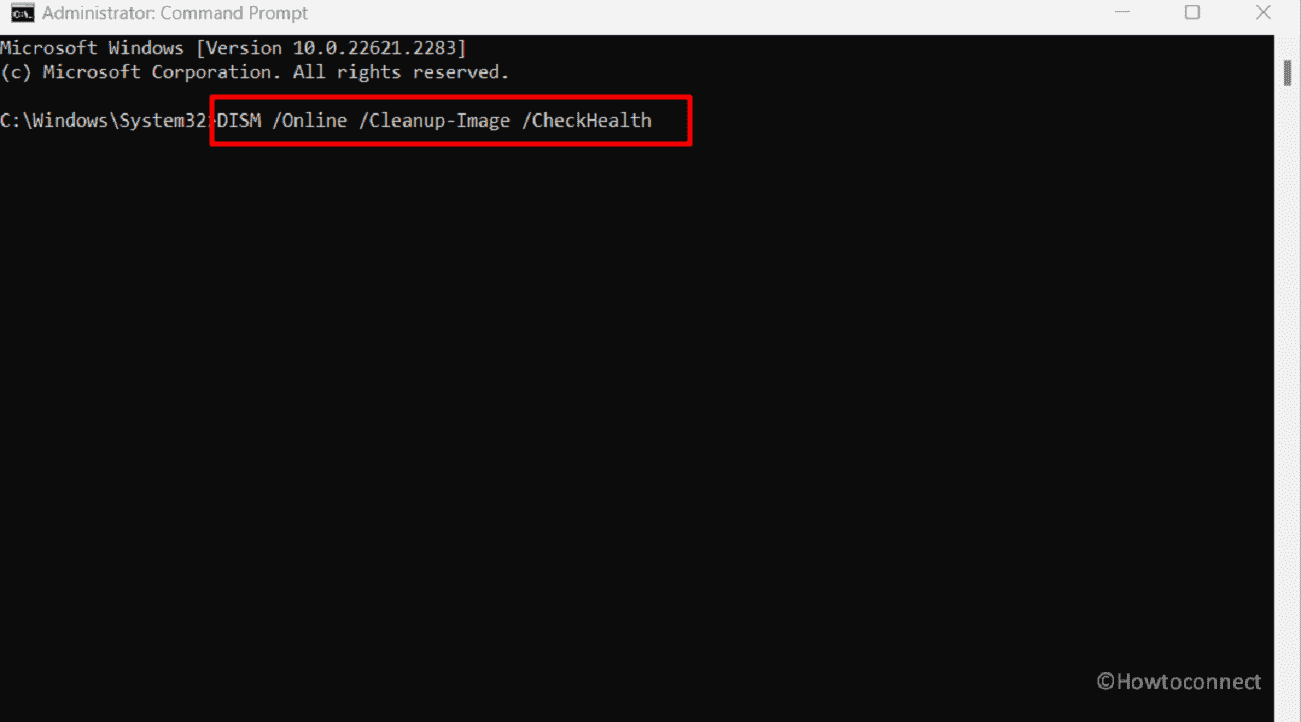
- Wait for the process to finish.
- Restart your PC.
Reference: SFC /Scannow, DISM.Exe, CHKDSK Windows 11 or 10
Temporarily Disable Third-party Antivirus
If you are looking for another potential way to solve the aforementioned error in your system you might want to try out disabling your third-party antivirus software. This threat protection software may occasionally cause problems with necessary upgrades by mistake. Here are the steps to follow:
- Press Winkey and R then type appwiz.cpl.
- Hit Enter.
- When the Programs and Features window comes on the screen find the third-party tool that can affect the Windows update process.
- Right-click on the antivirus software and select Uninstall.
- Click on Yes if a verification popup appears.
- If any instructions are shown follow them.
- Restart the PC and check for updates.
Perform a Clean Boot
Unlock the path to resolving Windows Update Error 0x8024a22d with a strategic maneuver: the Clean Boot. When conventional solutions fall short, this method steps in, allowing you to isolate and neutralize potential issues interfering with your updates. Check out the steps mentioned below:
- Close all ongoing programs.
- Type msconfig in Windows search and press Enter.
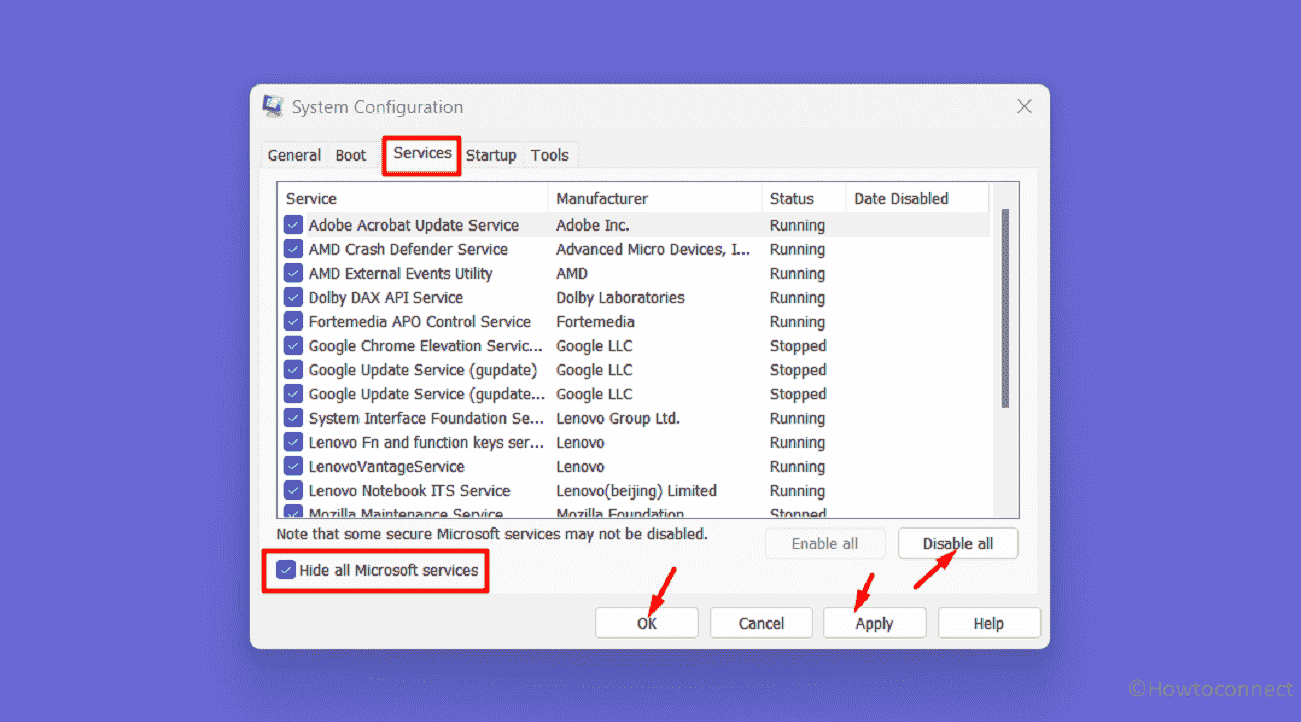
- In System Configuration, choose Selective Startup.
- Then, uncheck Load startup items.
- On the Boot tab, uncheck Hide all Microsoft services.
- Click Disable All.
- In the Startup tab, open Task Manager.
- Right-click programs and select Disable.
- Return to System Configuration, click Apply, then OK.
- Select Restart from the popup.
- After reboot, go to Settings (Win+I) > Windows Update and click Check for updates.
Initiate an In-place upgrade
When trapped in the relentless grip of error code 0x8024a22d, it’s time to explore the solution known as an In-Place Upgrade. If you haven’t discovered a way to resolve this problem, this technique might be your ray of hope.
The concept of an In-Place update is to upgrade your existing version to the most recent iteration while avoiding the difficulties of a clean installation. For that, check out these steps:
- Go to the website: https://www.microsoft.com/en-in/software-download/windows11 and reach Download Windows 11 Disk Image (ISO) located in the lower part of the page.
- Then, click on “Windows 11 (multi-edition ISO)“.
- Click Download.
- Choose the correct Product language and select Confirm.
- After that click on 64-bit Download.
- Go to the folder where the ISO file is downloaded, right-click on it, and select Mount from the top.
- Double-click on the setup.exe file and when a popup opens, select Yes for approval.
- Once Install Windows 11 window appears, click on Next.
- Choose Accept on the license agreement wizard.
- After the setup file will make sure that enough space is available on the local disk, Ready to Install page prompts.
- Check the option Keep personal files and apps.
- In the end, click on Install.
We hope with these 8 ways you will be able to fix Windows update Error 0x8024a22d in your system.
Methods:
Check Internet Connection
Run Windows Update Troubleshooter
Clean Up Windows Update Cache
Reset Windows Update Components
Run SFC and DISM Commands
Temporarily Disable Third-party Antivirus
Perform a Clean Boot
Initiate an In-place upgrade
That’s all!!
