Disk Management is an inbuilt extension of Microsoft that let you manage the installed disk-based hardware. Mostly, it is used to partition the recognized drives of your operating system as well as format them. Apart from that, the utility helps to allot drive letters of internal and external disk drives as well. Using the same extension, you can also lessen the partition size and enlarge them concurrently. But to carry out all these tasks, you need to open Disk Management in Windows 10.
Usually, you can access this built-in utility with just two clicks using the Power user menu. But if you are looking for multiple ways to do the same, Windows 10 offers that too. For that, you need to use the taskbar search box, Cortana, Computer Management console, Run command, Task Manager, Control Panel and many more. To know all the procedure in details, follow this context till the end.
Ways to Open Disk Management in Windows 10
Here are 13 Ways to Open Disk Management in Windows 10 –
1] Through the Power User Menu
Step-1: To bring up the Win+X menu, right-click on the Start button.
Step-2: Once appears, select Disk Management from the visible list.
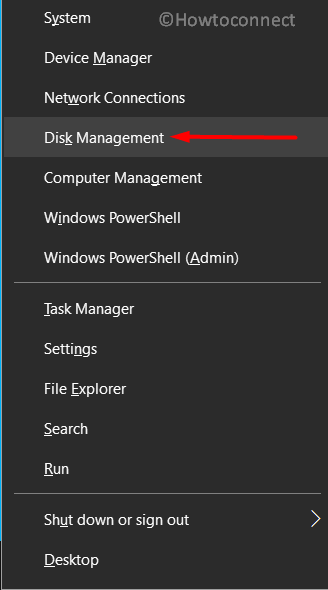
Isn’t it super easy!
2] Using Windows Search bar
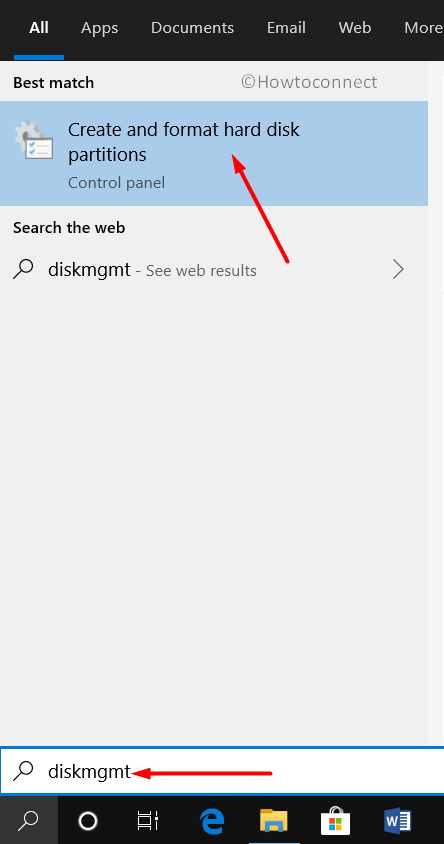
- At first, make a combined press of Windows key and S to invoke Windows search bar.
- Thereafter, type diskmgmt in the given text field.
- When the result comes up, click on “Create and format hard disk partitions”.
3] Taking the help of Run Dialog box
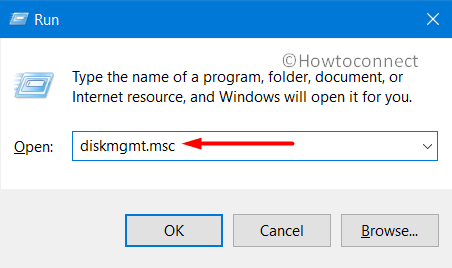
- To open the Run dialog box, you need to press “Win+R” together.
- Upon appearing, write down diskmgmt.msc in the empty text area located next to Open.
- Now, either click the OK button or hit the Enter key to launch Disk Management.
4] Via This PC icon
- Go to the Desktop screen and for that press Win+D hotkeys at one go.
- Right-click on This PC icon and select Manage from the fly-out menu.
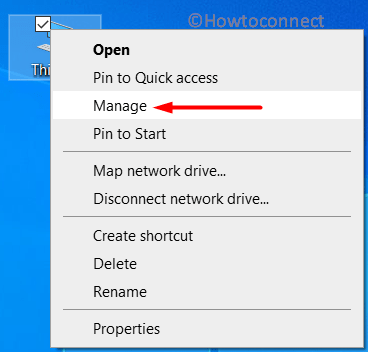
- Computer Management console will show up in the display. In its left column, you will view the Disk Management option. Simply click on it.
5] By going through the Start menu to Open Disk Management in Windows 10
- Click on Start icon located in the left-most corner of your desktop screen.
- To get access quickly, click # from the top and then select W alphabet.
- Locate Windows Administrative Tools from there and then click on the same to expand its options.
- After that, hover the cursor to Computer Management eventually make a click on it.
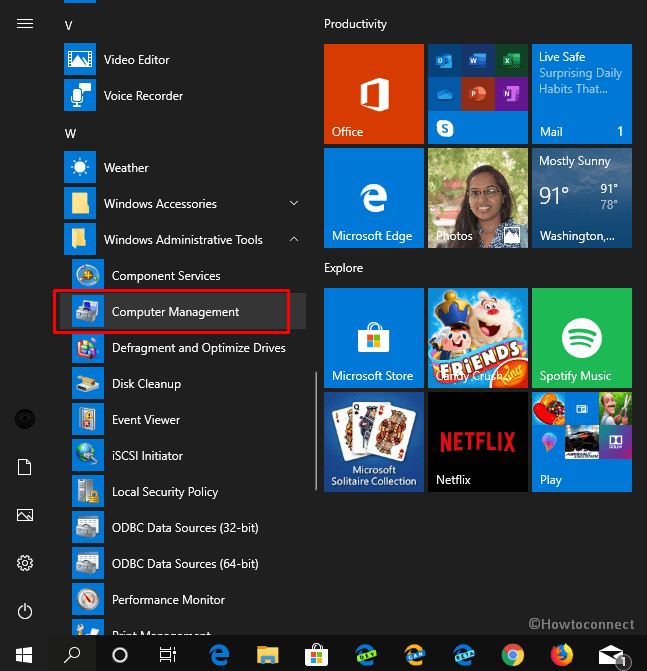
- Later on, click Disk Management from the left overlay of the Computer Management window.
6] From Window search
- Click on the Windows search icon located in the Taskbar.
- Speak out disk management and when the result turns up, hit the Enter key.
7] Open Disk Management via Control Panel
- Right-click on the Start button and select Run from the quick access menu.
- Next, type control panel in the void area and click the OK button.
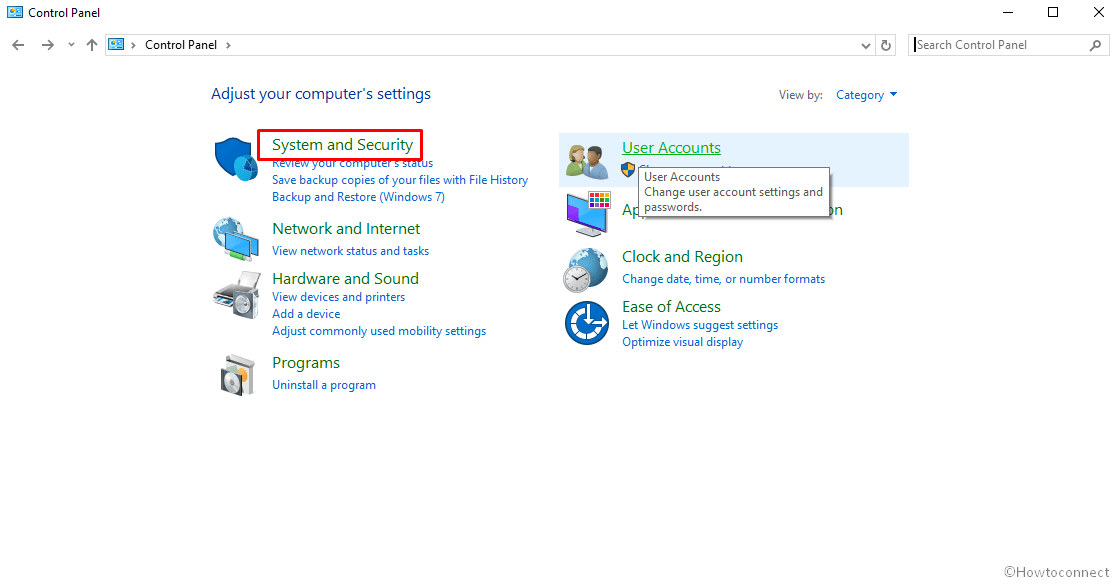
- When it comes into the sight, set the View by type to Category and then click System and Security.
- On the subsequent page, go to the bottom of the page and click Create and format hard disk partitions link located under Administrative Tools.
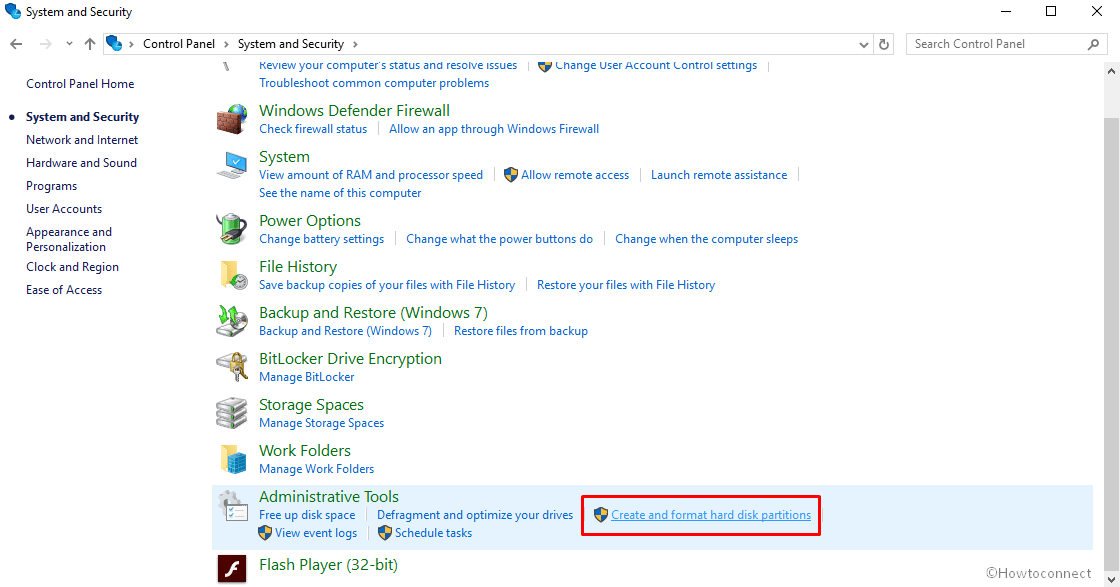
- This will immediately Open Disk Management in Windows 10.
8] Herewith Command Prompt
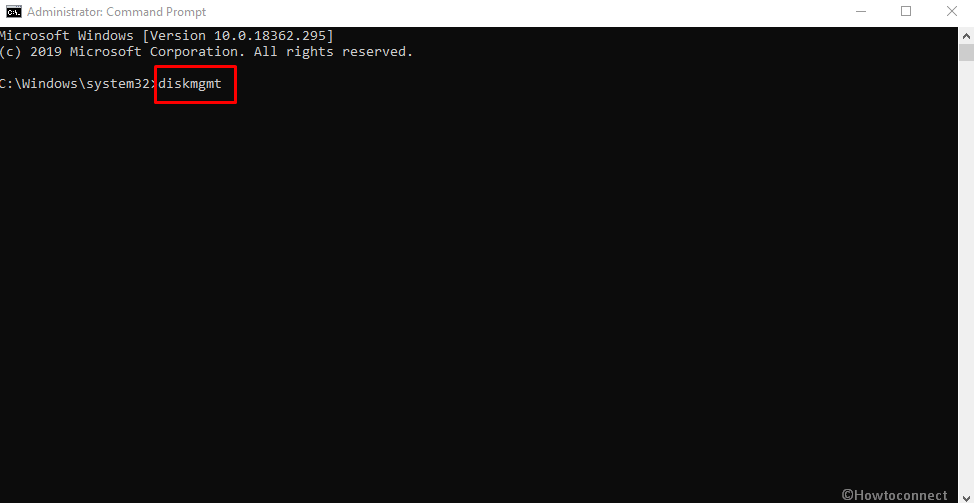
- Firstly, using any convenient way.
- When it appears, type diskmgmt after the blinking cursor and to run the command hit Enter.
9] Open Disk Management using Windows PowerShell
- Press Win+X at once and then select Windows PowerShell (Admin) from the appearing list.
- A UAC will prompt up for seeking your permission, click Yes to allow it.
- Wait until you see a cursor is blinking after PS C:\WINDOWS\system32>. Once you notice it, type diskmgmt there and hit Enter to launch Disk Management.
10] Open Disk Management in Windows 10 with Task Manager
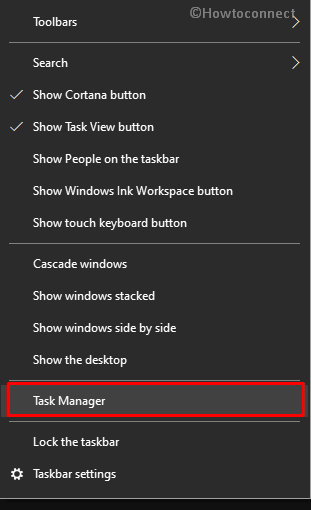
- Right-click on the void space of Taskbar and then choose “Task Manager” from the available options.
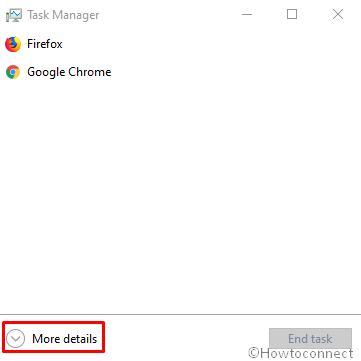
- When it makes an appearance, click on More details if it is not expanded already.
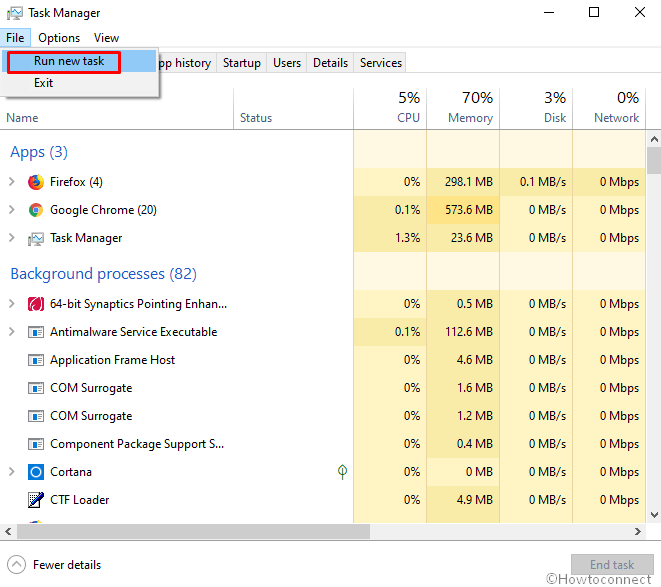
- Then hover the cursor to the menu bar and click on File followed by selecting Run a new task.
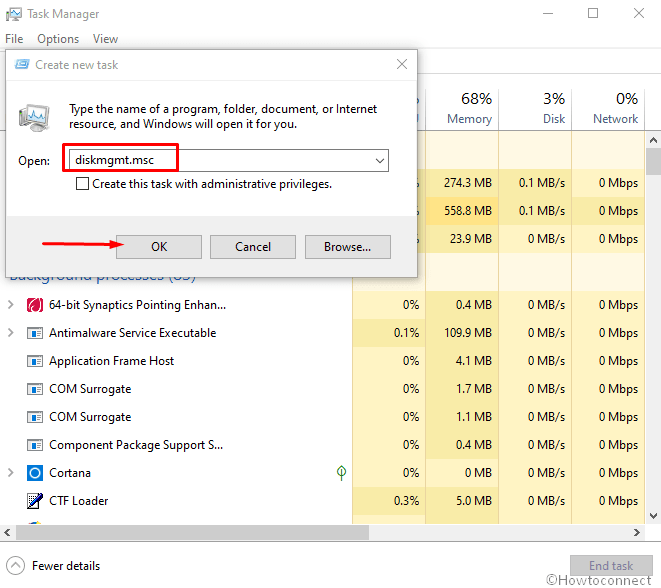
- A small pop up will roll out now. Type diskmgmt.msc in the provided area and hit Enter to launch the utility.
11] By exploring System32 Directory
Step#1: Open File Explorer by jointly pressing “Win logo + E” hotkeys.
Step#2: When you see it in the display, go to its address bar.
Step#3: Right-click on the same and select Edit address.
Step#4: Now, copy the following text and paste it into the address bar –
C:\WINDOWS\system32
Step#5: Hit the Enter key to reach out System32 directory. Once there, press Ctrl+F or simply click the search bar and type diskmgmt.
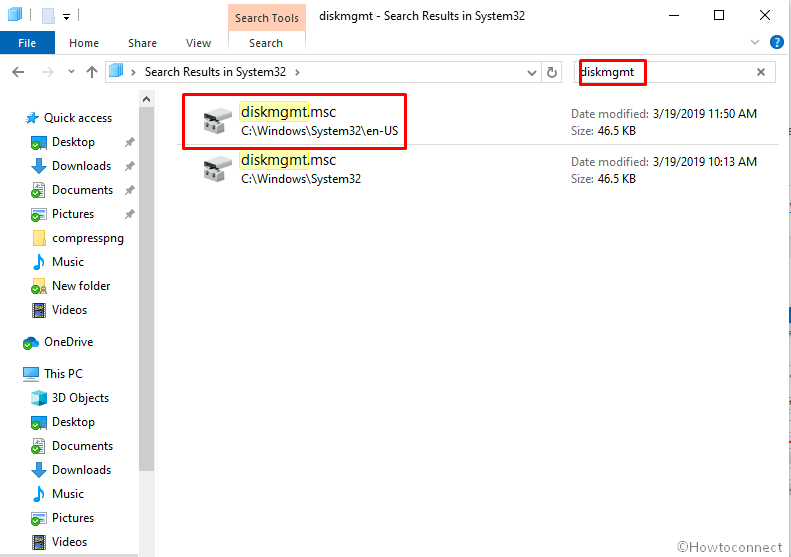
Step#6: When you see the result, click on diskmgmt.msc to Open Disk Management in Windows 10.
12] Through creating a desktop shortcut of Disk Management
- Click the bottom-right edge of your Display to head over Desktop screen.
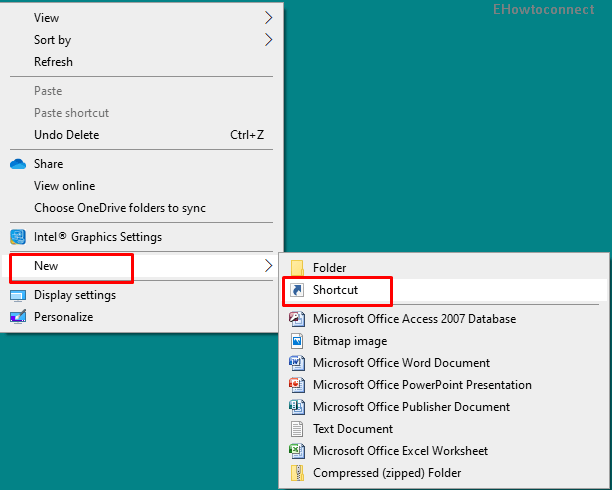
- Do right-click on a void space and from the context menu select New => Shortcut.
- Next, Create Shortcut wizard will come into the view. Copy the following location and paste in the given area – C:\Windows\System32\diskmgmt.msc.
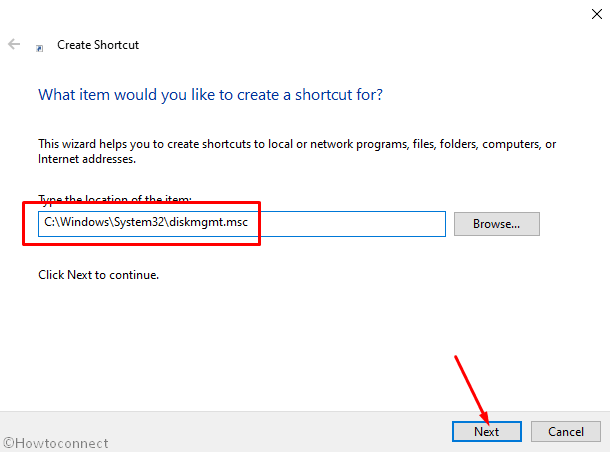
- To continue the process, click the Next button.
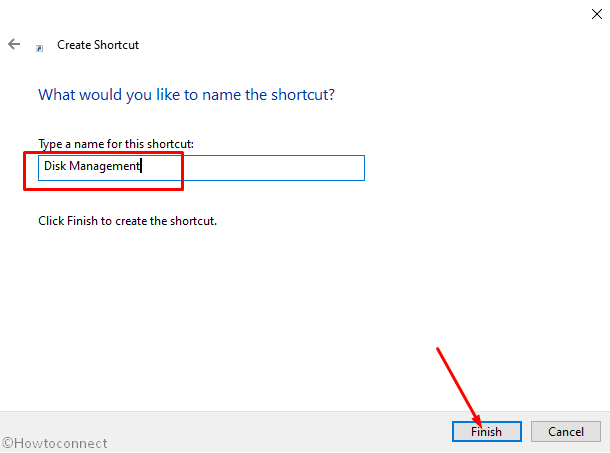
- Next, provide a suitable name such as Disk Management and then click the Finish button.
- In the future, whenever you need to open Disk Management, simply double-click on the shortcut you just created.
13] Using a hotkey to Open Disk Management in Windows 10
- To assign a hotkey, you just need to follow the previous method to make a desktop shortcut.
- Once created, right-click on the same and select Properties.
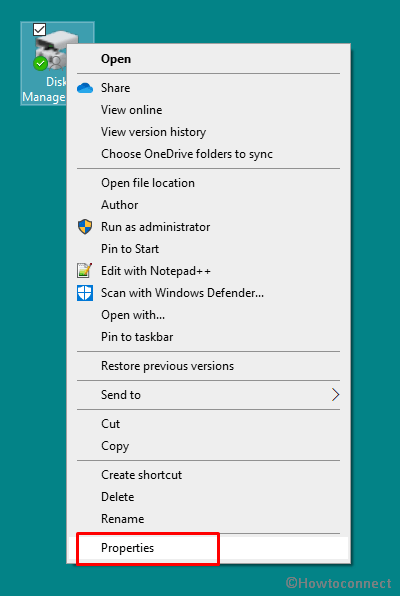
- A wizard will come up with the Shortcut tab opened. Move down to Shortcut key option and click on the box located beside it.
- Press a key you prefer to open Disk Management and the system will add Ctrl+Alt before that.
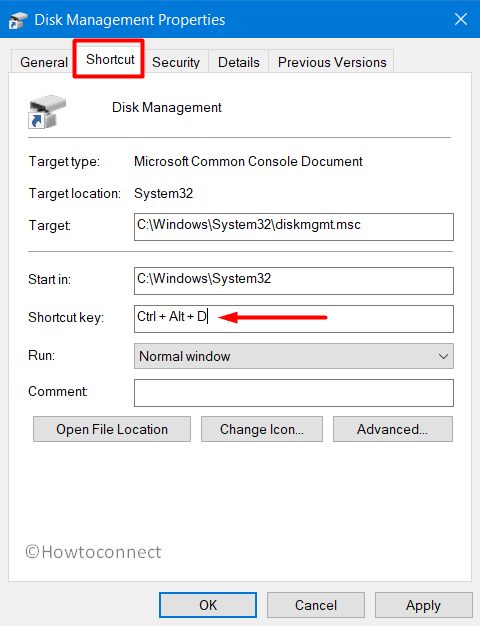
- Once you are done, click the Apply button and then OK to implement the modifications.
Methods:
1] Through the Power User Menu
2] Using Windows Search bar
3] Taking the help of Run Dialog box
4] Via This PC icon
5] By going through the Start menu
6] From Window search
7] Via Control Panel
8] Herewith Command Prompt
9] Using Windows PowerShell
10] With Task Manager
11] By exploring System32 Directory
12] Through creating a desktop shortcut of Disk Management
13] Using a hotkey
That’s all!!
