Without graphics, the system is useless. If your machine can contain multiple GPUs, Windows 10 support them in configuring the dedicated graphics card an application must use. These settings help in increasing the performance of the battery and increase its life. The Settings section in Windows 10, since the updated version from April 2018, has the option to set the preferred graphics card for the apps to run, by the desktop and MS store.
The steps mentioned enables the applications to use the GPU as specified or preferred by you in the settings section. The app uses the graphic processor that is best suitable for it irrespective of the settings in the system. In such cases, what we can do is change the preference directly in the app. Discrete has its RAM while integrated GPU’s don’t. Let’s understand the steps to change the default graphics card from settings in window 10, to get the best performance.
Change Default Graphics Card from Settings in Windows 10
Here is How to Change Default Graphics Card from Settings in Windows 10 –
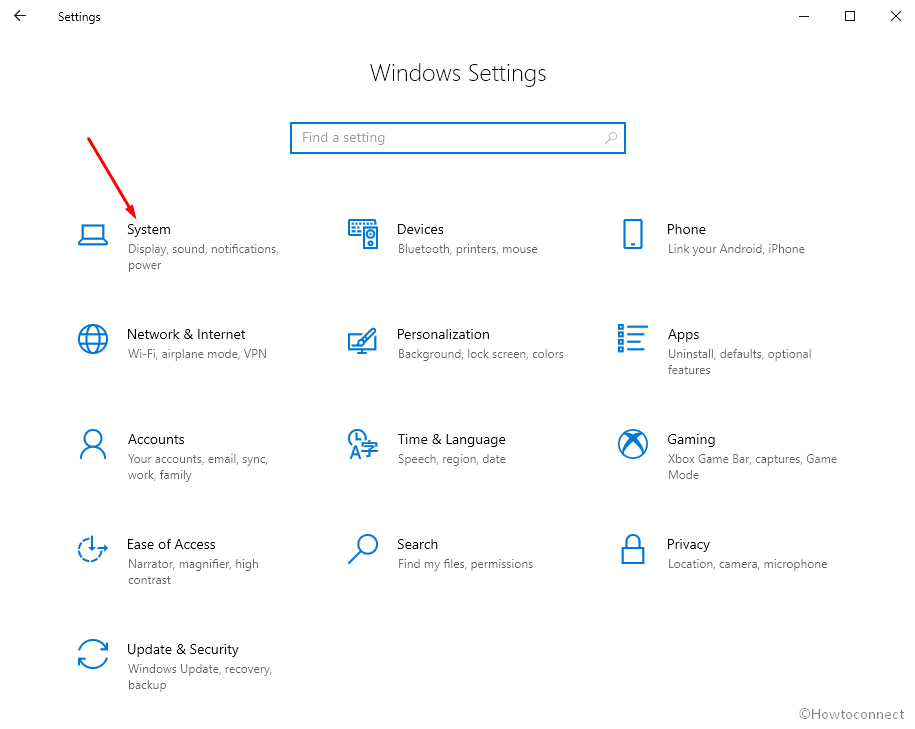
- Open Windows Settings (Win+I).
- Click the – System.
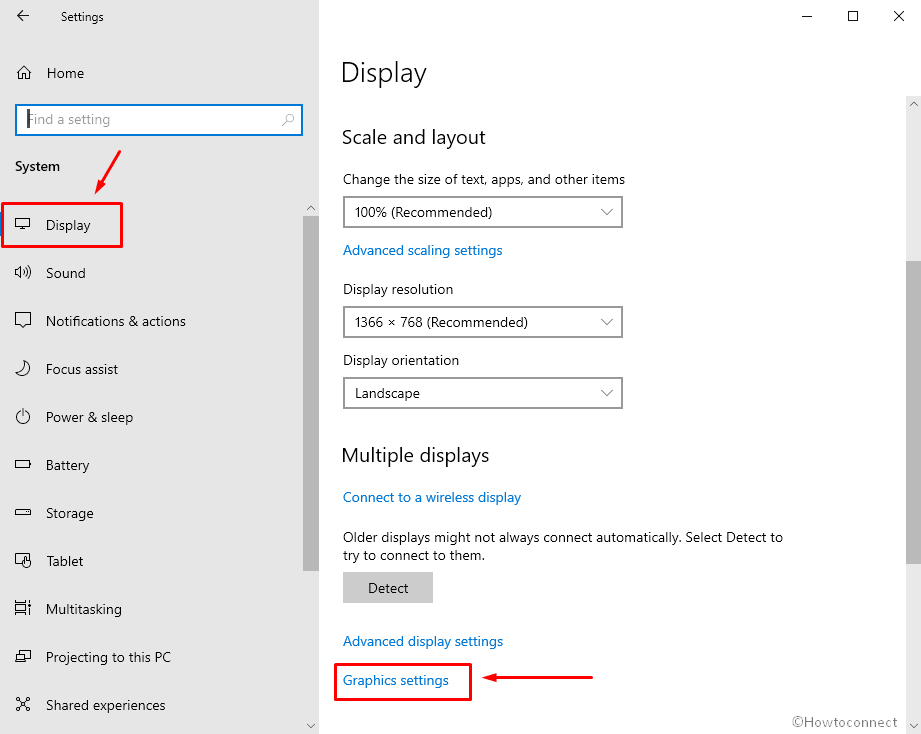
- Go to – Display.
- You will find multiple displays field; You need to click Graphics settings to change the default graphics card.
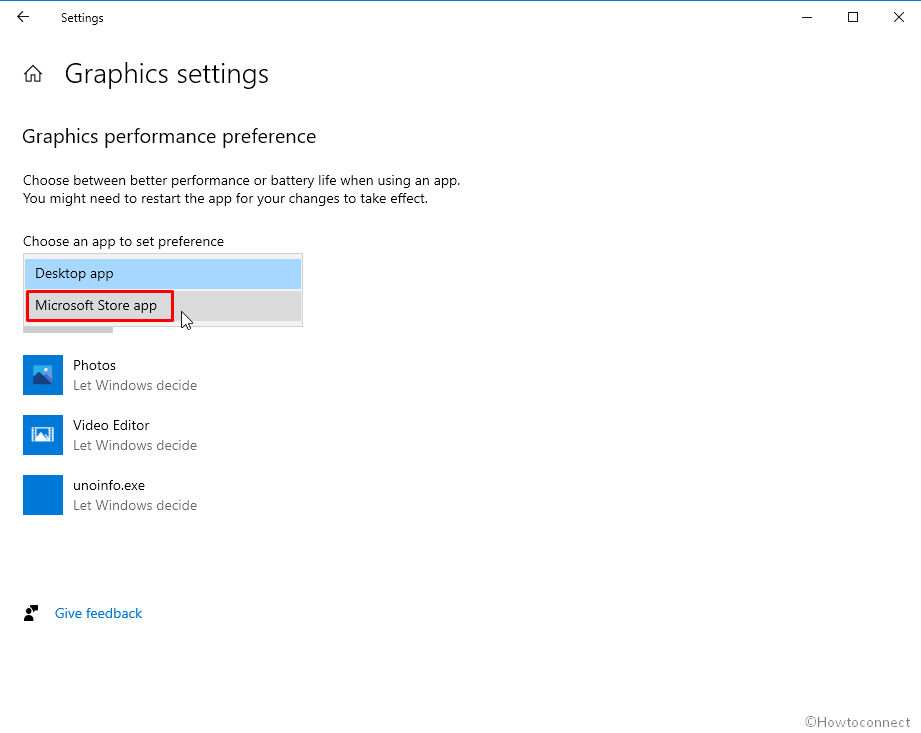
- Next, you reach Graphics performance preference settings page. Click the dropdown below Choose an app to set preference.
- Select either of two options, Microsoft store app, and Desktop app.
- “Microsoft Store app” indicates the apps that are installed from the built-in store while the “Desktop app” refers to traditional window programs.
- Choose Microsoft Store app, that will open another drop-down.
- Click the – Select an app.
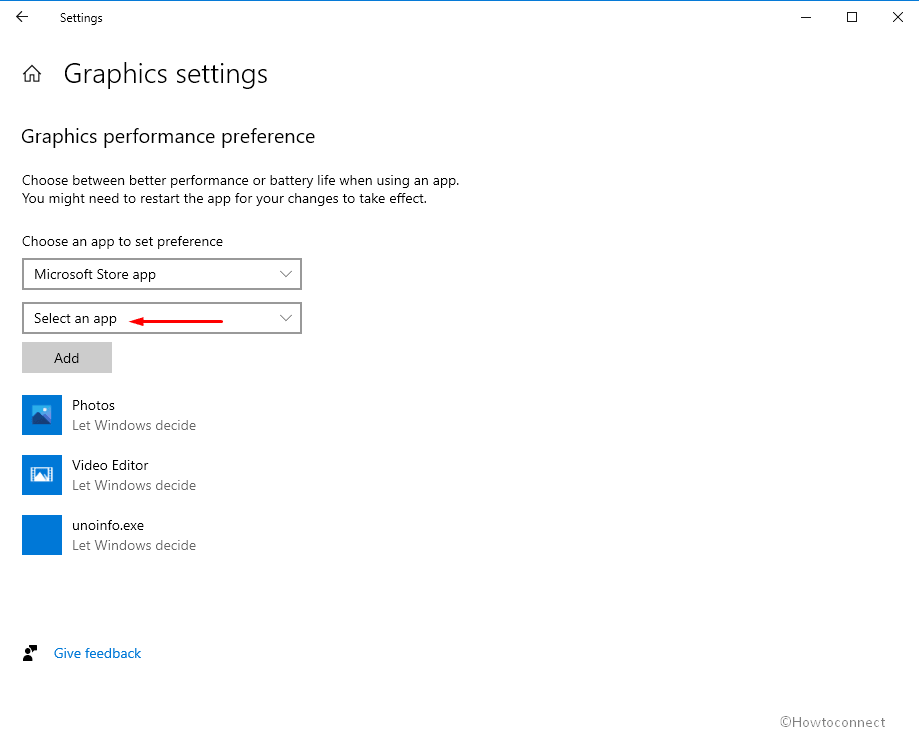
- Next, choose the needed app.
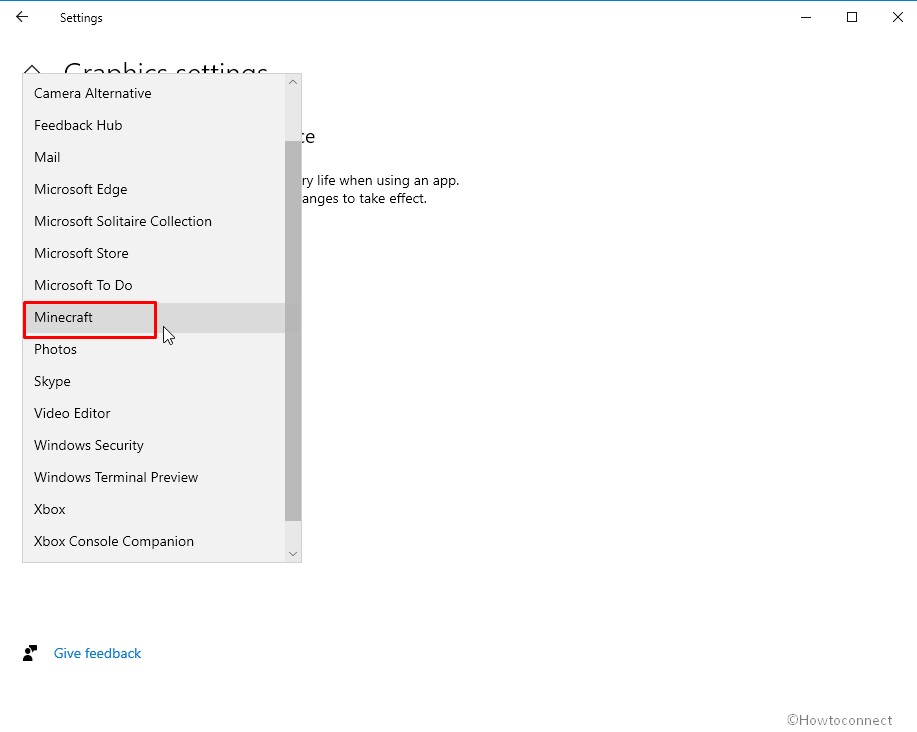
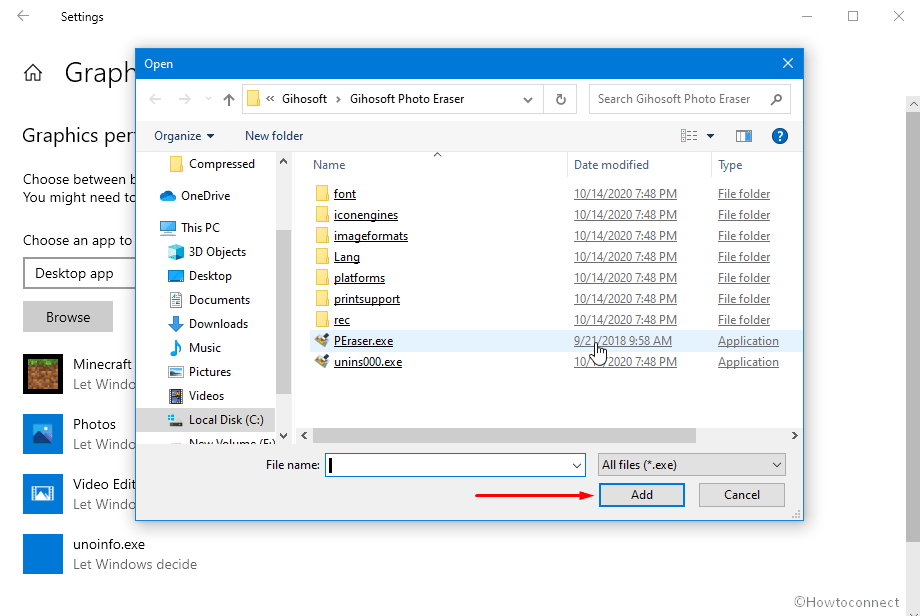
- Click the – Add.

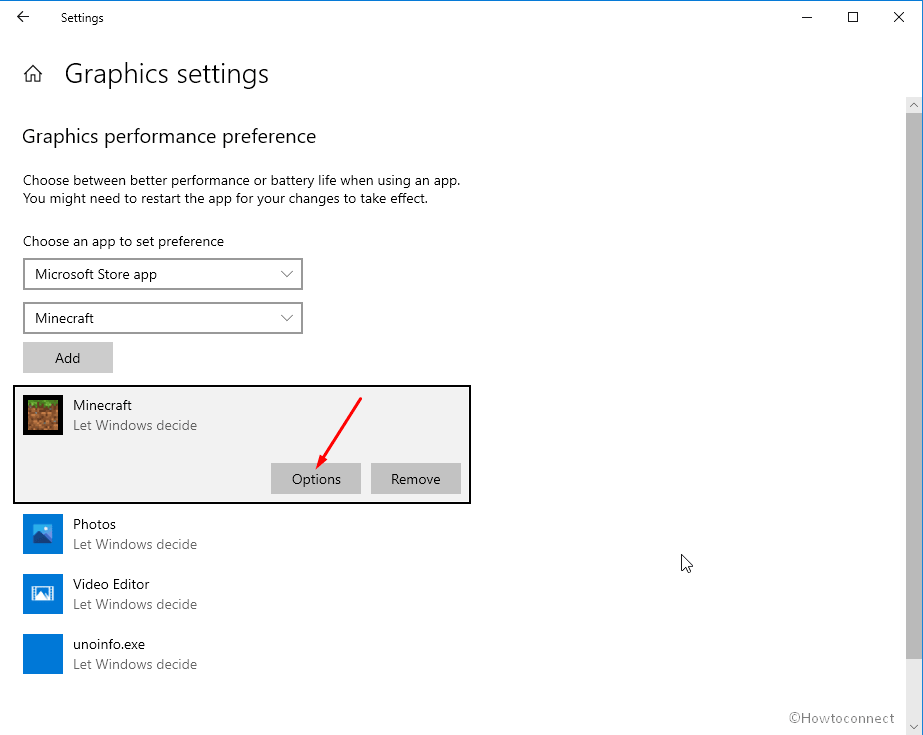
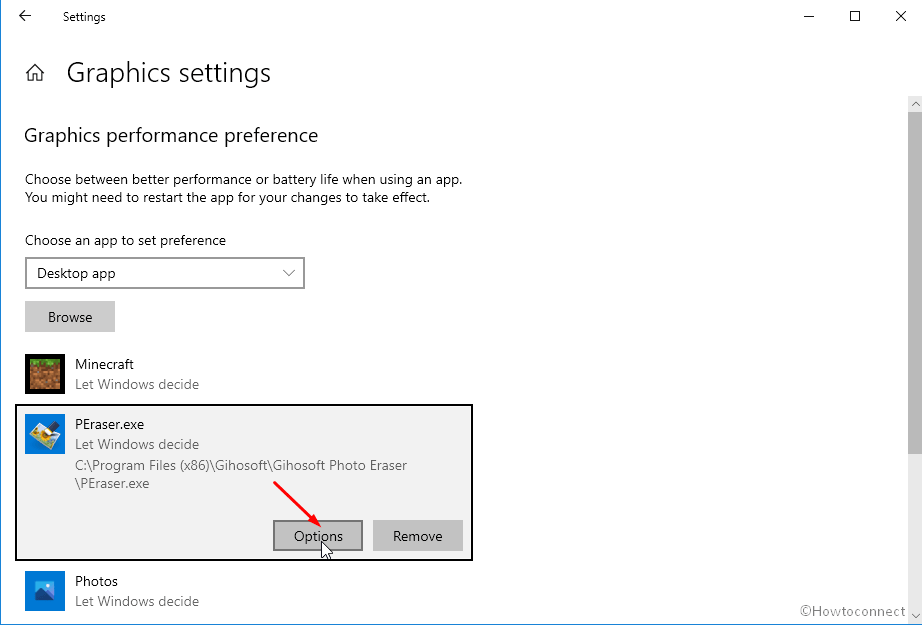
- Choose the – Options.
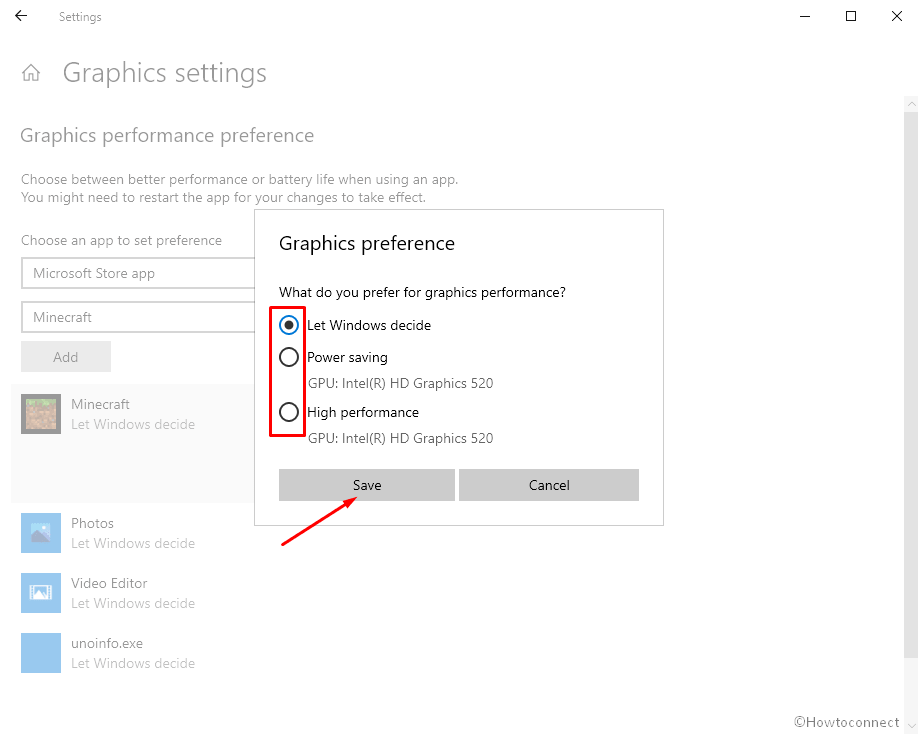
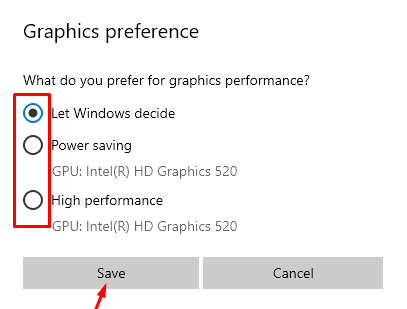
- There are three options namely; Let Windows decide, Power saving, and High performance. These options help in setting graphic preference one wants to use.
- Click Save to Change Default Graphics Card from Settings in Windows 10.
- When you select a Desktop app, click the Browse.
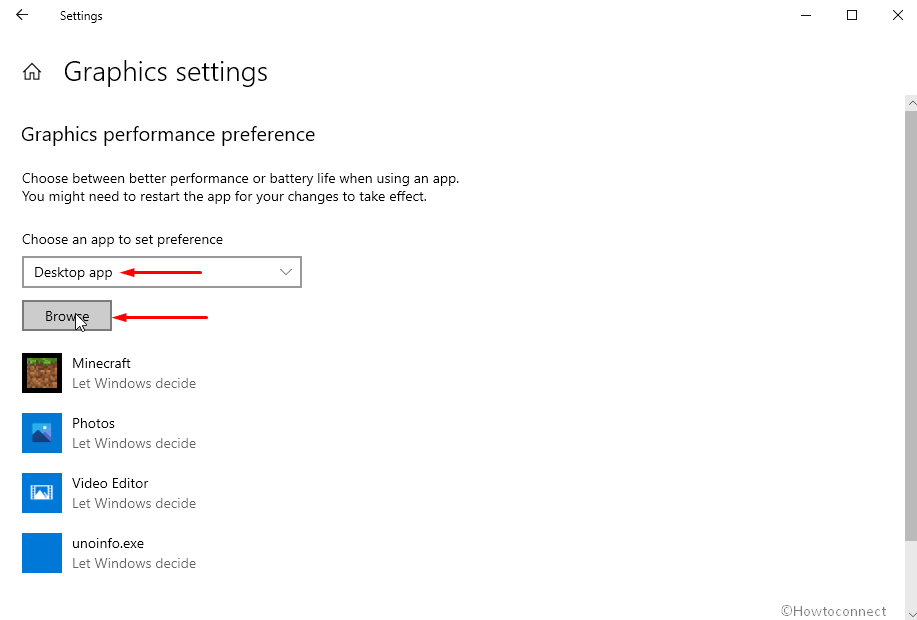
- Add a .exe file.
- Click the – Options.
- Again choose the suitable one from – Let Windows decide, Power saving, and High performance.
- Once you select the graphic preference, click – Save and that’s it.
Well, we have explained the three graphic specifications options below –
Let Windows decide – By default this allows Windows 10 to use Graphic processors automatically.
Power saving – Less complicated or complex apps run on power-saving mode. It limits the apps to the integrated graphics processor.
High performance – This is selected for complex apps with high demand such as games, videos with high graphics, etc.
In case, you want to stop using a preferred GPU, we must go to the app list to select and then remove it. Then select the systems default option.
That’s all!!