The location of contents such as pictures, documents, maps, and so on is by default set to save into This PC on Windows 10. The items automatically go the respective folders of C Local drive until you make a change. But this Windows 10 allows you to change the default location to any other drive as per your preference.
In this guide, we present to you the series of steps to Change Where New Content is Saved in Windows 10. For example – When you use Camera app to take pictures or make videos, they directly get stored in the Pictures folder inside This PC. But once you change the save drive location, the new images will be saved in that respective drive. Regarding the application, you can observe How to Turn On / Off Time Lapse in Camera App on Window 10. This feature was available earlier also but with the advent of Creators Update Windows 10, Microsoft changed its name.
Change Where New Content is Saved in Windows 10
Step 1 – To Change Where New Content is Saved, open Start Menu and select Settings icon. Alternatively, you can also press key combinations of Win and I to launch Settings.
Step 2 – Click System tab on the homepage of the Settings application.
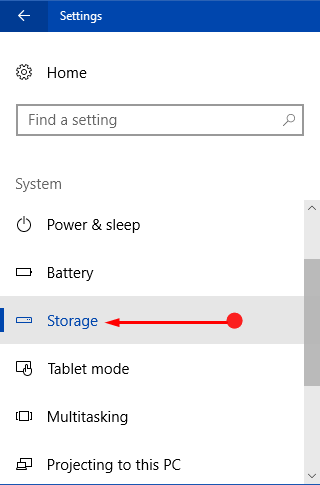
Step 3 – On the left sidebar, various sections are visible. Locate and click Storage.
For reference, follow Windows 10 – How to Access and Use Storage Sense.
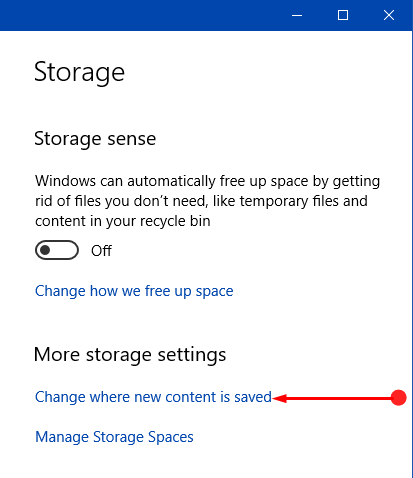
Step 4 – Shift to the right pane and underneath the heading More storage settings click Change where the new content is saved.
Step 5 – In the next page, you will notice that by default the location set for applications, documents, pictures, music, maps, and videos are the local drive. So, click on any of the options and from the drop-down click another drive of your choice.
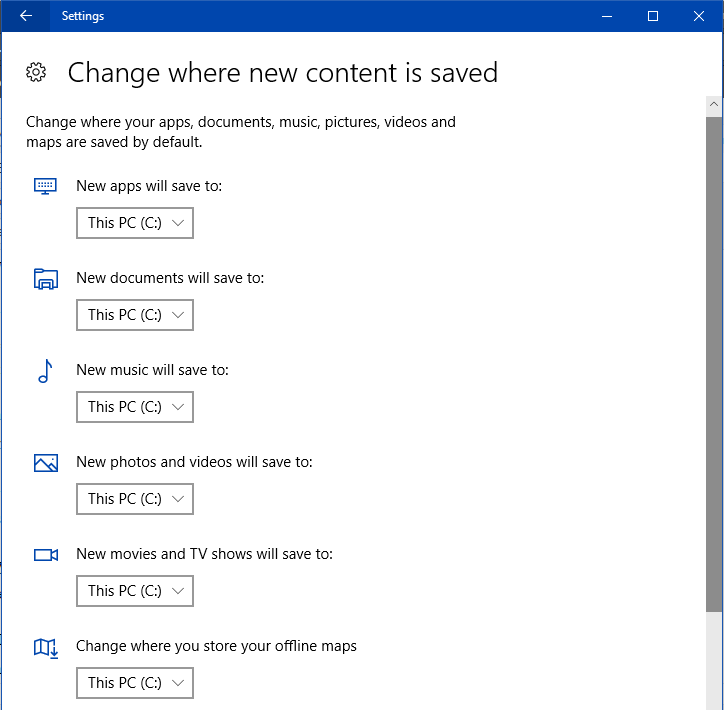
For example – You wish to change the drive location for Photos to another drive. So, click the drop-down underneath Photos options and pick up another drive from the list.
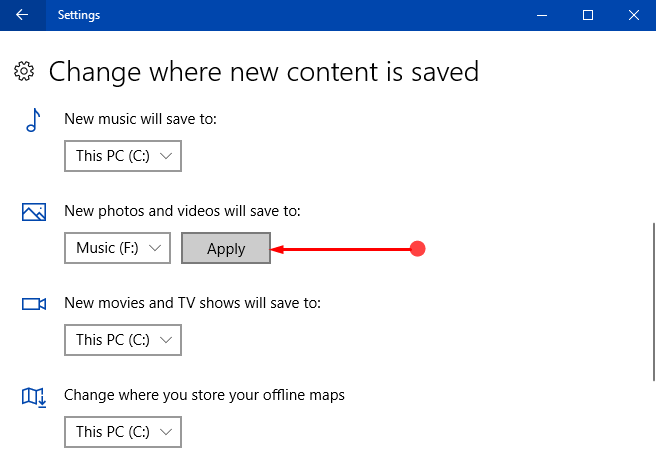
Step 6 – Once you set another drive, an Apply button will come into view, click on it to implement the changes.
In case you are running Windows 10 version prior to Creators Update, then pursue this guide to make the same modifications – How to Change Drive to Save Files in Windows 10.
Note – The changes that you make will be effective for the new content. The old contents will remain intact in the old locations.
Final Words
Once you follow the above simple steps, you will be able to change where the new content is saved in Windows 10. Well, things are changing with every new update and we will keep updating you if anything new about Storage comes. Till then, try to change the location for the new contents and let us know if you face any problems.
That’s all!!
Hi. I came to this post because even though I would change the storage devices to have content saved somewhere else, it still wouldn’t work. Content would still get saved to my really filled up default storage device. I play this one game a lot so my main storage drive is filled with all that data so I’m not sure if this has anything to do with it. Is there anything I can do?