Here, you will see the easy way to Clean Install Windows 10 May 2019 Update version 1903. This edition brings a collection of modern and useful features such as new Start layout, Windows Sandbox, Light theme, Tamper Protection, Reserved storage, etc. Moreover, improvements in the Settings app, WSL, Game bar, Taskbar, and action center takes the OS to a new level.
As of the Announcement made by Microsoft in their Official web, this is not really necessary to Clean install May Update 2019. The company will deliberately provide automatic update when available for your device. But there is a scope of wasting valuable time in Startup loop. In addition, improved Operating System performance is one of the biggest concern. So, to make your dream come true in a flawless way, we will elaborate the Clean Install Windows 10 May 2019 Update method here in the later segment. So, let’s begin the process with no prolonged delay –
Ways to Clean Install Windows 10 May 2019 Update
Here is how to clean install Windows 10 May 2019 Update –
Initial part – Preparing the Device
Preparing the PC comes first before you start installing work. Think of saving all of the necessary data to avoid the loss after current tasks. A secured Internet connection is a must before you proceed. Ensure you have stored a backup of your digital contents in the Disk drive. Try avoiding the Mobile data connection and use Ethernet cable or Wi-Fi network instead. It will reduce the scope of download to be terminated midway.
Download Windows 10 May 2019 Update Version 1903
Media Creation Tool, in short MCT, comes most handy while downloading the ISO file of Windows 10 May 2019 Update. Microsoft site contains the utility both in 32-bit and 64-bit architecture so download the one you need based on the configuration of the device.
Step-1: Launch the Microsoft Edge browser from the device and click on the address bar.
Step-2: Copy the following link, paste it into the address bar and then hit Enter key –
Step-3: Once guided to the Official Website of Microsoft, move the cursor down to reach out Create Windows 10 installation media area and Hit a click on the Download tool now option from here.
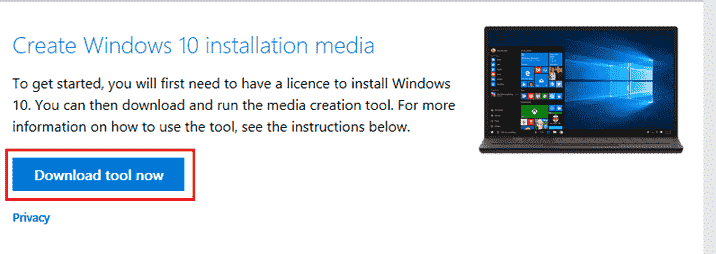
Step-4: Select Run option from the popup windows appears at the bottom prompts you for Run or Save.
Step-5: Upon complete downloading the files, UAC will prompt for your permission to make changes in the device. Choose Yes to go ahead.
Step-6: Be a little patient and wait until the Windows 10 Setup wizard appears on the display. When it comes to appearance, hit Accept option from the right most corner at the bottom.
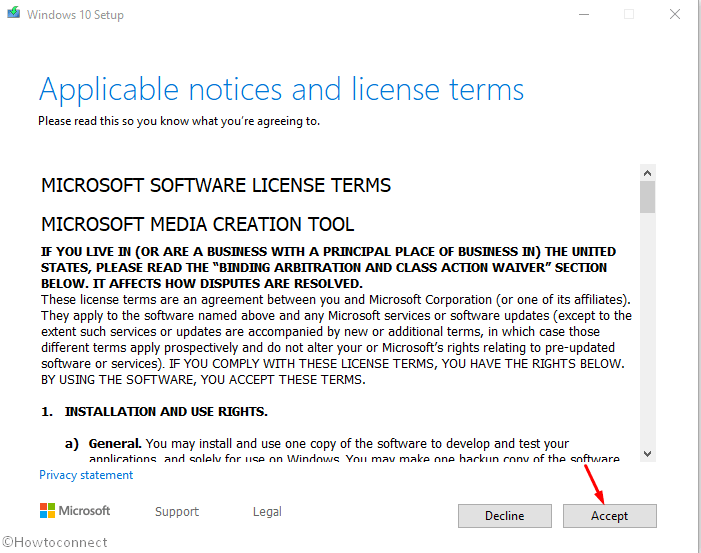
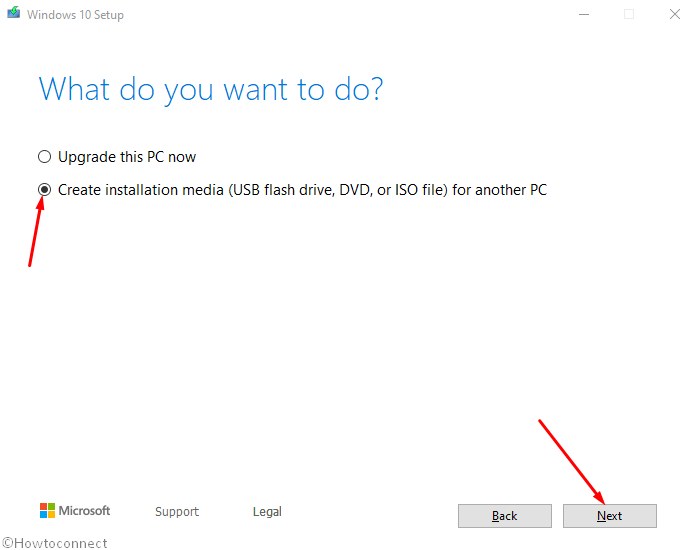
Step-7: Moving further to the next screen, choose the Create installation media (USB flash drive, DVD or ISO file) for another PC option and then click the Next button to proceed ahead.
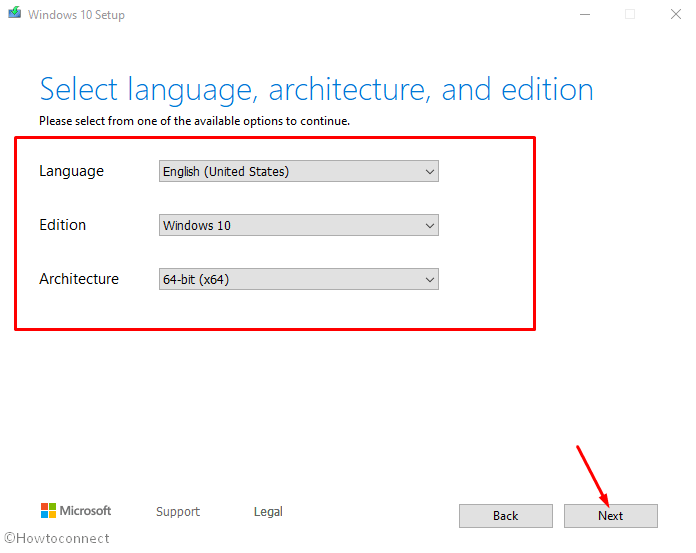
Step-8: When the next Set up screen will hit on the display, choose your preferred Language, Edition and Architecture from the respective drop down menus available in this page. Upon providing all the necessary information in all fields, hit the Next button.
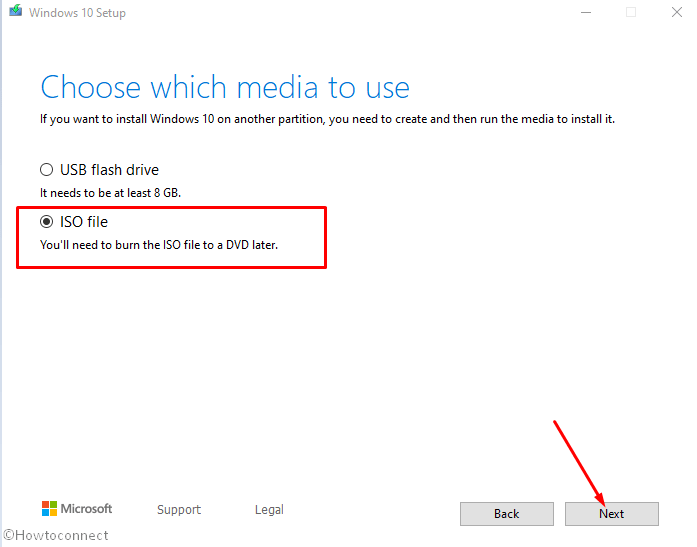
Step-9: On the subsequent window, choose the option saying ISO file followed by clicking on the Next button.
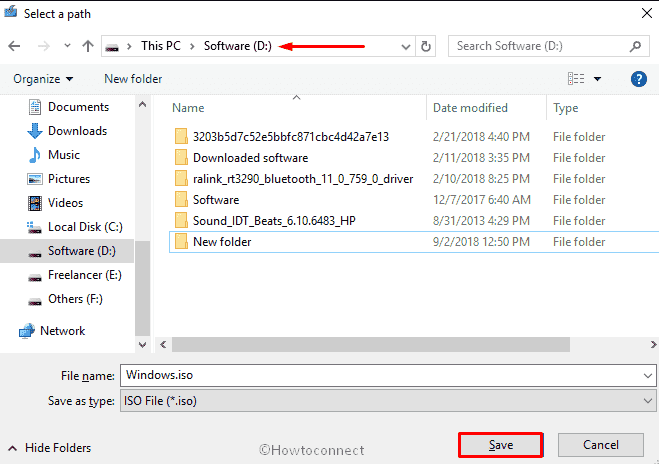
Step-10: In a few moments, a new window will show up asking you where to save the ISO file. Select the preferred location and then hit the Save button to proceed forward.
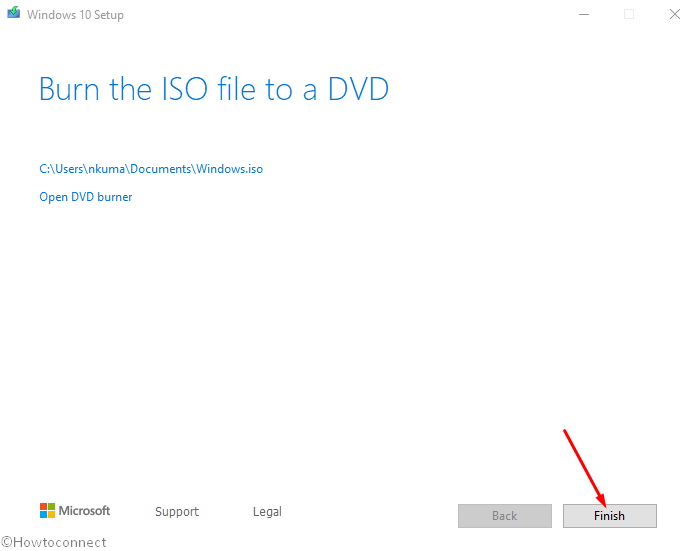
Step-11: With the above task, the download will get started and will take a quite long time to finish. When it gets over to 100%, perform a click on the Finish button and leave the MCT.
Making the bootable ISO file
After finishing the downloading completely, the time has come to make these ISO files bootable. There are quite a few methods to do so. You can go for making a USB stick bootable or choose to use Rufus to Install Windows 10 1903 in case of dual boot.
Today, we will show you to Install Windows 10 using Rufus. Let’s start –
- Open the Browser and make a move to a page following the link.
- Once the page comes to view, download the .exe file of Rufus from there.
- On finishing, double click on the rufus.exe file and launch the software.
- When UAC prompts for permission, give consent by selecting the Yes option.
- Connect a USB stick having at least 4GB of space to the computer’s port. You can choose the USB drive or DVD instead as well.
- From the software interface, click on the dropdown menu under Device and choose the one you have inserted just now (Pen drive /USB drive/DVD).
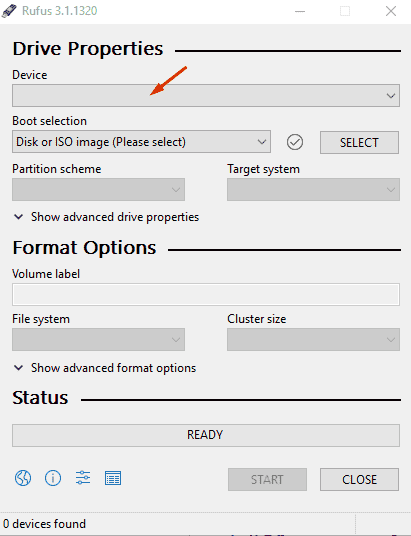
- Hit the Select option and advance to the location where you have stored the ISO files of Windows 10 May Update, 2019.
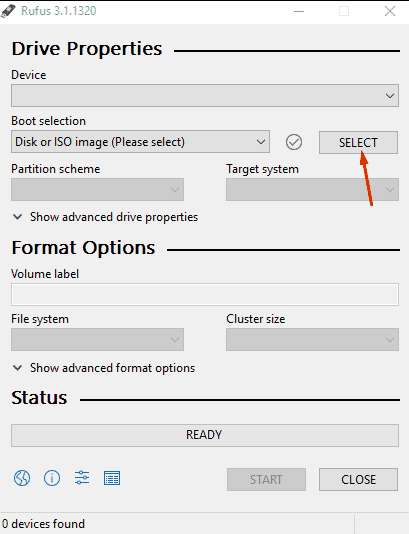
- Select the File and click on Open option.
- Finally, hit the Start button from the software page and also follow the advice appears on the display.
Clean Install Windows 10 May 2019 Update 1903
The next task after making the pen drive Bootable is Clean installation. For that, follow the below guidelines –
- Take the Bootable media and insert into any of the port located on your device.
- Power on the device and press the Esc, Del, F2 or F12 keys (depending on system brand).
- Choose the USB/DVD using the function key suggested on the next screen.
- In a few seconds, a new wizard Windows Setup will rise up asking the following information –
“Language to install”,
“Time and Currency format”
“Keyboard or input method”
- Select the option in each dropdown correctly.
- Click on Next button.

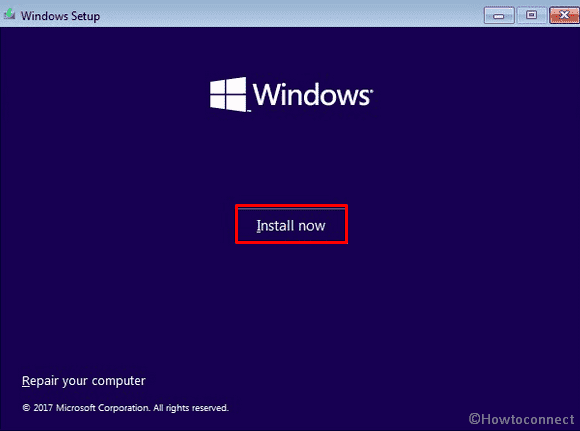
- From the following window, click on the Install now option.
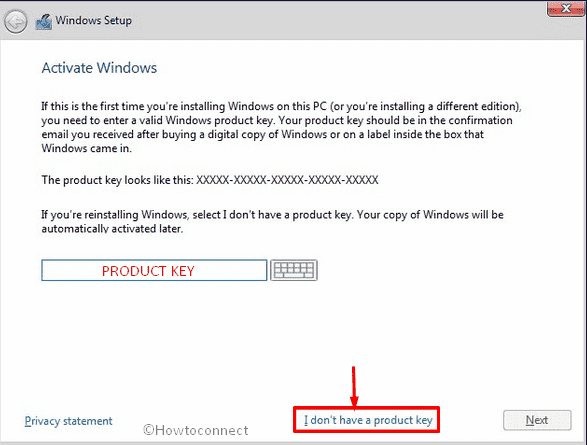
- When the next window comes into view, you will be asked for inserting the product key. Better is to provide the original one but if you don’t have or forget, just select I don’t have a product key option.
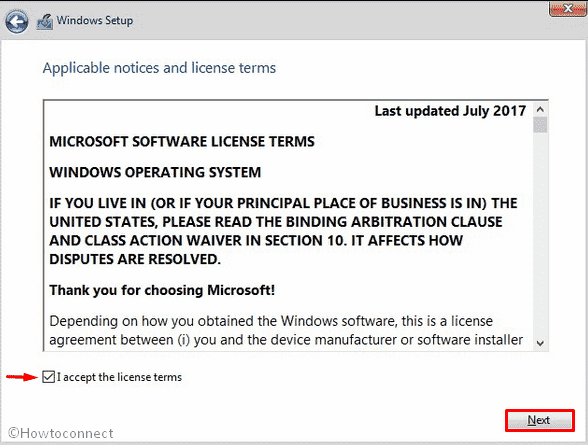
- Put a tick mark on the box saying I accept the license terms and eventually hit the Next option from the bottom of the Wizard.
Note- Steps mentioned in the below part are not mandatory. If you want, you can custom them based on need. We are proceeding forward to show you as an example –
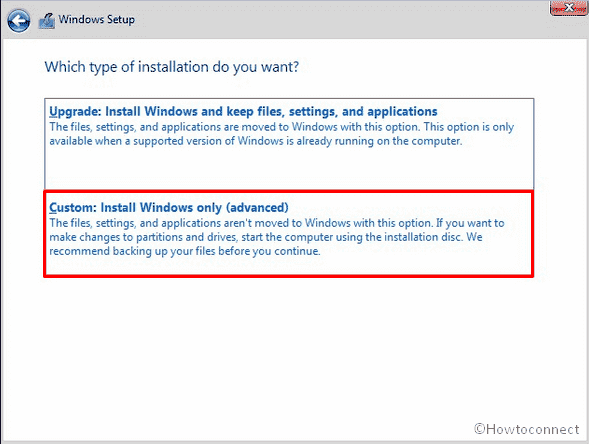
- On the successive wizard appearing next, choose the Custom: Install Windows only (advanced) option.
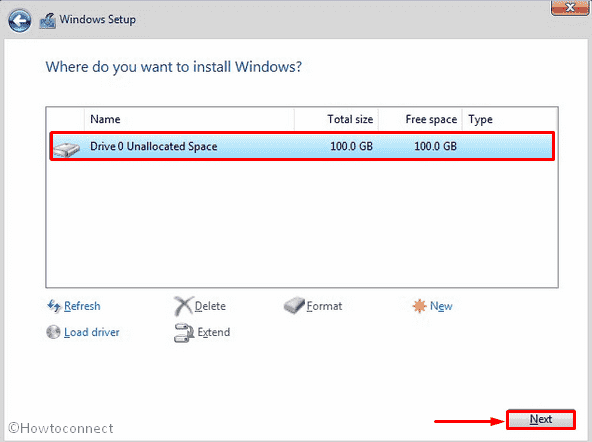
- The following window will be completely based on your device. As for example, we have connected only a single drive and it is shown as Drive 0 Unallocated Space.
- Select the drive and eventually choose the Next option from this page. This will initiate the Clean Install Windows 10 May 2019 Update process in your computer.
- Soon after starting the procedure, a Windows Setup dialog box will pop up warning you about deleting the existing contents. Select OK.

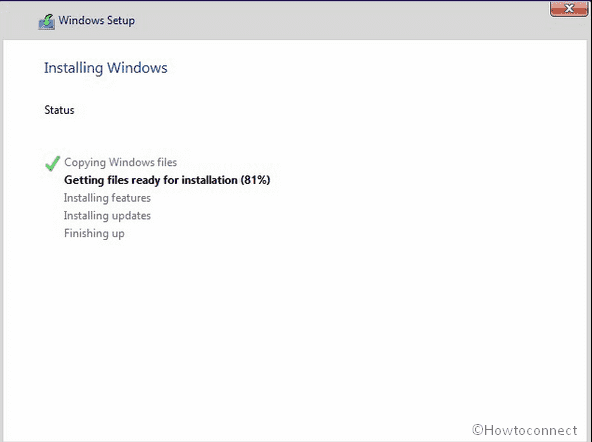
- Rest of the installation work is set to Automatic by default. However, don’t leave this screen unmanned as sometimes it might prompt for a few info and provide the correct options. The whole process might take prolonged hours and also a couple of Rebooting as a part of Installation.
- On completing fully, add the Microsoft email account, Skype identification as well as a Phone number in the respective fields once asked.
- Alternatively, you can select to Set up at PIN and hit the Next button.
- For enabling Cortana, perform a click on the Yes option.
- Finally, select the Privacy settings based on your preference and lastly click on the option previewed as Accept.
That’s all!!
