In this article, we are going to talk about WUDFHost.exe in Windows 10. Before starting we want to clarify that it’s not a virus itself but is prone to threats just like any other .exe files. Developers can decode this type of executable files easily and spread out the malware through it to your system that carries the same name.
Read – How to Fix Ctfmon.exe Unknown Hard Error in Windows 10
Some of the potential troubles related to this file include the inability of the system to recognize external hard drives like pendrive. It is also responsible for the disconnection of Bluetooth from the phone to the laptop. The file causes the CPU and RAM to be used at a very high rate. If the actual identity of the file happens to be a virus then there is more chance of further infections in the system.
Disable and Fix WUDFHost.exe in Windows 10
Here is how to How to Disable and Fix WUDFHost.exe in Windows 10 –
Use End task to Disable WUDFHost.exe
If you want to end the process of WUDFHost.exe then you can use Task manager using following steps –
Step-1: Press the combination of Ctrl+Shift+Esc and let the Task manage appear.
Step-2: Click on More details to expand the tool.
Step-3: Click on Details tab and locate WUDFHost.exe.
Step-4: Right click on the same and select End Task.
Run Windows Defender full scan to remove Virus if exists
If you find any virus because of this executable file then
- Press Win+R, type %windir%\explorer.exe windowsdefender: in the run dialog box and then hit Enter.
- Click on Virus & threat protection and select Scan options from next page.
- Check Full scan and click on Scan now.
- This will take a long so wait patiently see what the Windows Defender notifies you.
But so far as the question of WUDFHost.exe you may have to follow a few extra solutions –
Update the Wireless Network adapters
Wireless driver is responsible for offering your computer the scope for accessing Wifi. Disabling this may help to fix WUDFHost.exe in Windows 10. To do so, follow the below process –
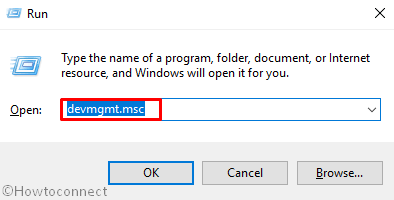
Press Win+R in order to launch Run dialog.
Write down devmgmt.msc in the text box and hit Enter.
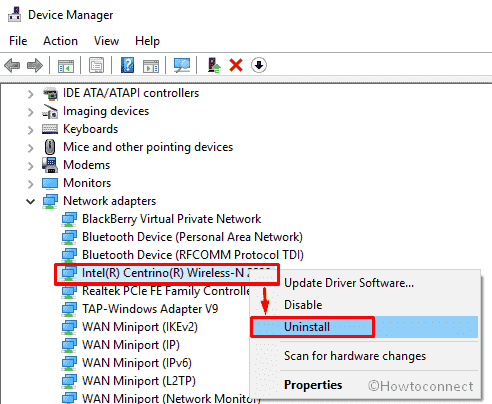
Now you will view Device Manager in the screen. Locate Network adapters section and expand it by double tapping.
Then do a right click on the driver that named similar to Wireless and Select Uninstall.
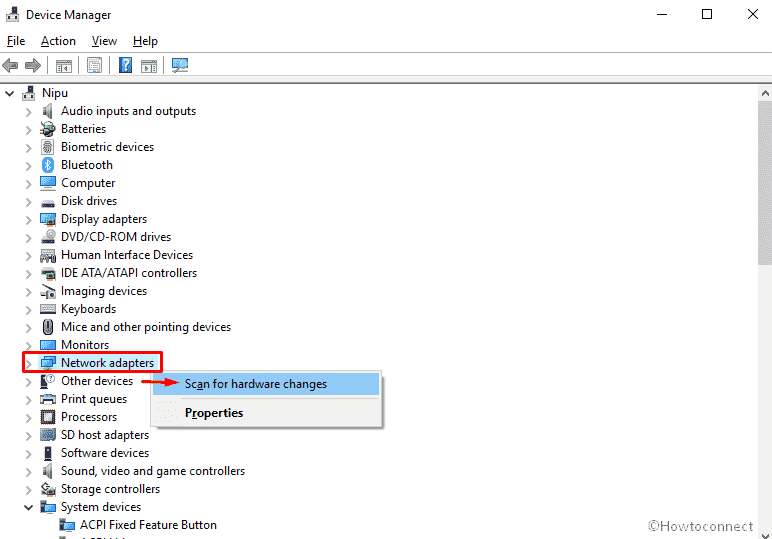
Reboot your PC to save the changes and again open Device manager.
Perform a right click on the Network adapters and Select Scan for hardware changes.
Now check whether the issue is resolved. If it not then right click on the Wireless driver and Select Update driver.
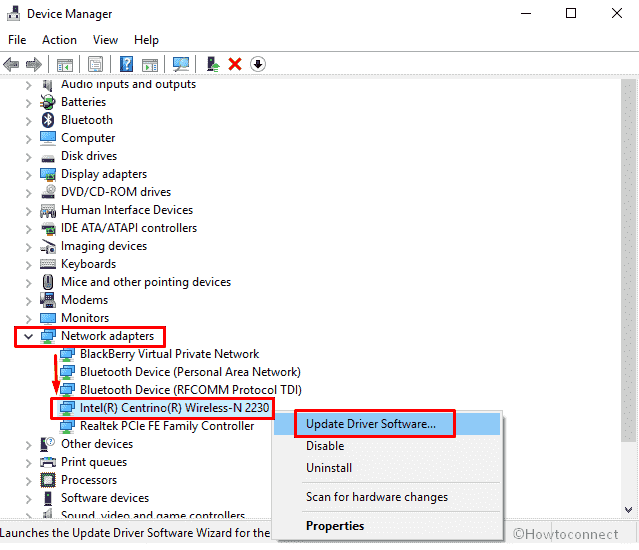
In the end, Restart the PC to view the changes.
Disable Portable Devices
A portable device refers to any computer hardware that can be disconnected from it and carried to be fitted to another one such as a wireless mouse or keyboard. These are often responsible for causing the high CPU usage known to occur with WUDFHost.exe. In order to disable any portable device here is the process –
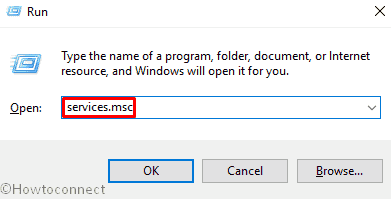
- Do a right-click on Start button and Select Run.
- Type services.msc in the void box and hit Enter
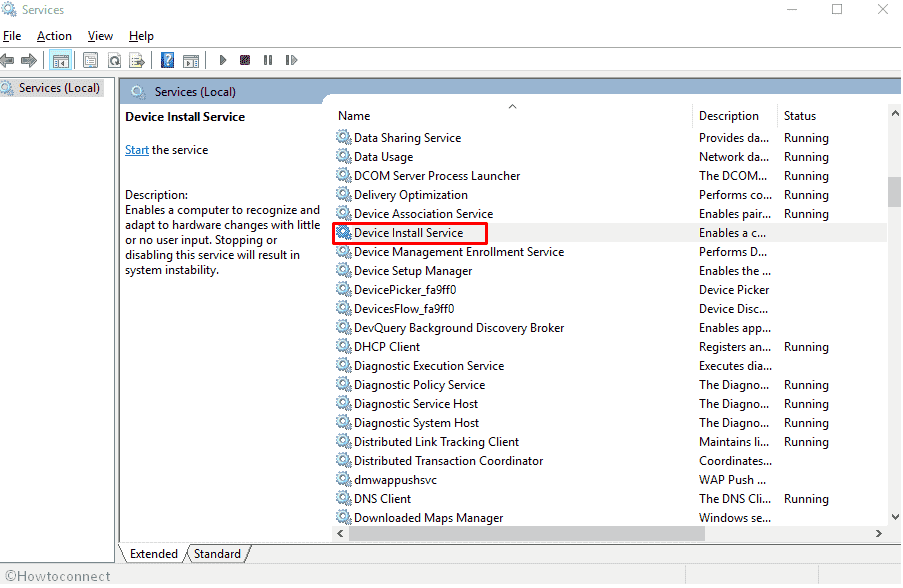
- Locate Device Install Service from the list and make double click on it to open its Properties.
- Now Select Disable from the drop-down menu located beside Startup type.
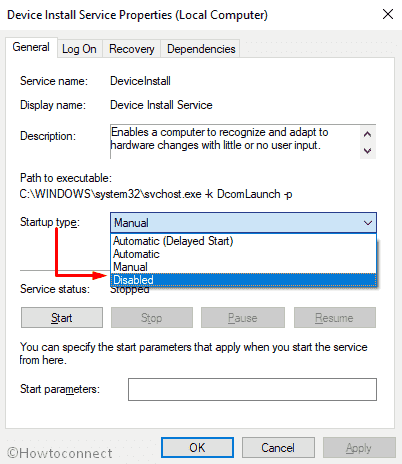
In the end, Click on Apply and then Ok to keep the changes.
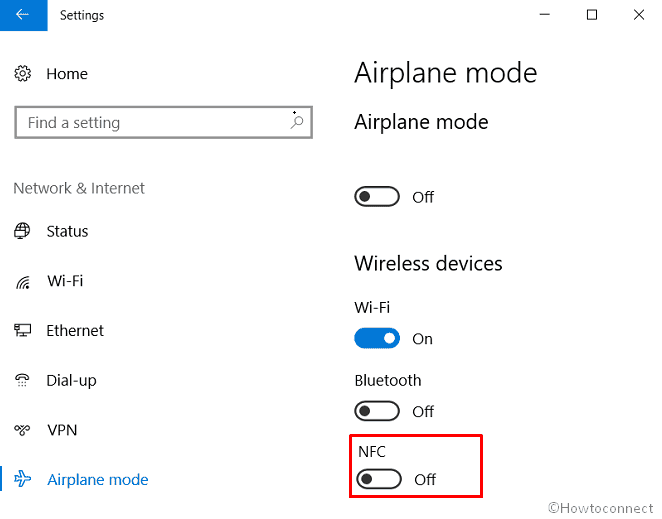
Disable NFC
Often NFC causes WUDFHost.exe in Windows 10. So disabling might help to resolve it. Here’s the process –
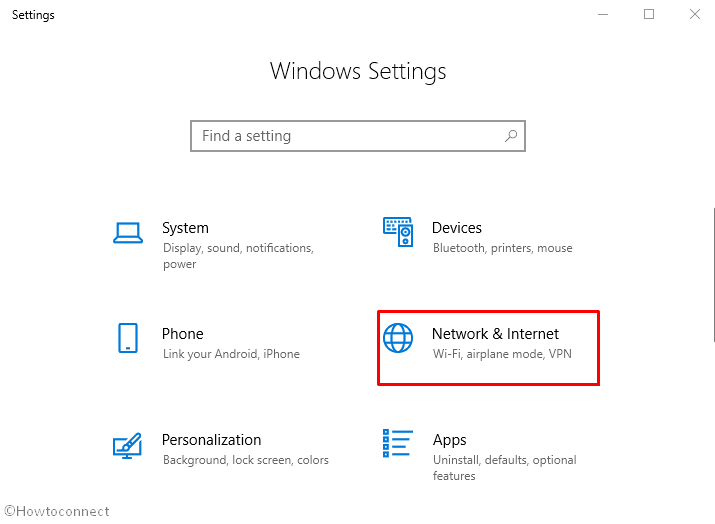
Launch Power menu by Pressing Win+X jointly and Select Settings.
Click on Network & Internet.
Perform a click on Airplane mode from the left column and shift to the right side.
Turn off the toggle button of NFC located under Wireless devices.
Run System Maintenance Troubleshooter
- Go to Cortana and type CP in the search box. When the result appears, Press Enter to open Control Panel.
- Locate Troubleshooting and click on it.
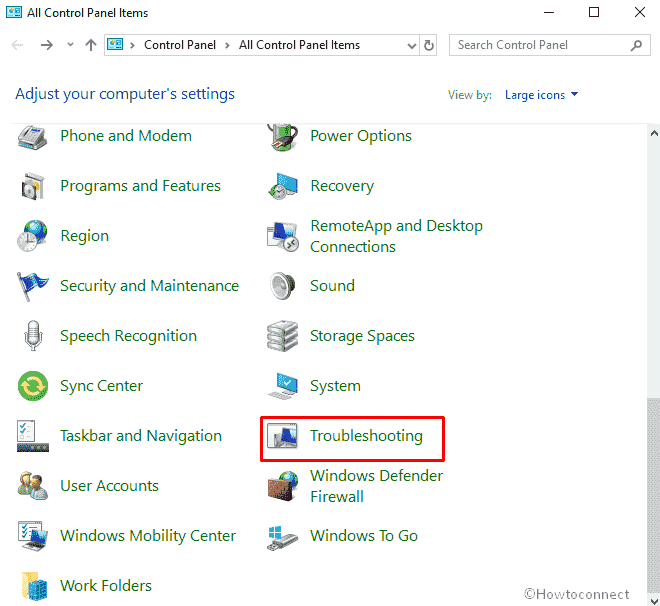
- Click on View all from the left column.
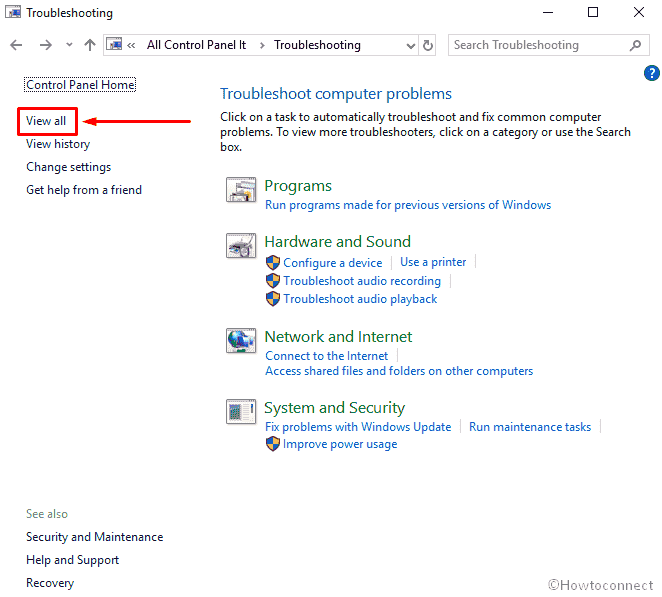
- Now, Select System Maintenance from the list.
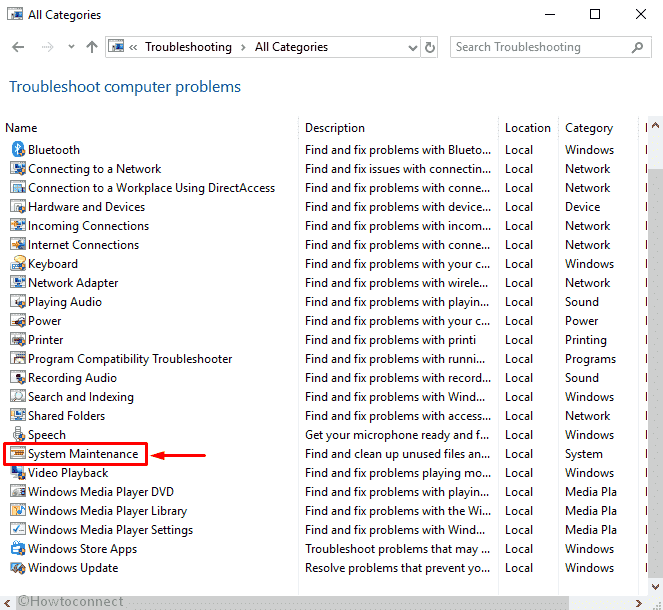
Follow the instruction that comes into the screen to complete the troubleshoot. After this, if you are still experiencing high CPU usage then you have to run System Performance Troubleshooter through Command Prompt. Here’s how –
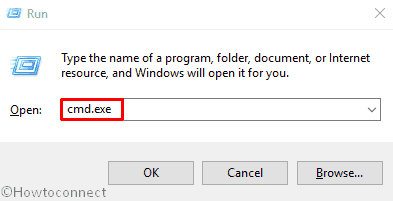
- Open Run dialog. Type cmd.exe and hit Enter.
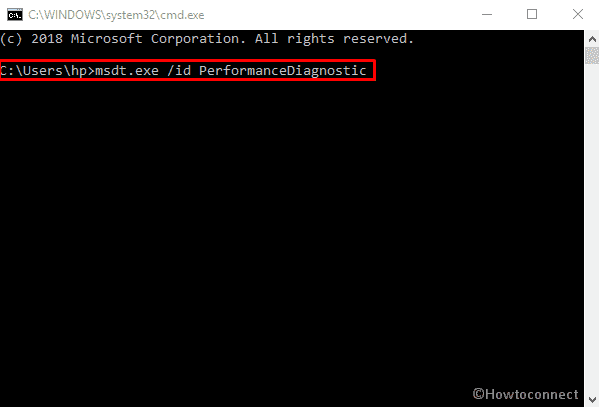
- Write down the following command after blinking cursor and again Press Enter –
msdt.exe /id PerformanceDiagnostic
Henceforth follow the instruction that rolls up in the display and finish the process.
Check Windows Update
An update is sometimes useful to remove the WUDFHost.exe in Windows 10. It helps to replace the old software patches for better performance of the operating system. This also updates the device drivers that handle the hardware of your in the computer. Though it’s not the best solution, some users found it helpful. In order to update your Windows 10, follow the below steps –
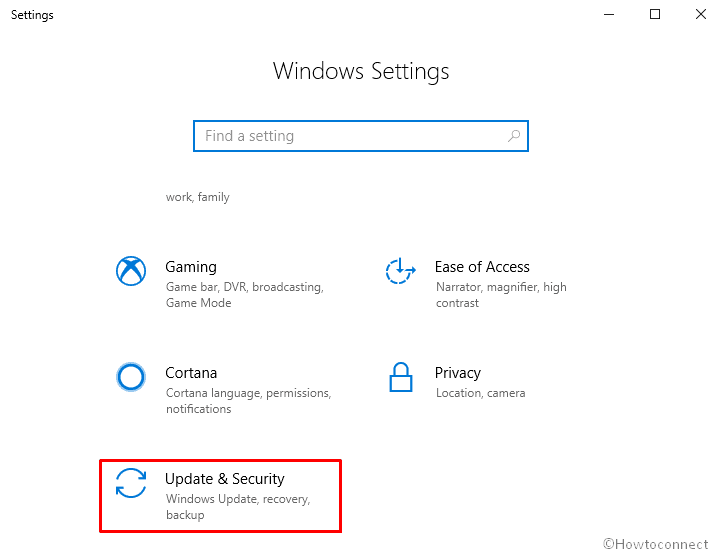
Step-1: Hold Win+I hotkeys together to open the Settings app and perform a click on Update & Security.
Step-2: When the new page is roll up in the display, make a click on Check Updates from the right pane.

Now the system will start searching update for you. If an update is found, it will automatically install that. When the entire process finishes, Restart your machine for letting the changes to take effect.
Clean Boot your PC
A clean boot refers to the process in which the computer is started using the minimum number or basic required drivers for the proper functioning of the device. It Often it may fix high CPU usage issue associated with WUDFHost.exe in Windows 10. In order to perform a clean boot follow the below procedure –
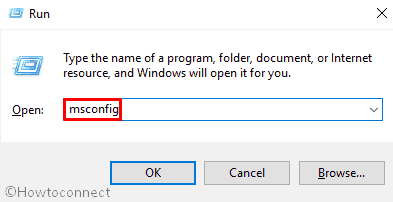
- PressWin +R and type msconfig in the text box of Run dialog.
- Then hit Enter on your keyboard and you will see System Configuration wizard in the screen.
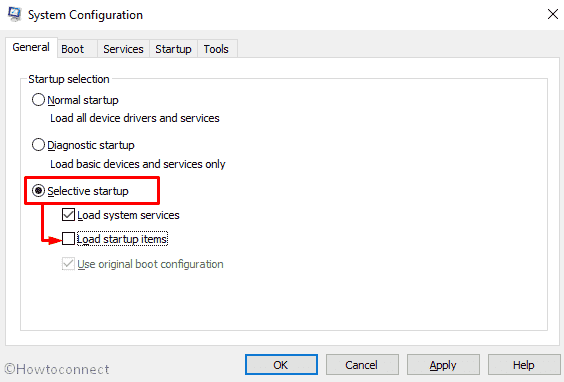
- Click on the radio button of Selective startup from the General tab.
- Uncheck the box located beside Load startup items.
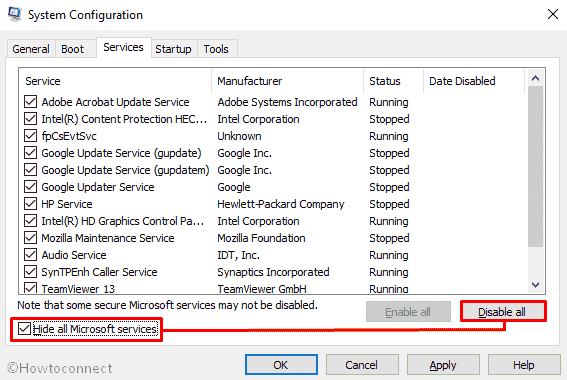
- Now move to Services tab and check the box of Hide all Microsoft services from the bottom of that wizard.
- Select Disable all.
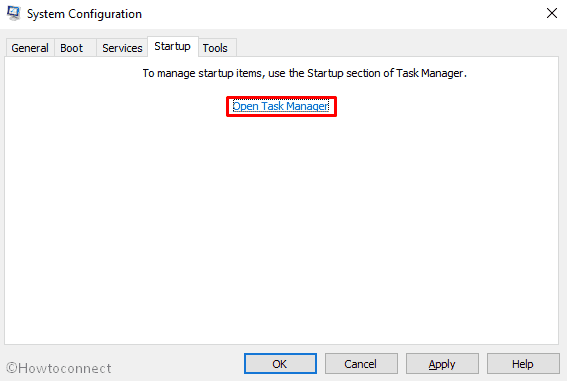
- After that, switch to the Startup tab and do a click on Open Task Manager.
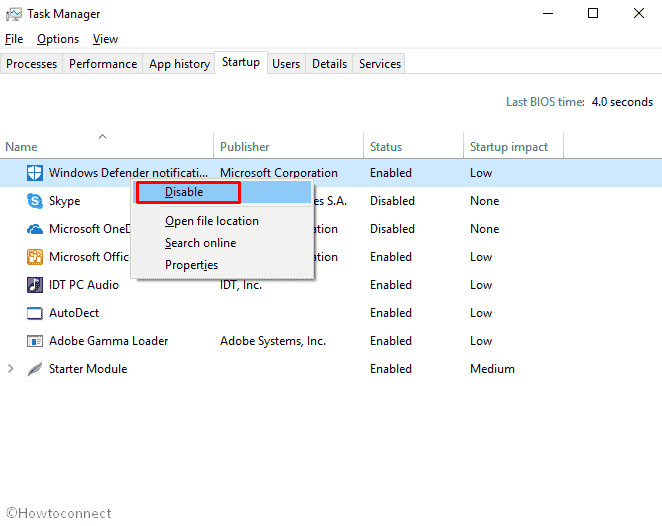
- When it turns up, right click on each app individually and Select Disable from Startup tab.
- Once done, Restart your PC.
Make sure to re-enable all the programs from Task Manager. Otherwise, you may lose some OS functions. After completing the above process, restore your system by doing the following –
- Again launch System Configuration like earlier and click on the radio button of Normal startup from General tab.
- Navigate to Services and uncheck the box located beside Hide all Microsoft services and Select Enable all.
- Shift to the Startup tab and tap Open Task Manager.
- Enable all the programs you disabled earlier.
- Again Reboot your PC.
Additional info about WUDFHost.exe
WUDFHost.exe full form is Windows Driver Foundation which you previously knew as Windows Driver Framework. The main purpose of this file is to provide greater stabilization and security to MTP devices, sensors, Portable Devices etc. Some users observe that WUDFHost.exe drains high CPU and RAM resources which may cause corruption of your drivers. In most cases, Intel Wireless driver, NFC or portable devices are responsible to lead you in this problem. However, you can fix it with several workarounds. In this context, we are going to chart out each and every detail of WUDFHost.exe.
You can’t term Problems regarding the WUDFHost.exe file as virus intervention unless monitoring the location, behavior, and status of the device drivers. One of the reasons for this issue is when a particular application in the computer makes use of the item. In that case, you shouldn’t remove lest the system comes to a standstill. The other cause may be an insertion of a pendrive that has not been scanned before opening. In case this happens the best way is to run an antivirus scan on your computer to remove virus infected files.
In the Windows operating system applications are required for performing certain processes. These applications may be system software or application depending on whether they help the computer to run or fulfill a user’s job. Each application is composed of a number of instructions and codes. The machine executes them when the user clicks on the application on his desktop. The instructions are written in an executable file or .exe file and the system refers to the executable files when the application is started.
WUDFHost.exe can be considered as a process running within the operating system. Its main job is to provide protection to USB drivers for making them stable in their functioning. It was initially introduced in the Windows Vista operating system and made its way into the Windows 10 later after its build
It is simple to recognize whether the file is actually a virus sitting inside your system. The steps are simple and it starts with navigating to the task manager in the system. Thereafter go to the Processes tab and do a right click on WUDFHost to search for its location. If the file is present outside the Program Files folder in C then it is possible that your system is affected by the virus.
That’s all.