Steps to Enable WiFi Access point in windows 8 from Command Prompt – Computer and Internet are complimentary for each other. Nowadays an individual who owns a computer wants to have an Internet connection. If he has not an Internet connection, he is not in the rest till the Internet is not accessed.
The Connection between Internet and Windows 8 computer is a great issue. In order to Internet accessing activation, many new ways are being discovered day by day. Today we will talk about how to enable WiFi Access point in Windows 8 from the Command Prompt. Related Post:- How to Enable WiFi Internet Sharing in Windows 8.
Enable WiFi Access point in windows 8 from Command Prompt
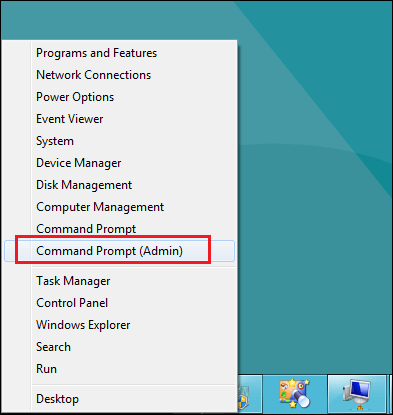
Step 1 – Click shortcut key combination Win+X and choose “Command prompt (Admin)” from the list showing options.
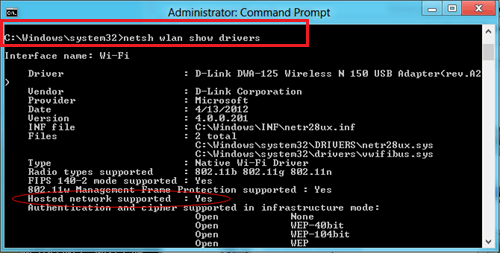
Netsh wlan show drivers
to view details of wireless device and driver and click Enter.
Step 3 – Once after running the command ensure that – “Hosted network supported – Yes” is available in the result.
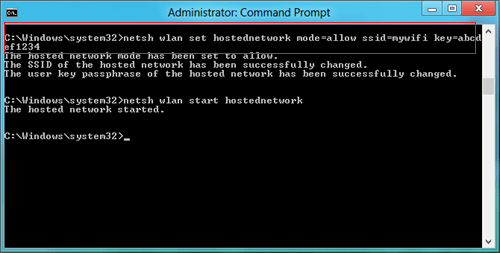
Step 4 – Now type another command to build wireless restrictions like insert SSID name, correct Passkey and set up the wireless connection.
Netsh wlan set hostednetwork mode=allow ssid=myssid key=password
For example-
Replace the mywifi key with your WiFi Key and myssid key with your SSID Key (In the screenshot mine is written).


Noteworthy tips:
SSID – It denotes your network name,
Password – It defines wireless network key or Passkey.
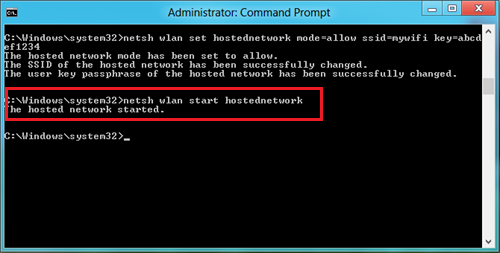
Step 5 – When you write the following command and click Enter, it starts displaying wireless hosted connection message.
Netsh wlan start hostednetwork
Step 6 – Your next work is typing the underneath command and pressing Enter.
netsh wlan show hostednetwork
This command is used to find out complete details of the active wireless connection such as the total number of the connected computer and a lot more.
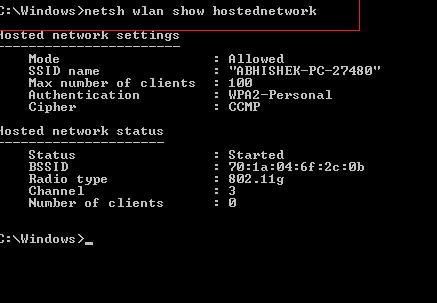
Thus, you become successful to Enable WiFi Access point in windows 8 from Command Prompt on your laptop. Now you are ready to start transferring files or Internet over a wireless network.

Thanks Brandon.
Naresh, you have to make sure that you have the drivers for your wireless card (thats what i’m asuuming that you’re using) before you start doing anything.
If your drivers are installed and updated, restart your computer. Then try again.
@vikram, you have to share your internet connection as described in the hyperlinked article up top. Make sure you share your ethernet connection. I just literally followed all these steps and now i’m able to access the internet on my phone using WiFi.
Hope you guys get it working! Good luck! Hope this helps some =D
I am trying to connect to internet from ASUS tablet thhrough wifi created by this method. I could connect to the network but i am not able to browse the internet. Please help
it shows the error like “the hosted network couldn’t be started.
a device connected to system is not functioning…
wat am i do…
pls tell me the solution…