Oftentimes, Windows fails to process a certain program even after you have repeatedly attempting to run it. This mostly happens because of Bad image error in Windows 11 which is caused by the files and folders required to run that very program are corrupted. This is an old error in Windows operating system and found to be appearing in earlier versions of the OS. Same issue comes up commonly after installing an update and it throws an error message frequently.
Bad image error when opening programs in Windows 11 prevents users from doing regular operations on a computer. Broken system files, buggy updates, presence of malware, third-party apps, and malfunctioning Windows image are the main reasons for this issue. The error message is in the form of “‘Software name – Bad Image’ – ‘File path’ is either not designed to run on Windows or it contains an error. Try installing the program again using the original installation media or contact your system administrator or the software vendor for support. Error status 0xc0000…” The error codes are generally 0xc000012f, 0xc0000020, and 0xc000007b.
Bad Image Windows 11 Solutions
Here is how to fix Bad Image Error in Windows 11 –
Way-1: Remove Windows Update
Windows updating is a spontaneous process in the operating system and this is in a sense the most vital task. Microsoft releases the updates making it a compact source of the modifications about UI, improved & skilled tools, and fixes of bugs. Keeping Windows 11 up to date saves big time keeping it away from all sorts of bugs and errors. However, some updates come with a bit of issue and cause a few troubles with programs, hardware systems.
It has been discovered that Bad Image Error Windows 11 happens after receiving update. In that case, you have no way but to remove that specific update file from the system. Nothing to be worried about since Windows has specified a procedure to wipe out an installed update without making any change to the system. To do that, follow the below steps –
- Press Windows key and R at once.
- In the Run dialog box, type – appwiz.cpl.
- Click – OK.
- Click View installed updates link from left pane.
- Go to the last installed patch in the list.
- Right-click the file (KB…) and select Uninstall.
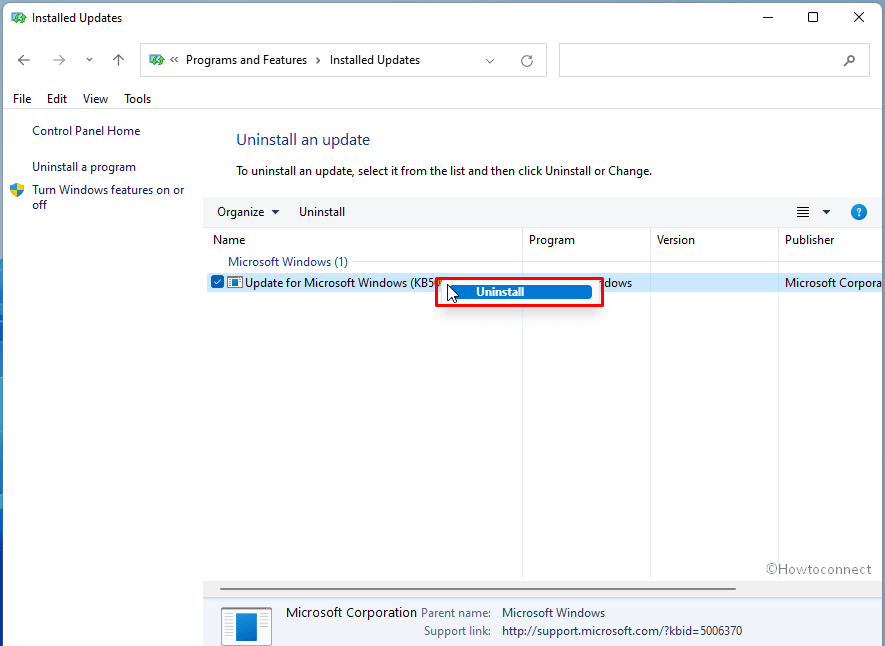
- Click Uninstall again from the warning dialog box.
- Bad image error Windows 11 after update should be fixed now.
Way-2: Run SFC scan and repair corrupted files
System file corruption is found to be one of the most common causes behind Bad Image Error in Windows 11. Windows has some core components that help to run the system smoothly and of course, maintain it in an errorless State. These files are often prone to get corrupted due to factors like sudden power surge, power outage, malware attack, and a faulty update. Once become malfunctioned, these essential components render critical troubles including bad image error.
Another vital component in Windows is Dynamic Link Library file which will cause severe issues once found missing. However, Windows 11 has a very fine scanning utility to detect these .DLL files as well as corrupted system components. The System File Checker tool is so powerful that it can easily fix them as well including recovering the missing DLL. You can run this SFC scan now to fix the ongoing issue using the below guidelines –
- Press – Windows key
- Type – cmd.
- When Command Prompt appears in the result, right-click on it.
- Select – Run as Administrator.
- Click – Yes after the UAC pops out for permission.
- On the Elevated Command Prompt, type below command – Sfc /scannow.
- Press – Enter
- Windows will start running the System File Checker utility. Once the scanning is done, Windows will trace out defective components and missing .dll files. These files will be fixed and recovered automatically.
- Reboot Windows 11 once the process ends.
Way-3: Uninstall the program causing error
Some low coded applications may conflict with system components and resulting in Bad Image error in Windows 11. This is one of the most prominent reasons for getting into trouble but you need to locate them early on to avoid it. Having traced out, uninstall them to get rid of bad image error on Windows 11. You can re-install the same if the problem is resolved based on priority.
To uninstall an application from Windows 11, follow the steps –
- Press – Windows key +X.
- When the menu is up, select – Apps and Features.
- After the Apps settings page opens, locate the troublesome program.
- Select from the list and click – Uninstall.
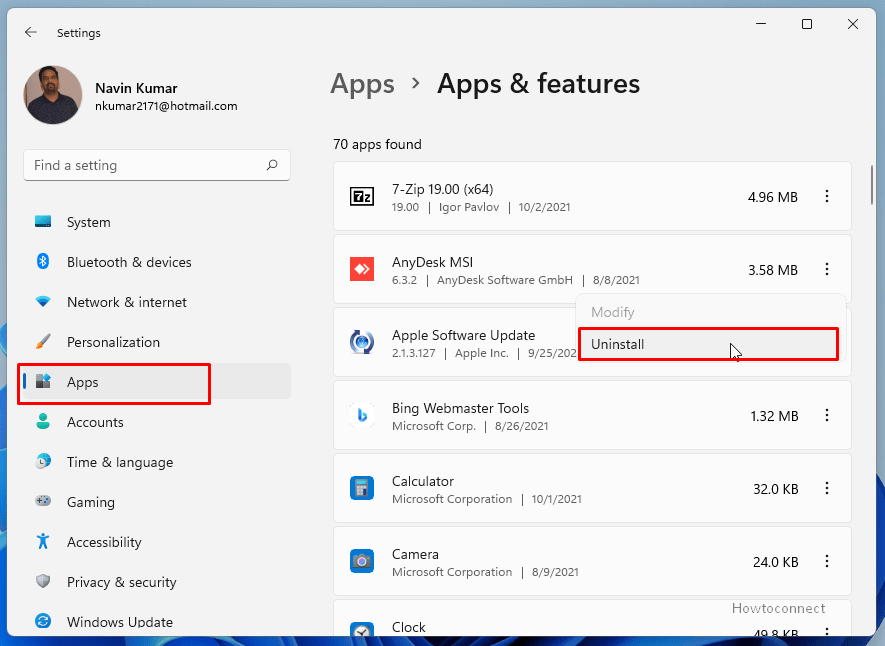
- Choose “Uninstall” again from the confirmation pop up.
- Once the eradication is completed, continue same process for all the problematic apps.
- Restart the Windows 11.
Way-4: Fix corrupted Windows image
Windows image files are sophisticated components. These files are written with a list of components, packages as well as various settings coming with that Windows image.
Oftentimes, these files become corrupted by malware infection or a sudden power outage to the system. In the end, they will cause Bad Image error in Windows 11 saying that the program is not designed to run on Windows. To fix these files, we can run the Deployment Image Servicing and Management tool. This is a renowned utility to repair, modify Windows images. The most interesting part about this utility, it is applicable on the virtual hard disk as well. To run the scanning, follow the below steps –
- Click – Start.
- Type – CMD.
- Choose – Run as administrator.
- After User Account Control prompts, click – Yes.
- Type in the command –
DISM /Online /Cleanup-Image /RestoreHealth. - Press – Enter
- DISM will start scanning through your system files and trace out defective Windows image components. Detected files will be treated and fixed automatically at the end of the process.
- Once done, Restart the computer.
Way-5: Carry out a full system malware scan
In order to fix the Bad Image Error in Windows 11, we must ensure the system is free from malware. To cope up with these strong malware, we have to use the security system. Windows 11 provides the best anti-malware system of all time by default. Windows Security has a robust construction and real time protection feature from all kinds of Trojans, spyware, worms, and malicious bugs. Performing a full system scan using this app can confirm that, your system is free from any virus. To do so, follow the instructions –
- Press the Winkey + S.
- Type – windows security.
- Hit – Enter.
- When the app is opened up, click on – Virus & threat protection.
- From the following window, click – Scan options.
- Once all the choices unfold, check Full scan radio button followed by a click on the “Scan now”.
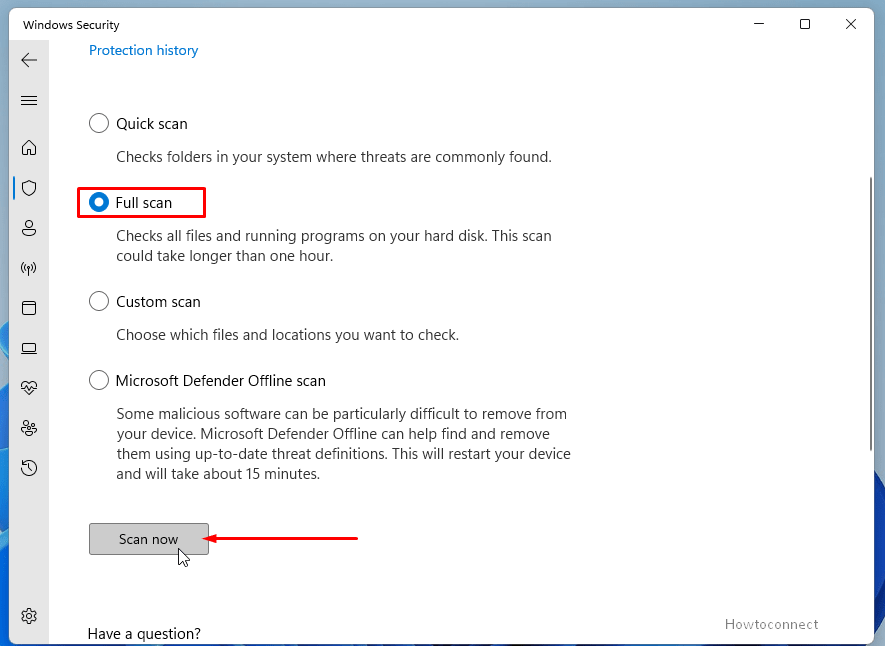
- The app will now start scanning for malware in the system carrying out checks in all the files, folders in the computer. Once it ends, the result will be shown on the screen. In case, there are any suspects of malware, click on Clean threats.
- Select Remove and then click on Start actions to kill the threats.
Way-6: Run Startup Repair
Startup Repair in Windows 11 is a built-in recovery utility designed to diagnose the common errors in the version and troubleshoot them. Usually, the tool starts working automatically when Windows is unable to boot the system after frequent attempts.
If you are getting the Bad Image Error in Windows 11, can carry out the automatic repair manually. Here is how to complete this –
- Click on Start from the taskbar.
- Next, click on Power icon on the Start menu.
- Select – Shut down.
- Once the computer is turned Off, press the Power key to turn on.
- When the device is booting, press F11 (depending on manufacturers) key to load Advanced Startup.
- Click – Advanced options.
- From the following screen, click – Troubleshoot.
- Hit the Advanced options again.
- When the new window is up, choose – Startup Repair.
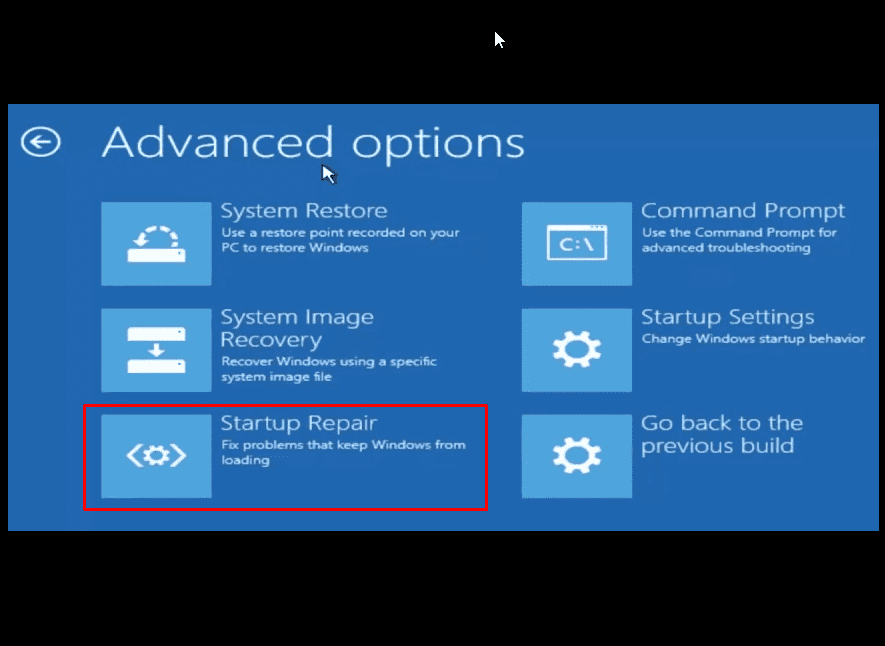
- The diagnosis will start immediately.
- The tool will fix the traced-out issue automatically.
Way-7: Perform System Restore
System Restore allows the users to go back to an earlier state of Windows when there was no need for any troubleshooting. If you cannot fix the Bad Image Error in Windows 11 with the above workarounds, try performing System Restore. To do that, follow the below guidelines –
- Click the magnifier icon on the Taskbar.
- Type rstrui in the text box.
- Press Enter key to unfold the System Restore wizard.
- Click – Choose a different restore point.
- Hit – Next.
- Choose the Date and time when the issue was started to happen and click on “Next”.
- Select Finish and click Yes on the confirmation dialog.
- This process will take time in hours so relax for some time and see when it is completed.
Methods list:
Way-1: Remove Windows Update
Way-2: Run SFC scan and repair corrupted files
Way-3: Uninstall the program causing error
Way-4: Fix corrupted Windows image
Way-5: Carry out a full system malware scan
Way-6: Run Startup Repair
Way-7: Perform System Restore
That’s all!!