When an automatic update is running, oftentimes the process gets stuck at a certain stage and starts throwing error code. One such error is 0x80090017. Even if the downloading shows one hundred percent complete, you will notice some of the downloaded files are not getting installed because of this fatal code. Every time you turn on the Windows 10 or 11 PC, the system attempts to download the unfinished updates and fails like earlier.
Error Code 0x80090017 mainly appears due to corrupted Windows update components. Furthermore, poor internet connection, overloaded hard disk, presence of malware, missing system elements are equally responsible. If the update error is arising due to some fault from Microsoft, all you need to do is wait for some days as it will get fixed automatically.
0x80090017 Windows 11 and 10 Update
Here is how to fix Error Code 0x80090017 in Windows 11 or 10 Update –
1] Check internet connection
A good network is a mandatory condition to receive Windows updates without any issue. Even if the system has all available updates downloaded and ready to be installed, an active internet connection is required to finish the process. If your system can’t access the internet, several errors may rise up to obstruct the installation process. Despite being connected to Wi-Fi, often you will see a question mark on the network name that mainly indicates that there is no internet. There might be several reasons behind this but in most cases, a router without power supply is found to be guilty. In such a case, rebooting the router and making sure the power supply will work as a trick. If it doesn’t work, switch to another network or call the provider to fix the connection.
2] Run Windows Update troubleshooter
Update errors are pretty common, that’s why Microsoft offers a built-in utility to fix such issues automatically. Once you run the troubleshooter, it will scan the full system to find out what is the real cause behind error 0x80090017. Diagnosing the case, the utility will propose an automatic fix also. Before running the Windows update troubleshooter, ensure to connect the PC to an active internet connection. Now, follow the way –
- Press – Windows + S.
- Type in – troubleshoot.
- Hit – Enter.
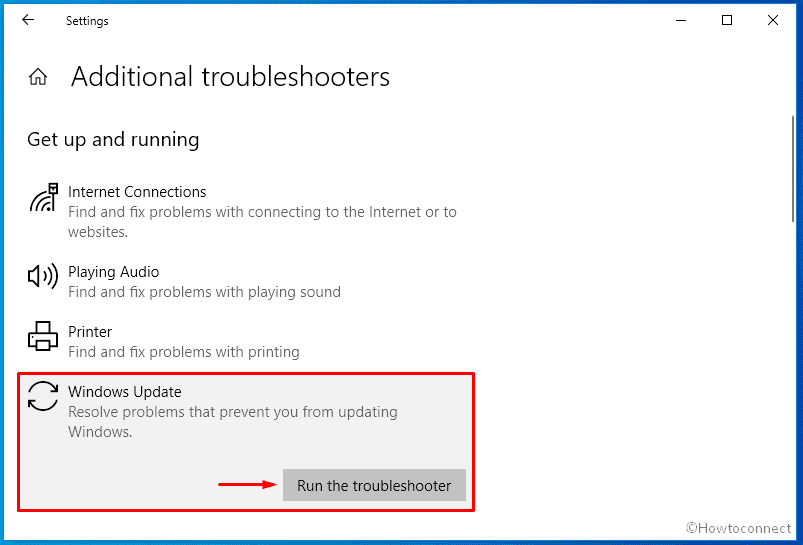
- From the right-pane of appearing settings page, click – Additional troubleshooters or Other troubleshooters.
- Select – Windows update.
- Click – Run the troubleshooter.
- If you are using Windows 11, you can click Run Directly.
- Follow on-screen guidelines if any.
- In the end, click – Apply this fix.
- Close the troubleshooter and reboot Windows.
3] Reset update components to fix 0x80090017
Broken or corrupted update cache is one of the biggest reasons to cause error Code 0x80090017. This cache mainly works as a storehouse that holds all update files and helps in the installation of cumulative patches and builds. Corruption in the cache folder sometimes deletes the existing DLL related to Windows update and leads to update problems. Resetting the same will bring the folder to the default state and most probably fix the appearing too. Here are the steps to follow –
- Click search icon from the taskbar.
- Type in – cmd.
- Hit the – Ctrl+Shift+Enter.
- When User Account Control pop-up appears, click – Yes.
- Execute the following lines one after another –
net stop wuauserv
net stop cryptSvc
net stop bits
net stop msiserver
ren C:WindowsSoftwareDistribution SoftwareDistribution.old
ren C:WindowsSystem32catroot2 Catroot2.old
net start wuauserv
net start cryptSvc
net start bits
net start msiserver
4] Try to install the latest update manually
As we said earlier, error 0x80090017 occurs when the system is set to install updates automatically. Therefore, try to get the same manually and see whether the error still exists.
- Press – Windows + I.
- Click – System.
- From the left sidebar, select – About.
- Note down the info present next to System type.
If you are using Windows 11, open Settings => move to the right of appearing System page and then click About.
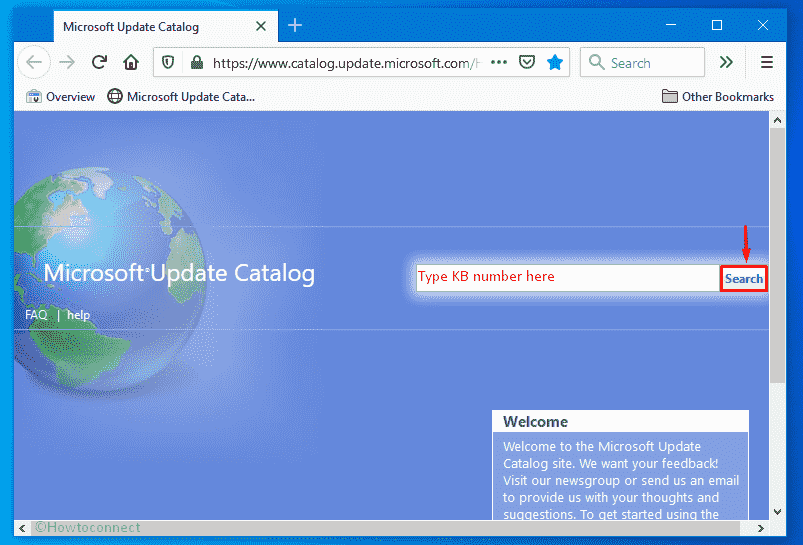
- Navigate the official webpage of the update catalog.
- Click the search bar.
- Insert the KB number that is giving the error.
- Click – Search.
- Look for the version that matches the system type you noted.
- Click Download present next to the found version.
- Visit the directory where the system saves downloaded items.
- Double-click the MSU setup file you just got.
- Install it by following on-screen instructions.
5] Make sure Windows update related services are running
There are some services dedicated to Windows update that runs in the background. These allow Windows 10 and 11 to download and install new patches automatically. If any of them is disabled, the system may end up causing error 0x80090017 during the installation process. To check the services, follow the below steps –
- Press – Windows + Q.
- Type – services.
- Hit – Enter.
- Once in the Services window, double-click – Windows Update.
- Set the Startup type to Automatic.
- If the service was disabled before, click – Start.
- Move to Log on tab.
- Click the radio button present alongside – Local System account.
- Uncheck – Allow service to interact with desktop.
- Click Apply and then OK.
- In the same way, also modify Background Intelligent Transfer Service, Event Log, and Remote Procedure Call (RPC) service.
6] Delete old Windows files to fix error 0x80090017
Even after installing the newer Windows version, some of the old files stay in the system for a certain time period. They not only create collision but also occupy a good amount of hard disk space. When the hard disk lacks enough free space, the system fails to install the latest update and throws error 0x80090017. To fix it out, clean the old Windows files and also other junk. Here’s how –
- Click Start present on taskbar.
- Type in – cleanmgr.
- Hit – Enter.
- When Driver selection pop-up emerges with C: drive selected, click – OK.
- Hit – Clean up system files.
- Again, click – OK for Driver selection prompt.
- Check all the boxes available under Files to delete segment.
- Leave Downloads and Recycle Bin unchecked if needed.
- Click – OK.
- When the process ends, reboot the device.
7] Scan for malware
Due to virus attacks, the system often loses the important components that are required for the system to install updates. Before you try to regain the missing elements, find the malware that exists on the system and eliminate them as well. To do so –
- Click the Windows key.
- Type – Virus & threat protection.
- Hit – Enter.
- Shift to the right of the consequent window.
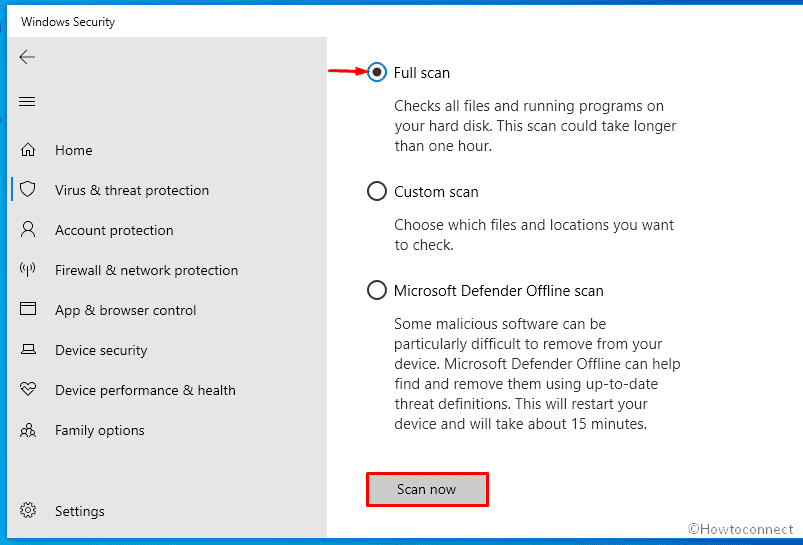
- Click the link – Scan options.
- Hit the radio button present before – Full scan.
- Click – Scan now.
- If Windows Security comes by any malware, hit – Clean Threat.
- After that, click Remove and then Start actions.
- Reboot Windows device to make the changes effective.
8] Recover missing system components to fix 0x80090017
Windows 11 or 10 often gives rise to error 0x80090017 if the required components are either corrupted or missing. Usually, these elements don’t go faulty on their own. Malware infection, software conflict, abnormal application termination, and power outage are mostly found to cause corruption. To resolve the bad components and also recovering the same, here are the steps to follow –
- Press – Start button.
- Type – cmd.exe.
- Right-click on Command Prompt and select – Run as administrator.
- When User Account Control asks for approval, click – Yes.
- In the black pane, insert –
Sfc /scannow. - Hit – Enter.
- Once the scanning process ends, check the report.
- If the utility fixed existing issues, restart the device.
- Or else, do what the tool suggests.
9] Disable antimalware program
In order to keep you safe from any threat, antimalware programs block suspicious files from entering the system. There is a possibility that the security suite you are currently using mistaken the updated files as a danger and obstructing the installation. To avoid such a situation, disable the antivirus program for some time being. However, don’t forget to enable the antimalware tool after eradicating the update error 0x80090017.
Turn Windows Defender Firewall off
- Press – Windows key.
- Type – firewall.cpl.
- Hit – Enter.
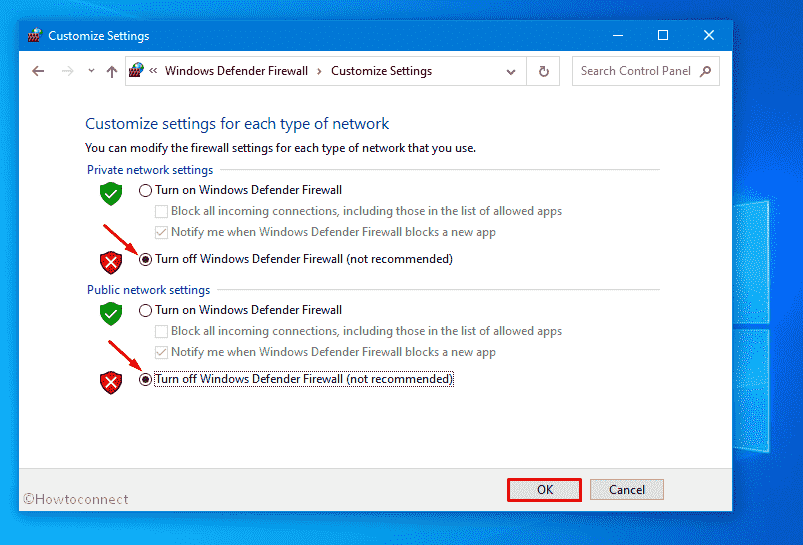
- From the left sidebar, click – Turn Windows Defender Firewall on or off.
- Choose Turn off Windows Defender Firewall (not recommended) option for both Private network settings and Public network settings.
- Click – OK.
Disable third-party antivirus to fix 0x80090017
- Click the up arrow icon from the notification bar.
- Right-click the antimalware icon.
- Choose – Disable.
- Opt for a time slot that decides how long the tool will remain disabled.
10] Restore an error-free state
If any recent changes tweak the registry wrongly or mischief with the settings of the system, update error 0x80090017 may evolve. Going back to the last known good configuration is the only way then. To restore Windows 11 or 10 –
- Press – Windows + R.
- In the Run box, insert – rstrui.
- Click – OK.
- When System Restore wizard shows up, hit – Choose a different restore point.
- Click – Next.
- Select the checkbox set before – Show more restore points.
- Choose a date when your Windows was error-free.
- Click – Next.
- Following that, hit – Finish.
- For the warning pop-up, click – Yes.
Methods list
1] Check internet connection
2] Run Windows Update troubleshooter
3] Reset update components
4] Try to install the update manually
5] Make sure Windows update related services are running
6] Delete old Windows files
7] Scan for malware
8] Recover missing system components
9] Disable antimalware program
10] Restore an error-free state
That’s all!!