When you find Windows 11 internet connection issues the most important task you need to perform is network reset. During this, there are two types of reset works; one is for network devices and the other is for network stack. Windows 11, similar to the previous version Windows 10, provides the built-in tool in the Network & Internet category of Settings app. This will allow you to complete this task in a few clicks but at the same time, you can execute some basic commands too. Let’s see all the ways for how to Network Reset Settings and adapter in Windows 11 in this post.
When you go for reset network adapter you need to reboot the device used to access internet with a specific procedure. This process will restore the original state of network settings and the device configuration.
Network Reset Windows 11
Here is how to Network reset Settings and adapter in Windows 11 –
Way-1: Using Settings
Windows 11 offers a default troubleshooting tool to deal with any problem with internet access. This will restore the basic network settings and leave no room for conflict or error. Most of all, it is so easy to use. Therefore, in order to fix internet connection on Windows 11, use this method of reset network as your first priority –
- Press Windows + I on your keyboard.
- Click – Network & Internet.
- Go to the right pane and click – Advanced network settings.
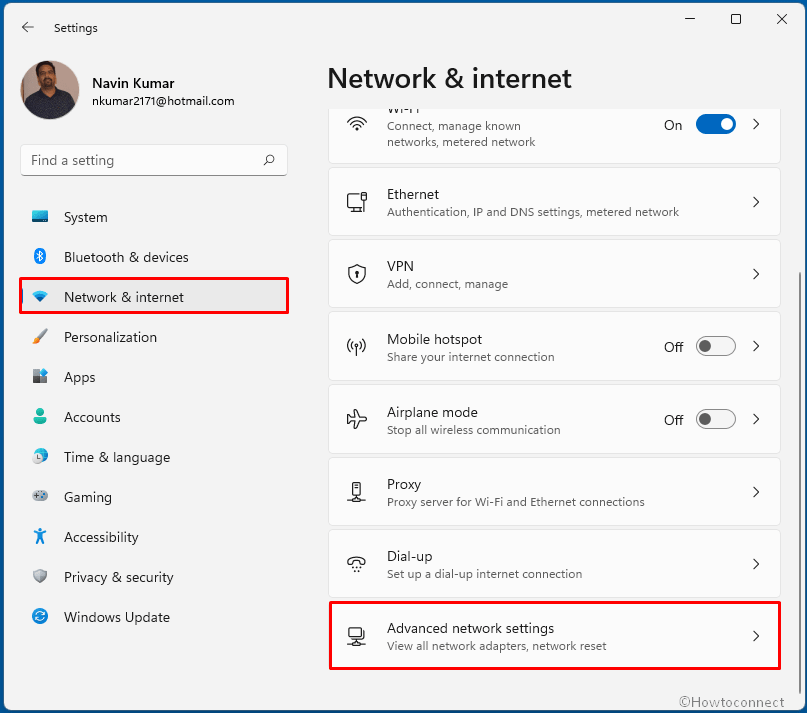
- On the next Settings page, go to the right pane and scroll down to the bottom.
- Now, click on – Network reset.
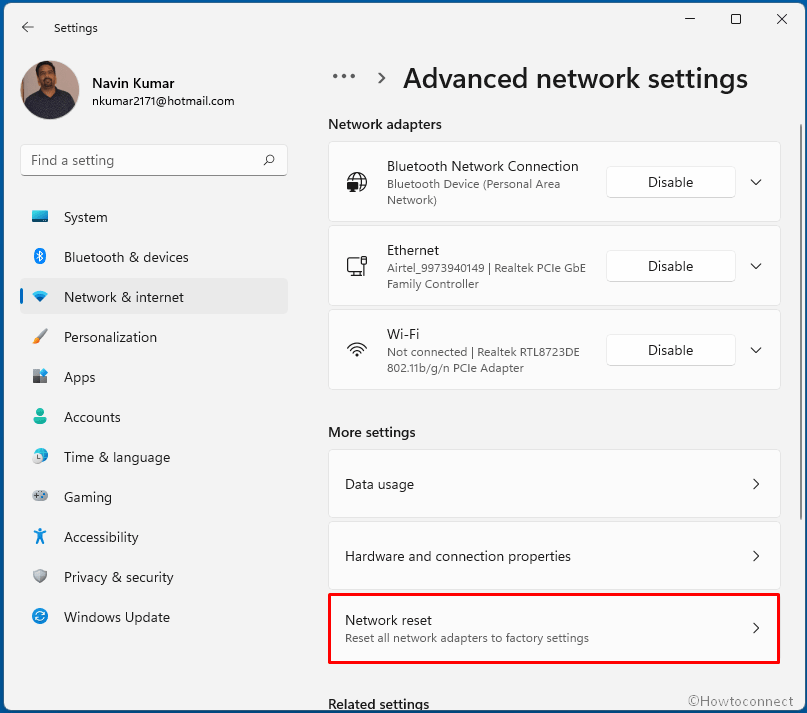
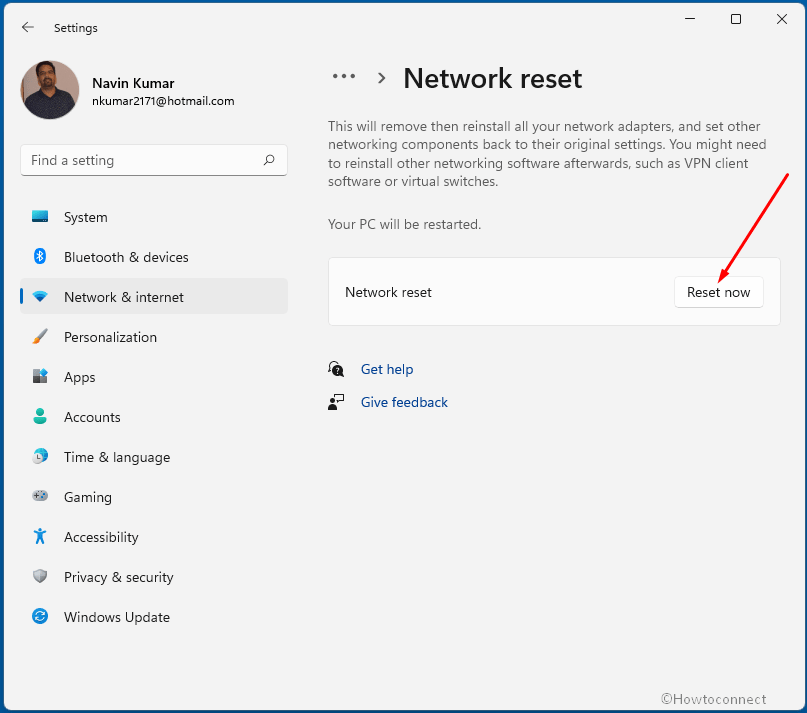
- You will see a statement –
This will remove then reinstall all your network adapters, and set other networking components back to their original settings. You might need to reinstall other networking software afterwards, such as VPN client software or virtual switches.
- Click the button – Reset now.
- A verification dialog will appear asking “Are you sure you want to reset your network settings”; select – Yes.
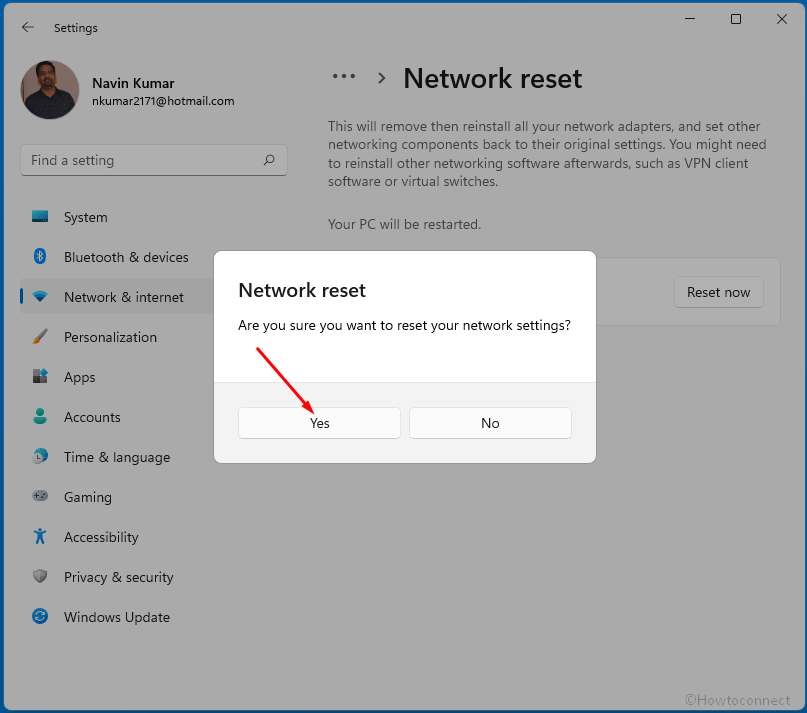
- Close all the ongoing tasks on your computer and wait for a restart.
- As the system is rebooted the network reset is performed.
See – How to Reset Network Settings to Default in Windows 10.
Way-2: Reset network settings Windows 11 with cmd command
When getting any problem of internet on Windows 11 such as wifi network not showing, no access, intermittent connection whether it is in wireless or ethernet you can use this method. Using this way you are able to reset network in Windows 11 through cmd command. Steps are as follow –
- Right-click on Start from taskbar and select – Run.
- Type – cmd.
- Press – Ctrl + Shift + Enter (13 Ways to open Command Prompt as administrator in Windows 11).
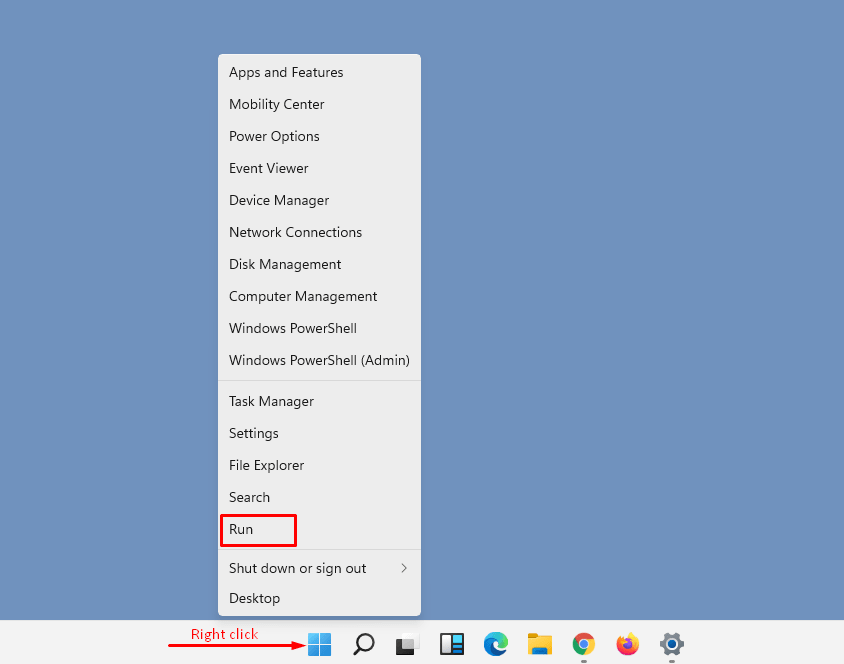
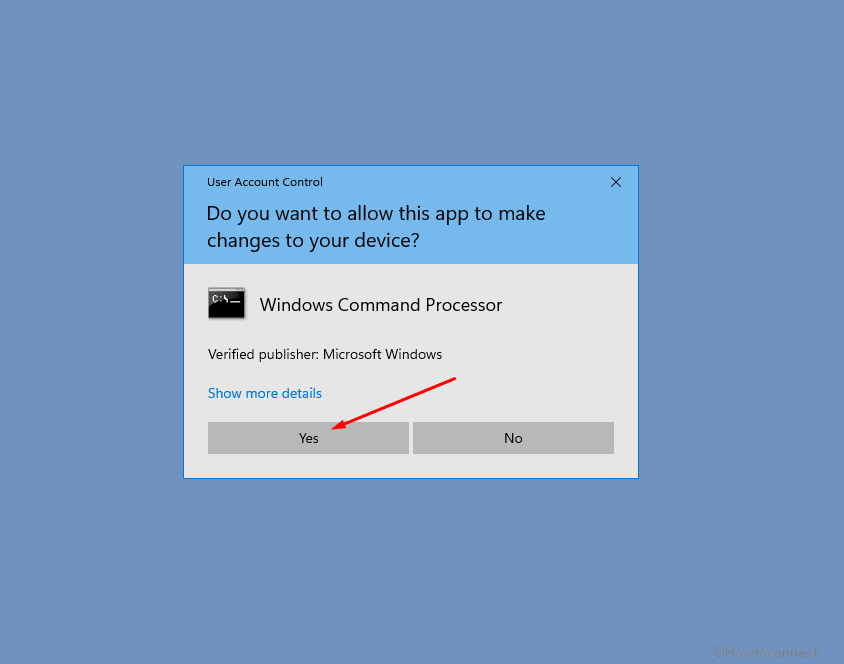
- A User Account Control dialog will prompt for your approval; click – Yes.
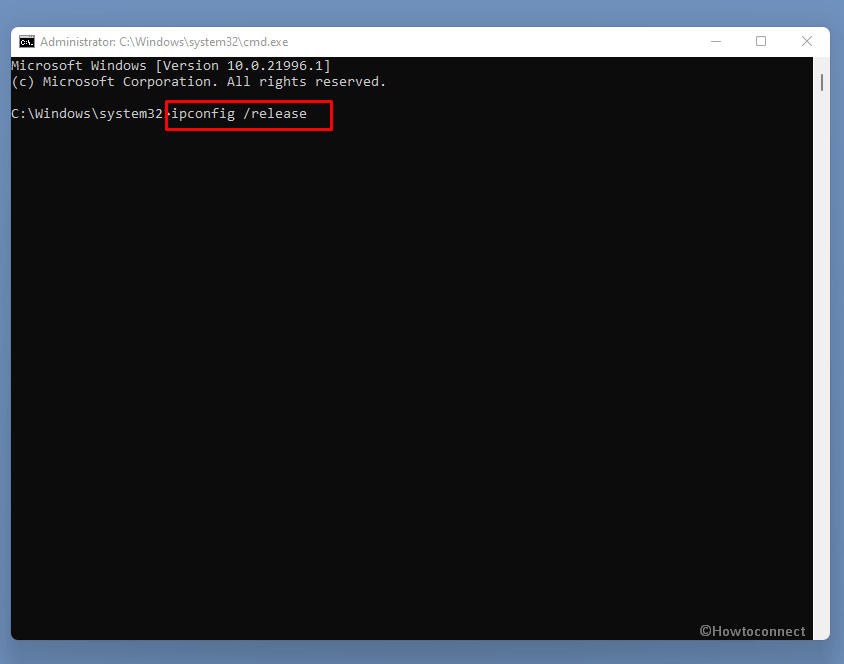
- Once you are on Command prompt, then copy each of the following lines, paste into the prompt, and hit Enter successively –
ipconfig /release
ipconfig /flushdns
Copyipconfig /renew
netsh int ip reset
netsh winsock reset
Note that while running these cmd commands certain errors might appear but don’t worry, it is absolutely normal thing.
- At last, click on Start, then on Power, and select Restart from the Start menu.
- Network reset of settings is completed.
You can know more about these commands by reading – How Does netsh int ip reset Work in Windows 10 and How Does netsh winsock reset Work in Windows 10.
Way-3: Reset the Network adapter Windows 11
On Windows, a Network Adapter controls the interface establishes connection between the system and WiFi or Bluetooth. Many times Windows 11 can’t connect to internet because the Operating system is unable to work perfectly due to issue with the adapter. Furthermore, slow network, limited network, or lost or no connection may occur in a wireless network in the computer system.
Reset network adapter is the easiest way to fix internet connection on windows 11 regardless of the types of issues. This will bring back the default settings for the device. Follow the steps –
- Close the running programs and shut down your PC.
- Keep in mind that you need to completely shut down so carefully check the computer may not go to sleep and then awake or hibernate and resume.
- Go to your modem (adapter) and ensure the light is on.
- Switch off the power switch in which the router is connected or pull out the plug.
- After 10 seconds or more and power on the router and wait for the light to be normal. (Note – After unplugging the light would be blinking). It will be ideal to wait for at least 5 minutes for a router after plugging in to reinstate the configurations.
- Power on your PC and the network is reset now.
This may help you – How to Run Network Adapter Troubleshooter in Windows 10
Methods list:
Way-1: Using Settings
Way-2: With cmd command
Way-3: From Network adapter
That’s all!!

This is a small problem, William. The version running on your Computer is Windows 11 Home. By default, this edition does not provide Group Policy Editor but you can enable it. Please follow the steps – Click on Search and type – cmd. Select – Run as administrator. A User account control popup will appear, click ‘Yes’ on that. When Command prompt opens Copy the below command and paste into that –
FOR %F IN ("%SystemRoot%\servicing\Packages\Microsoft-Windows-GroupPolicy-ClientTools-Package~*.mum") DO (DISM /Online /NoRestart /Add-Package:"%F"
)
FOR %F IN ("%SystemRoot%\servicing\Packages\Microsoft-Windows-GroupPolicy-ClientExtensions-Package~*.mum") DO (
DISM /Online /NoRestart /Add-Package:"%F"
)
Press Enter on the keyboard.
When the command has finished running, try opening Group Policy Editor.
For this, type gpedit.msc in the search bar and hit Enter.
If still unable to find out, restart your computer.
This should solve the problem, else, you can tell us here.
BTW There does not appear to be any Group Policy Editor in Win 11. Win 11 responds: “‘gpedit.msc’ and ‘gpedit’ is not recognized as an internal or external command, operable program or batch file.”
Thanks for the reply. I went to ‘Settings’ – ‘System’ – ‘Power & Battery’ and turned OFF Sleep mode. I’ll monitor this change in settings and report back later if this does not correct my problem. Thanks again.
Hi William, first try How to Keep Internet Connection Active When in Sleep Mode on Windows 10. If the issue continues, please tell us further.
When I turn on my win 11 laptop it automatically connects to the internet with a wireless connection. The laptop will go into sleep mode to conserve power after a 5 min period of inactivity. Stirring the mouse will awaken the laptop from sleep mode but at that point there is no internet connection. If I click on the internet connection on the taskbar and then attempt to reconnect there are no networks showing to connect to. I can get a connection again if I restart the computer or alternatively run the internet connection troubleshooter. The troubleshooter indicates that it resolved a problem. The internet is now available but there has been no intervening restart. The troubleshooter is somehow effecting a change which has restored the ability of the computer to ‘see’ networks available for connection – without a restart being needed. What did the troubleshooter do which I could duplicate thru the Admin Terminal and achieve the same results without a restart? Moreover, what is causing the loss of ‘available networks’ during a ‘sleep’ cycle? This has only been a problem since the mid-Feb update to the OS. Do not want to ‘roll back’ or remove the update as it may make the computer subject to other problems/vulnerabilities.