Windows 10 effectuates to record running games. With the help of newly include tools DVR and Game Bar, you are able to screen-grab the happenings of the gameplay. A combination of Windows and G keys is sufficient to do all the work.
Xbox App permits you to compare your scores and performance with your friends by signing in with the identical credentials you use for Xbox. A separate section for Game DVR is assigned where all the recordings and screen capturing of the running games can be viewed. It is perfect to capture something that has happened just now. The Game DVR in Xbox One performs the same features. So, here in this article we will walk through the steps and will see how to record running games in Windows 10.
Another Article:
Top 10 PC Games with Download links
How to Record Running Games in Windows 10
1. Begin the game you wish to play. Next, you need to open the Game Bar by jointly pressing Windows and G keys. The Game Bar looks like a small dialog box with s few control buttons that covers the tiny portion of the game.
2. Allow the game to be played in the background while you proceed with the recording. So to record it, press the Red round button on the Game Bar and let the recording begin. After expiry of few seconds, the Game Bar will disappear and you can only see a small timer running on the extreme top edge of the game screen.

3. When you feel to stop the recording, bring Games Bar again with the combination of Windows and G keys followed by a click on Red square button.

4. Soon you will see a message as Game clip recorded. You can find the recording in your Videos folder (user account’s video folder).
5. Well. if you don’t prefer the Games Bar to appear on screen, you can use the shortcut keys for the recordings. Jointly hit Win + Alt + R to begin and end recordings. This sounds very comfortable when you are in the middle of the game and at the same time want to Record Running Games in Windows 10 Using DVR.
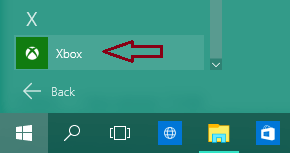
6. The Xbox app lets you display the list of keyboard shortcuts you can use to either record or capture screen happenings of the running games. Let us take a tour of the app also. Make Xbox app appear on your screen. You can access it from the Start Menu.
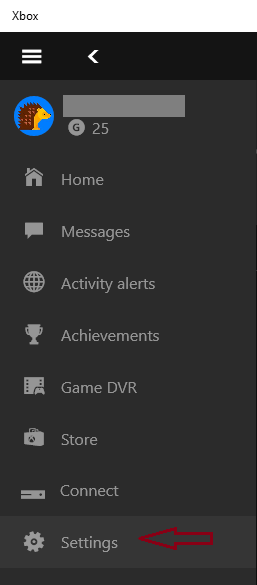
7. After the Xbox app opens up, click Settings symbol.
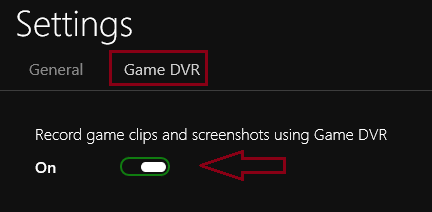
8. You will come through two slots of Settings, Go to the Game DVR. The first option of Record game clips and screenshots using Game DVR is switched on by default.
9. You can do modifications on the keyboard shortcuts if preferred to Record Running Games in Windows 10 Using DVR. The users of Surface doesn’t have the keys that are listed to carry out certain actions.
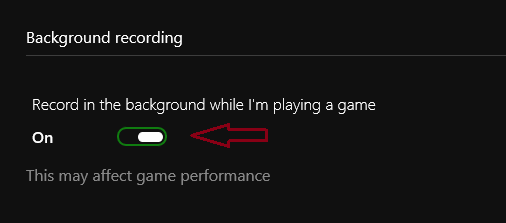
10. Now, take a look at the next section which tells you to Record in the background while I’m playing a game. Make sure your system is supported enough to perform this task as turning it on may hamper your game with uneven happenings taking place.
11. Just below it is a drop-down menu that permits you to set time to record the last few minutes of the game.

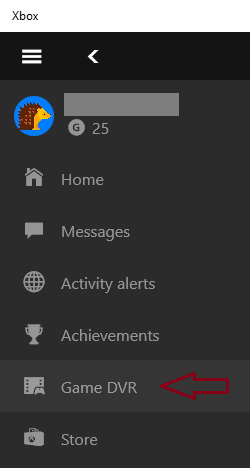
12. Now, to see the recorded videos and screen captures, click Game DVR symbol on the left pane of the symbols.
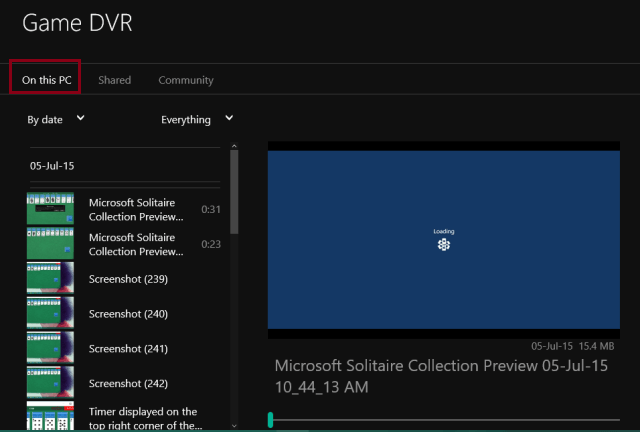
13. You can see three different segments mentioned, be into On this PC.
14. Execute a click on any of the screen-capture and you can view it on the right half. To watch the recordings, use the play control button.
You will use a new default tool in Windows 10 with avidity and interest since this is the easiest process to record game on your PC. You can also upload the recorded game or clip to the Social site and YouTube.
Source: PC Advisor
