Whether it’s about maintaining a social life, corporate world, or online class; many of us depend on video conferencing platforms nowadays. Currently, Zoom is the most popular and significantly used program for this purpose. The app is seeing the biggest increase because it’s free, easy to use, secure, and above all more robust than other programs. However, bugs and breakage can get in the way while using Zoom as no app in this world is one hundred percent error-free. In case this video conferencing software is having an issue or not working properly, uninstall and reinstall Zoom on Windows 10 and 11 can resolve it.
Some people also want to get rid of Zoom because they are concerned about their privacy. Lately, it’s being reported that the app is collecting the personal data of users and sharing the same with advertisers. But before you delete Zoom, for this reason, you must know this app lets you enable end-to-end chat encryption, set meeting password, and prevent participants from recording the screen.
Uninstall and Reinstall Zoom on Windows 10 or 11
Here is how to Uninstall and Reinstall Zoom on Windows 11/10 –
1] Uninstall Zoom
- Press – Windows + S.
- Type in – appwiz.cpl.
- Hit – Enter.
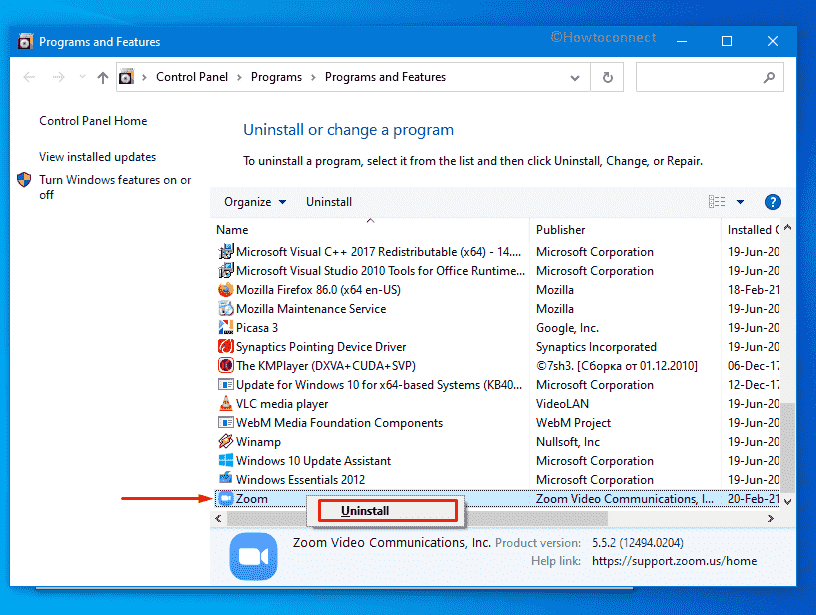
- When Programs and Features window shows up, look for Zoom.
- Right-click the same and select – Uninstall.

- To give final consent, click – Yes.
2] Reinstall Zoom
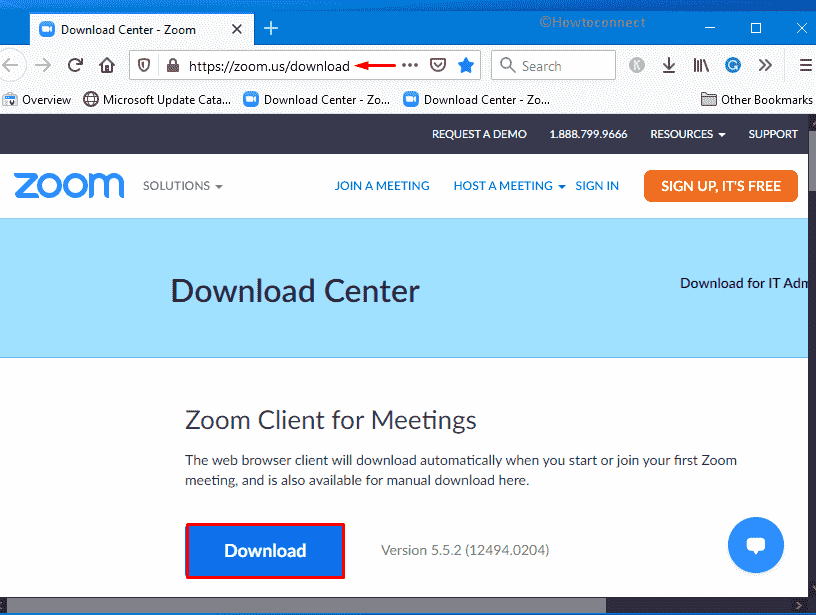
- Visit download center of Zoom.
- All available versions will be available there.
- Click Download present beneath your desired version.

- When the downloading process ends, go to the directory where the system stores downloaded files.
- Double-click – Zoominstaller.exe.
- Follow on-screen instructions to complete the installation process.
See more articles about Zoom –
1] How to Fix Zoom Error Code 103033 in Windows 10
2] Fix: Zoom Audio not working in Windows 10
Methods list:
1] Uninstall Zoom
2] Reinstall Zoom on Windows 10
That’s all!!
