In Windows 10, the tiles on the Start Menu or Start Screen can be stable or functional. The stable tiles are those that come by default with the operating system. The functional tiles or the live tiles are the ones that keep you updating in all aspects. For example, Appointments on Calendars, or even notification from friends; the Mail app will notify you the number of unread emails or new emails of your Microsoft Account. There are certain tiles which keep prompting the details even after unveiling them. So at times creates a fuss while working. Even after viewing them, they keep on notifying it. So there is a solution to this problem. You can Clear Personal Information from Tiles on Windows 10 prompting up on the Start Menu. There are two simple ways of doing it and we are glad to share them with you. Here they are –
You might also like to read:
How to Clear Cache on Windows 10 – All Type
How to Clear Personal Information from Tiles on Windows 10
As we have mentioned above, there are two methods of clearing them. You can do it either from Taskbar and Start Menu Properties window or by using the Settings Charm. Lets’ see both the methods one by one.
Using Taskbar and Start Menu Properties
- Go to your Windows 10 Taskbar.
- Right click on the empty area of the Taskbar.
- Select the Properties.
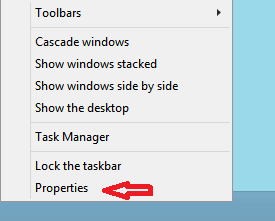
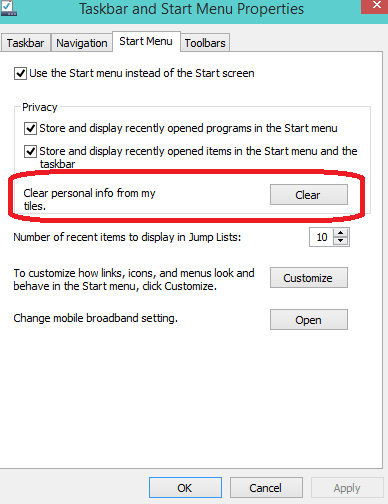
- You are into the Taskbar and Start Menu Properties.
- Now take yourself to the Start Menu.
- You can see an option there which says Clear personal info from my tiles.
- Click on the Clear button which is beside that option.
- Click Ok and that’s it!
Using Settings Charm
How to Shift From Start Menu to Start Screen on Windows 10
- Go to your Windows 10 Start Screen.
- Pull out the Settings Charm.
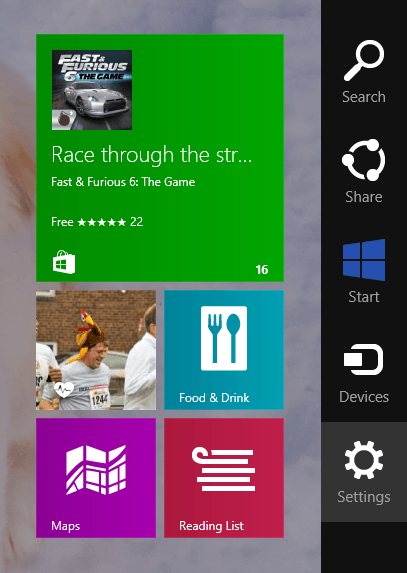
- Then click on Tiles.
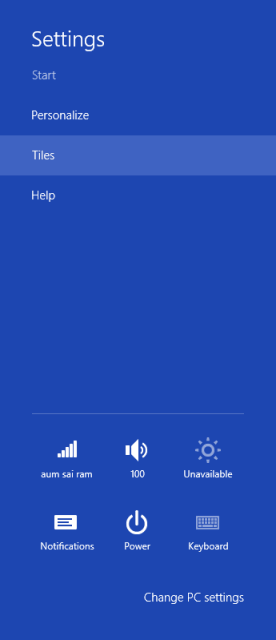
- Click on Clear button to clear all your personal info.
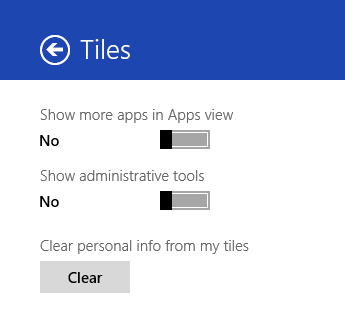
Note – The Tiles option will not be displayed if you go to the Settings Charm from your desktop. Hence, you have to go to your Start Screen and then to the Settings Charm to get the Tiles option.
