In Windows 10, the image captured for the happenings on the display screen of a PC is known as Screenshot. The devoted users of Windows 10 are familiar with various tools that are capable of this functioning. Hence, this post will have the basic yet significant tips on taking screenshots that too by utilizing the default tools in Windows 10.
There are multiple tools for capturing screen events, but the ones that Windows bestows to its users are commendable without the need of a third-party material. The tools are none other than the shortcut keys. In the below section, you will come across combinations of different keys, each of them allowing you to capture different happenings. So, let us delve into the main section and see the multiple tips to take screenshots in Windows 10.
How to Take Screenshots Using Default Tools in Windows 10
1. Keyboard Shortcut button – Windows + PrtScn
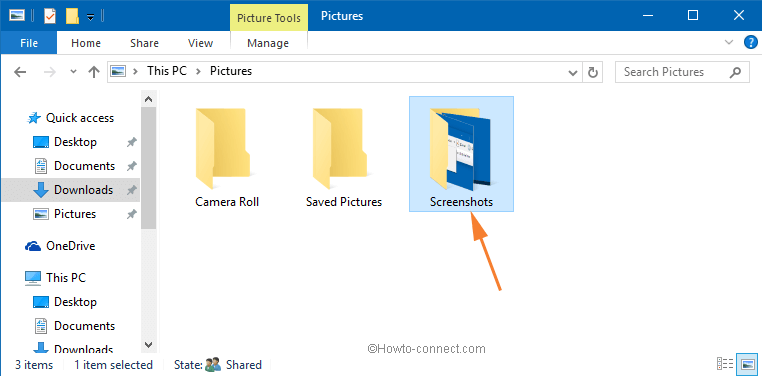
This is one of the favorite methods for capturing the happenings of the display screen. When you use the combination of Windows and PrtScn keys on your keyboard, the whole display on the screen will be captured at a time. The best thing is that you don’t have to save it separately. Windows will automatically save the captured images in the Screenshots folder of Pictures. You will see that the entire screen will slightly become dark when you press both the keys. It means that you have taken a screenshot. Isn’t that a good indication?
2. Keyboard Shortcut button – PrtScn
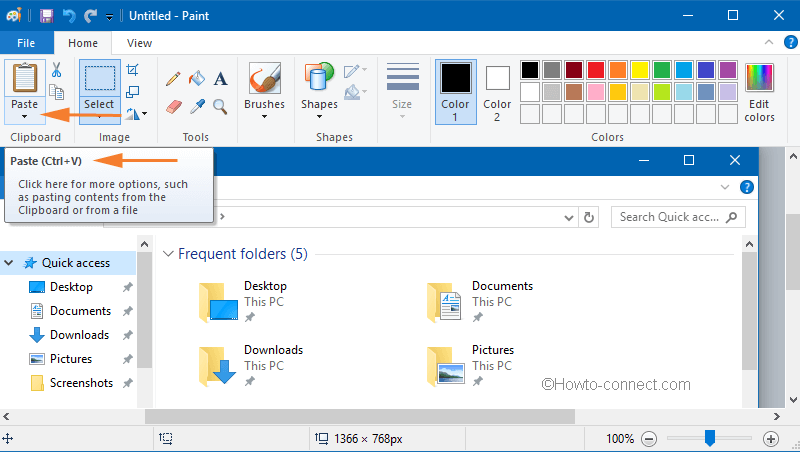
The second keyboard shortcut tool is pressing the PrtScn key on the keyboard. After pressing the key, the display screen will be captured but it will not be saved automatically. To save the image, you need to paste it any of the picture editing programs of Windows. All you will do is that press PrtScn key (screen will be captured), launch a picture editing program on the screen such as Paint and at last paste the captured image in the Paint. Once the image is pasted on the clipboard, save it your destined folder or location.
3. Keyboard Shortcut key– Alt + PrtScn
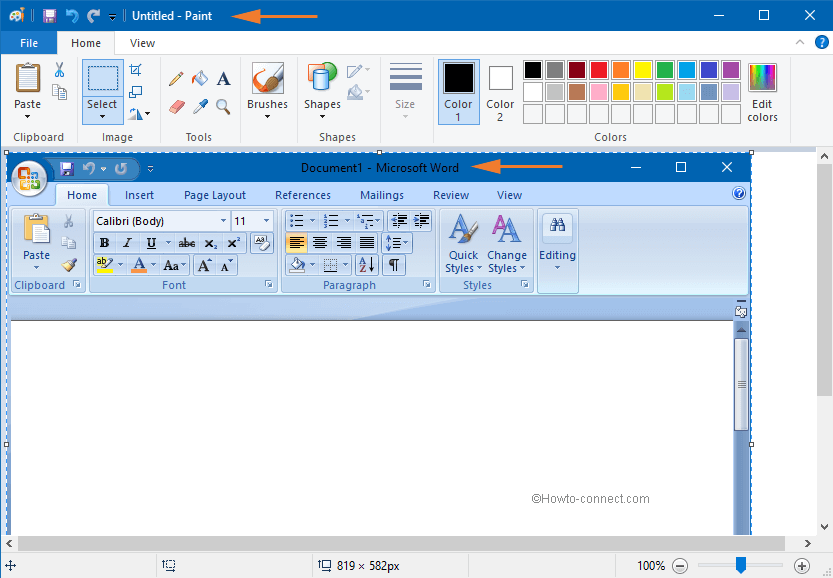
This is the third keyboard shortcut tool which can be put into use. But the functioning of this is bit different from the above two. It also captures the display of the screen but only the selected window will be captured. Suppose I have opened an empty Word document and wished to take the screenshot of the Word document only, then instead of using the above shortcuts I will prefer this one because it lets me capture that particular window only. Press Alt and PrtScn keys and then paste the captured image in the editing tool, for example – Paint. Lastly, save the image.
4. Snipping Tool
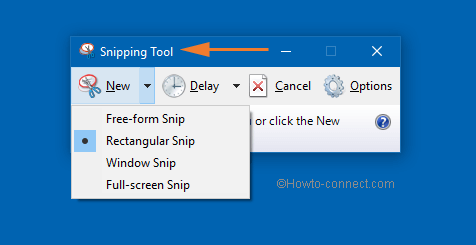
The snipping tool on Windows 10 lets you take all types of screenshots. The snipping tool is easily available on the Start Menu. You can read a detailed post on the workings of snipping tool of Windows 10 by going through this link:
Windows 10 – How to Use Snipping Tool – Capture Screenshot
Screenshots on Surface or Windows Tablet
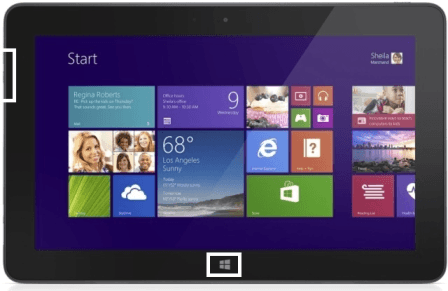
If you are a user of Surface or Windows Tablet or Dell Venue, you will not be able to use the PrtScn key for taking the screenshot as this key is not available with them. Well, of course, snipping tool will be of help but working on it in the touch screen is not that easy. Still, you have an option. Use the hardware buttons for the screenshot.
To capture the screen, jointly press Windows logo and the Volume Down buttons. This will take an image of the full screen and will save it in the Screenshots folder of the Pictures. When you do this you notice the screen becoming darker for a moment which is the signal for the screenshot being captured successfully.
Conclusion
So we have learned a very new thing. You might be familiar with one of these methods but knowing all the methods is a plus point. All the ways are very easy and handy to put in use. If you have something else in mind on How to Take Screenshots Using Default Tools in Windows 10, please do let us also know about it. After all, we should never stop learning!!!

For Screen shots, #1 works perfectly. Thanks.
Perfect, thank you and it works.
#1 did the trick. No need to read past #1 for this user!
this article was really helpful. Thank you
think you so much !!!!!!!!!!!!!!!! for Windows 10 – How to Take Screenshots Using Default Tools.
Taken Screen Shot
Use Snipping tool or touch keyboard.
I don’t have a print screen key on my computer. what should I do to to take a screen shot?
Very helpful. Thanks a ton to to you.