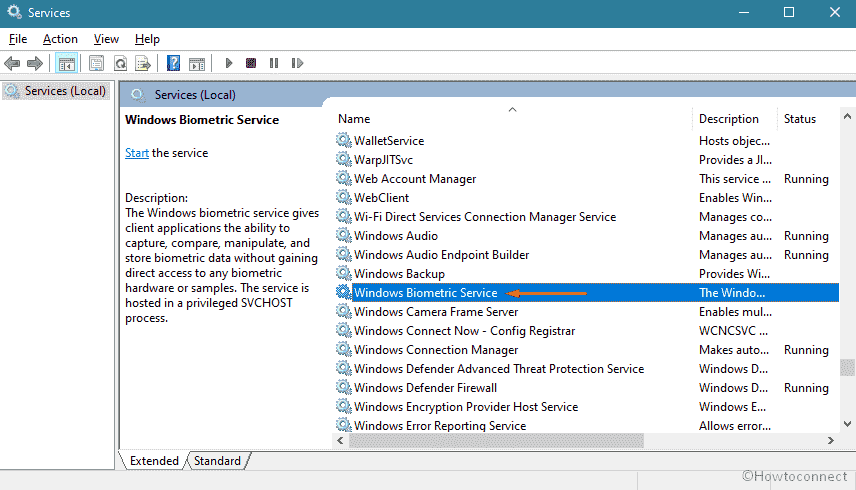
Modern days laptop and PC comes with a built-in face or fingerprint scanner. Windows Biometric Service or WbioSrvc is used to manage this feature and allow client applications to capture, compare, manipulate, as well as store biometric data. The service doesn’t need to gain direct access to any biometric hardware or samples for this. The service is hosted in a privileged SVCHOST process and Enabling this will allow the system to run this data.
Though the service is often useful, some people don’t use it much so they want to keep it disabled. Also, the service sometimes found to cause high CPU along with disk usage. Path to this executable is C:\WINDOWS\system32\svchost.exe -k WbioSvcGroup.
Enable/disable Windows Biometric Service in Windows 10 or 11
Here is how to How to Enable / disable Windows Biometric Service in Windows 11 or 10 –
- Press – Windows + S.
- Type in – services.
- Hit – Enter.
- From the available list, find – Windows Biometric Service.
- Double-click the same.
Enable
- Click the drop-down for – Startup type.
- Choose – Automatic.
- Hit – Start.

Disable
- Again, click the dropdown beside – Startup type.
- Select – Disabled.
- Click – Stop.
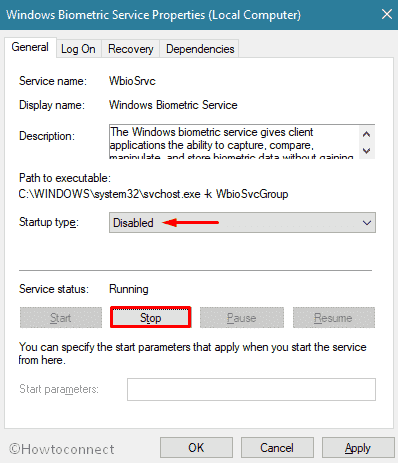
- Lastly, hit Apply followed by OK.
That’s all!!