Blue Screen of Death has been generally one of the extensively irritating affairs encountered on Windows OS. Various occurrences are responsible for creating BSOD including hardware and software malfunctioning. But here we will focus on the fixes for Windows 11 or 10 Critical Process Died Error that keeps restarting PC.
First of all, let’s see what critical process died means. Critical_process_died is a Blue Screen error that occurs when the data inside the system are crashed and it shows you its error code with the message “Your PC ran into a problem and needs to restart. We’re just collecting some error info, and then we’ll restart for you”. After 100% checking is complete the Computer restarts but several times after the reboot the Blue Screen again appears. This way, due to BSOD critical process died Windows 10 or 11 cannot boot to the desktop. This is also called boot loop. Commonly, this BSOD occurs because of buggy Windows update, corrupted system files, incorrect Power options settings, and obsolete device drivers.
Blue Screen Critical Process Died
Here is how to fix Critical Process Died Error on Windows 11 or 10 –
Way-1: Run System File Checker and DISM
- Click on Start located on the taskbar.
- Type cmd.
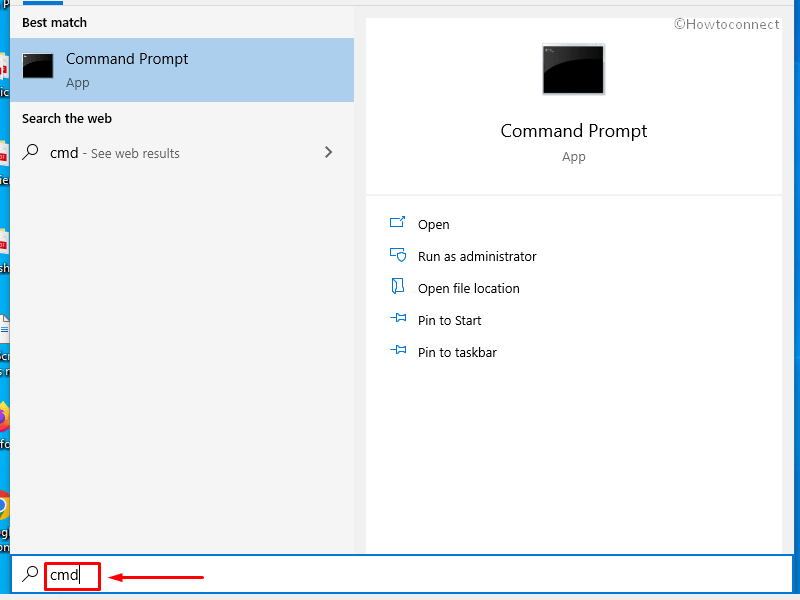
- Press Ctrl + Shift + Enter.
- Select Yes on the User account control dialog.
- Soon elevated Command prompt will appear; type
SFC /Scannowon it.
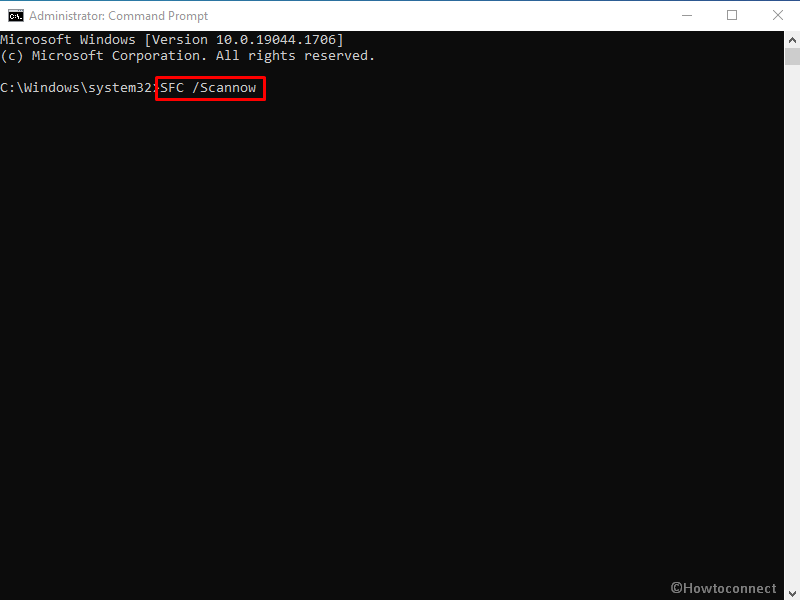
- Press Enter.
- After finished, restart the PC and check if critical process died Windows 11 or 10 boot loop still persists
- If not it is solved until now then again open Command prompt as administrator.
- Type –
DISM /Online /Cleanup-Image /RestoreHealth. - Press – Enter.
- Once completed, restart the PC.
Dump files might help you to resolve the error so see – Dump File Location Windows 10.
An app that can tell the reasons for the BSOD – How to Use BlueScreenView to Detect the Cause of Blue Screen.
Way-2: Uninstall Windows Updates
For Windows 10
- Press Windows + S.
- Type Update history.
- Click View Update history.
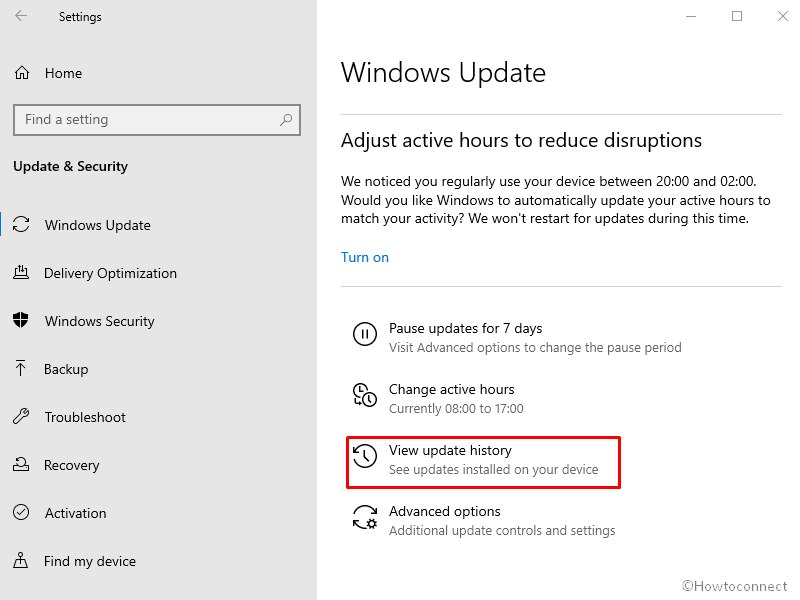
- Select Uninstall updates.
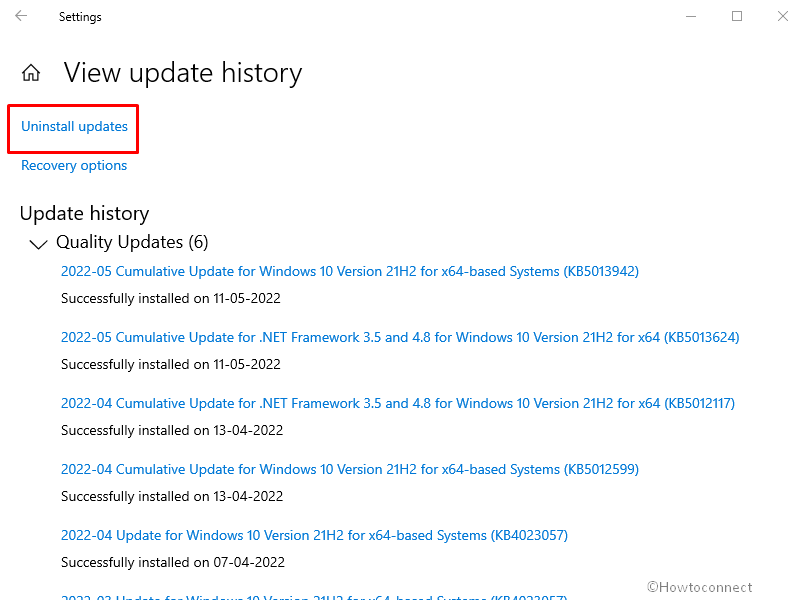
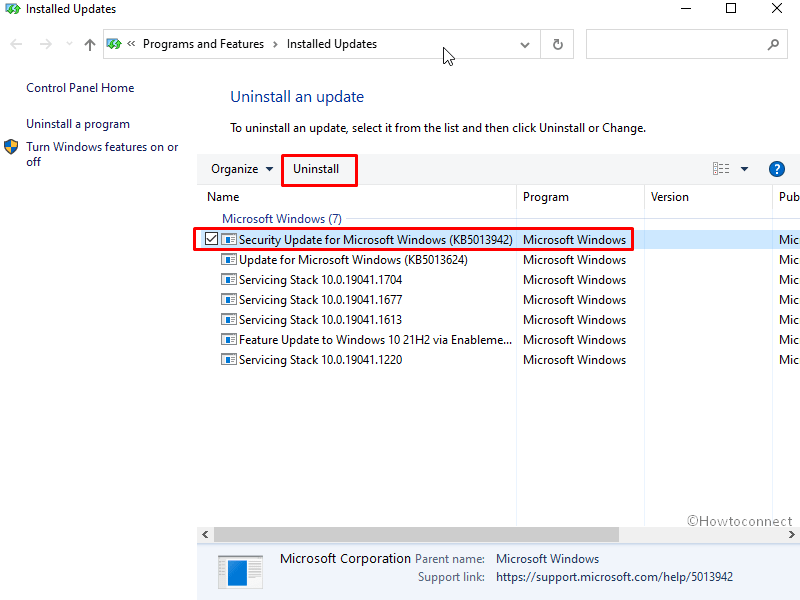
- On the Installed updates window, select the update (in the shape of KB123456).
- Click on Uninstall.
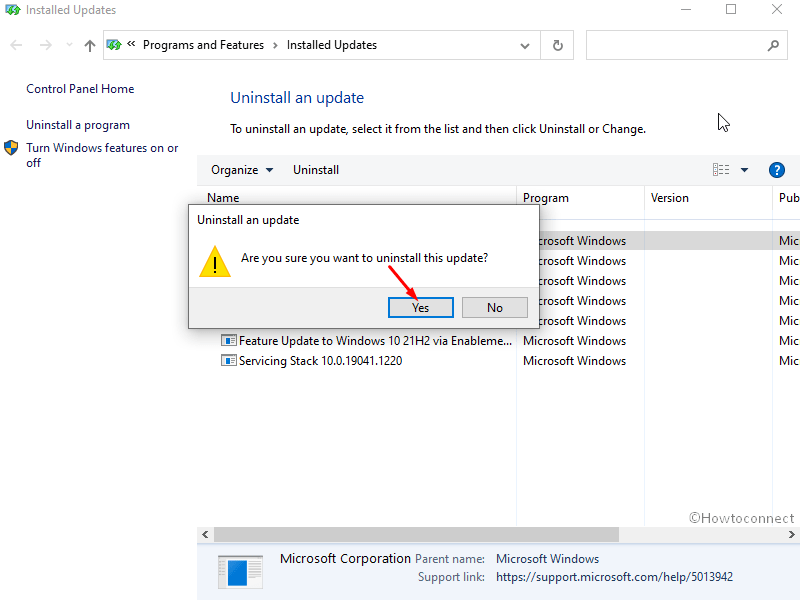
- Select Yes on the confirmation prompt.
For Windows 11
- Press – Winkey+I.
- Select – Windows update.
- Click on – Update history.
- Select “Uninstall” to see the list of updates.
- Find the update you have to remove and click on Uninstall.
- Confirm the pop-up.
Way-3: Update Drivers
Another source behind the Windows 11 or Windows 10 blue screen Critical Process Died could be the drivers that incorrectly use memory or bad drivers. Hence, it is pretty much necessary that all your drivers are up to date. Update the driver using guidelines –
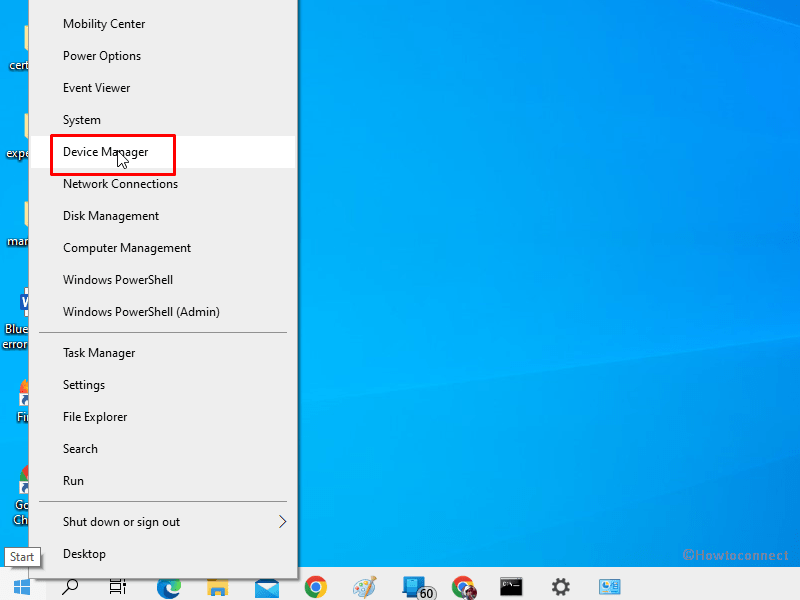
- Right click on Start.
- Select Device Manager.
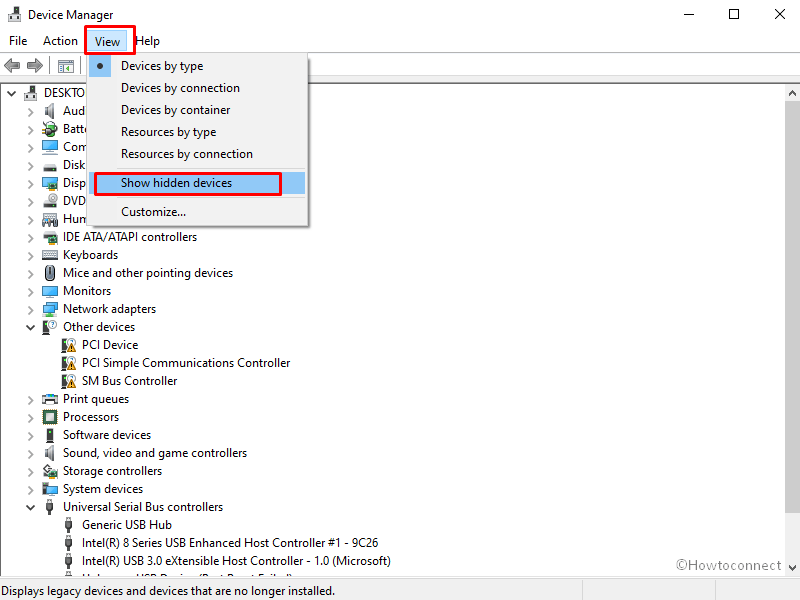
- Click on View from the top menus of the Device Manager.
- Select Show hidden devices.
- On the Device’s list, double click on the items to expand them one by one.
- Find the drivers which are showing yellow warning icon.
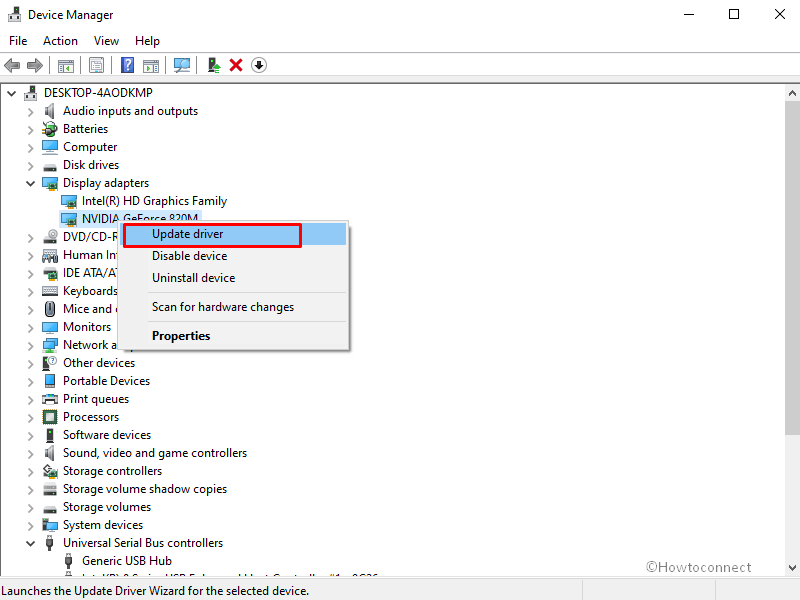
- If found, right-click on that and select – Update driver.
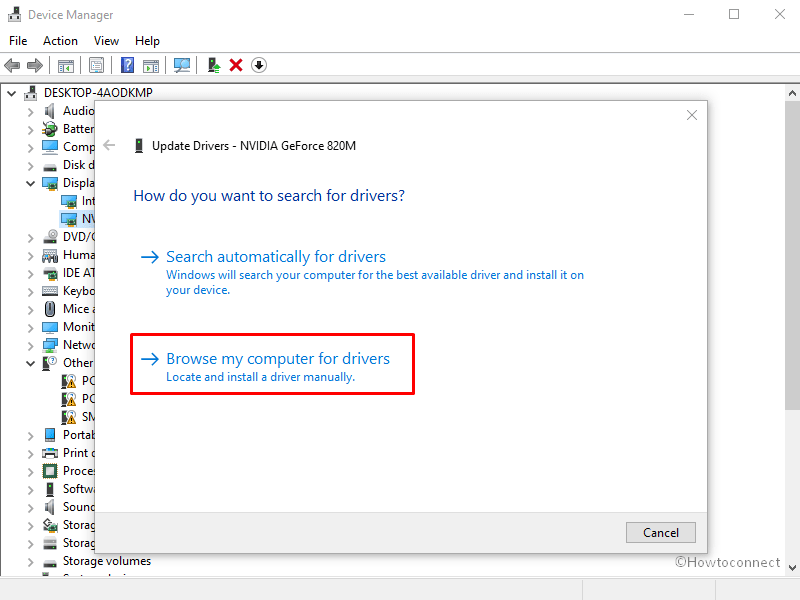
- From the Update Drivers window, click on Browse my computer for drivers.
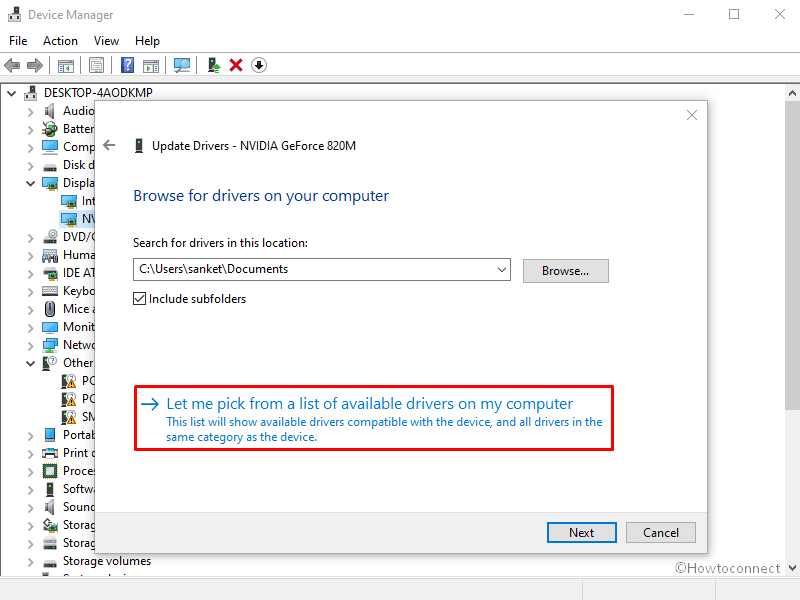
- Select – Let me pick from a list of available drivers on my computer.
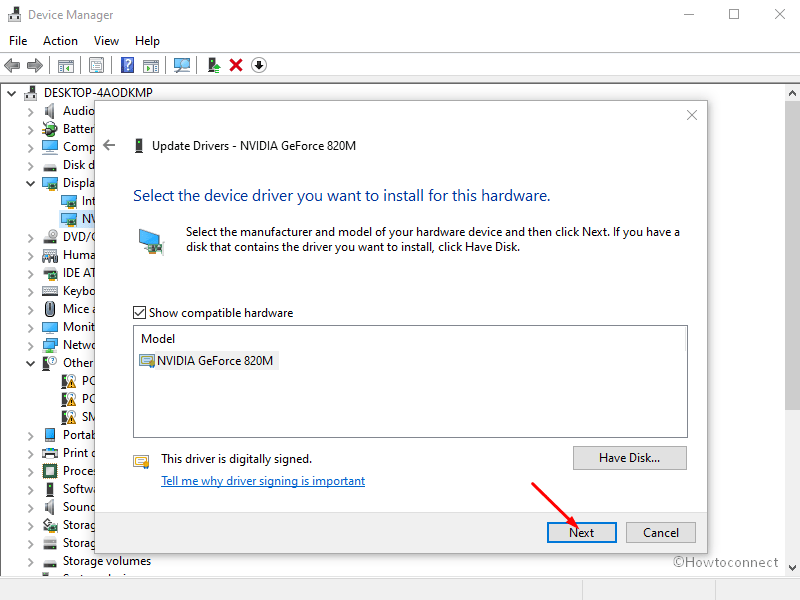
- On the coming window, click on Next.
- Restart the computer and check if the critical process died can’t boot is solved.
Get help from Tips to Update Driver Software on Windows 10 Step by Step and How to update drivers in Windows 11 (Best ways).
Way-4: Disable Sleep and Hibernate
- Click on Search.
- Type – control.
- Hit Enter.
- On the Control panel, click on View by and select Large icons or Small icons.
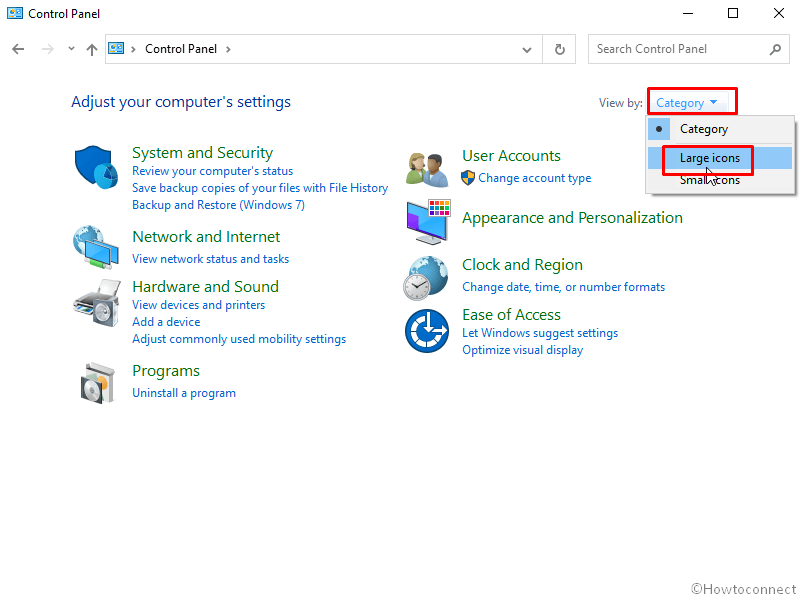
- Now, select Power options.
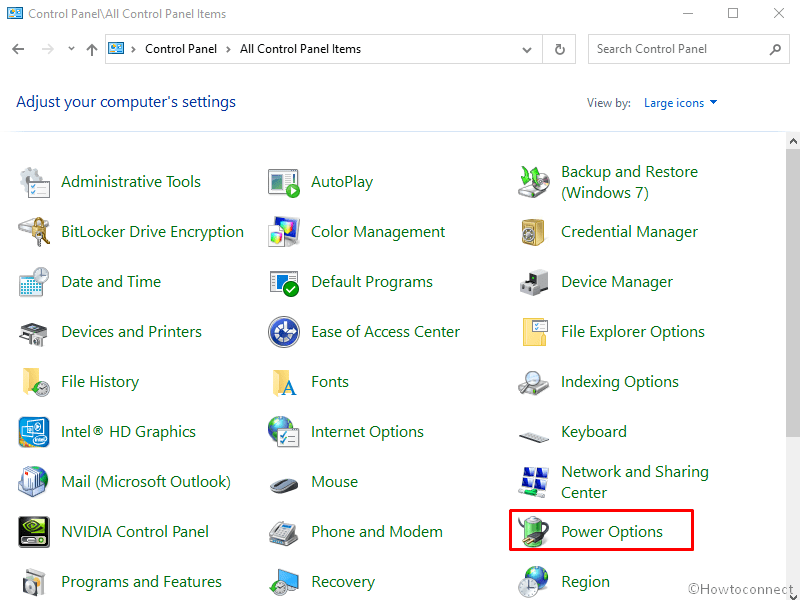
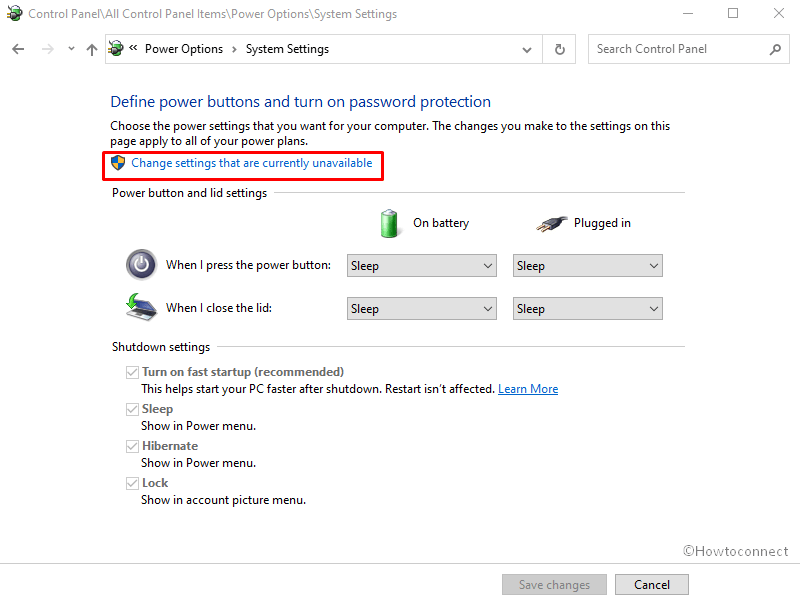
- Click on – Choose what the power button does.

- Select – Change settings that are currently unavailable link.
- Uncheck the boxes for the options Turn on fast startup (recommended), Sleep and Hibernate.
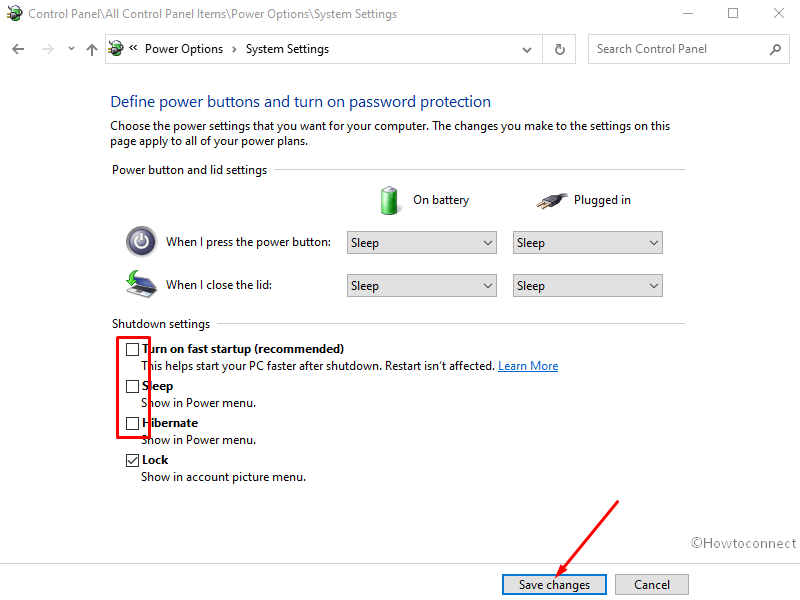
- Click Save changes.
Hopefully, the above solutions will make you free from the occurrence of BSOD.
Methods
Way-1: Run System File Checker
Way-2: Uninstall Windows Updates
Way-3: Update Drivers
Way-4: Disable Sleep and Hibernate
That’s all!!
