Customize Battery Usage by App in Windows 10 – Few heavyweight applications absorb power cells very rapidly so avoid running these is an intelligent decision especially when not necessary. So Microsoft has recently included a tool within Battery in the System Settings region that permits to configure an application whether you afford to function it in background or not.
However, plenteous apps won’t perfectly discontinued and still functions in the background even after you cut. Our beforehand elaborated article to Force Close Ongoing Programs in Windows 10 renders a method but this is manual and requires executing over and over again.
To Customize Battery Usage by App in Windows 10 task manager can also be proved as a meaningful utility. End task choice existing on the right click contextual menu in Task Manager Processes tab forcibly abolishes the applications functioning in the background without any delay. As a result, you successfully skip battery exploitage. But once more, each application can be closed one by one and this is a tedious task.
How to Customize Battery Usage by App in Windows 10
- Hit “Windows and I” together and allow the “Settings” application to be visible on the screen.
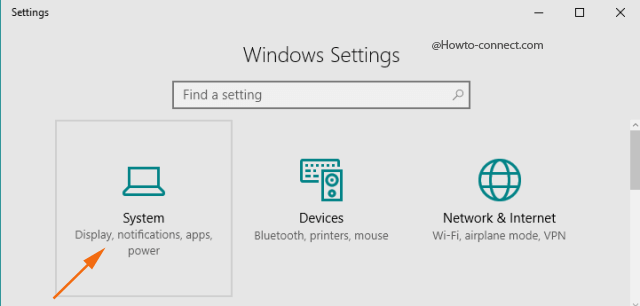
- In the outspread window, click or hit the first category that is termed as “System”.
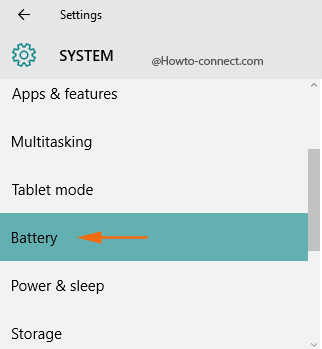
- Now, in the left flank of segments, click “Battery” that appears to be present in the middle of the column.
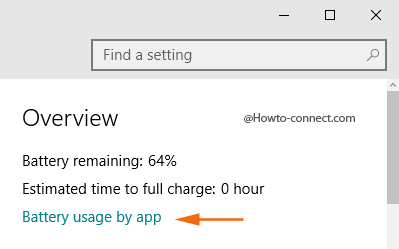
- Look at the other side of the selected segment and just beneath “Overview” title, click or hit the link that says “Battery usage by apps”.
- A page “Battery usage by app” comes into sight a short time ago included seeing the convenience of users.
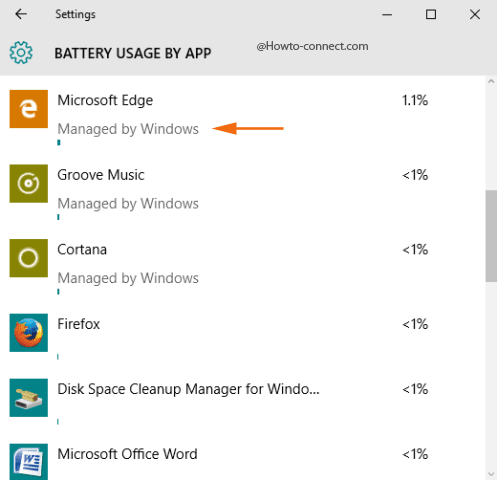
- Now, in this page, you can observe all running apps (based on the time span selected at the top) which include “Windows apps”, “Desktop applications”, and other “Windows 10 components” that perform or behaves like an app, for instance, Settings and Cortana.
- If you observe carefully, certain apps have “Managed by Windows” note exhibited just beneath them.

- Click on any of those apps, and thereafter you could see three radio buttons – “Always allowed in background”, “Managed by Windows” and “Never allowed in background”.
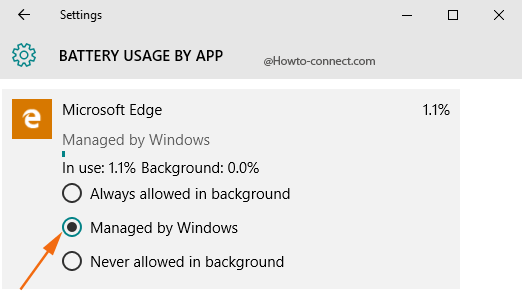
Always allowed in background – The first choice you get to see after clicking the specific app that shows “Manage by Windows” note. The intention is to render the opted app functions in the background mode even when your “Battery Saver” is turned on.
Managed by Windows – The second choice is opted by default in the new build 14316 and preserves the battery life when a machine is in “Battery Saver” mode. The option adds up a facility to shut down the applications for a limited period when discovered high battery discharge, until the next time you re-open it.
Never allowed in background – This choice forbids the specific applications to function when the system bears “Battery Saver” mode.
- Depending on the app and your preference, decide which choice to opt for but it is suggested to opt “Managed by Windows”.
Thinking about the users, this time, Microsoft has put everything into one page and thus, ushers new feature called “Managed by Windows”. Give it a shot and experience yourself the change!