Are you getting an error at boot of your computer system and unable to reach the desktop? This post will describe the solutions to 0xc0000428 The digital signature for this file couldn’t be verified that occurs in Windows 10 or 11 at startup.
Full error message is “The operating system couldn’t be loaded because the digital signature of a file couldn’t be verified. Error code: 0xc0000428. You’ll need to use recovery tools on your installation media. If you don’t have any installation media (like a disc or USB device), contact your system administrator or PC manufacturer”. The major cause of this issue is an outdated boot manager (it may be due to a system update or the installation of a service pack). Furthermore, corrupted bootloader might be a reason for this issue.
The digital signature for this file couldn’t be verified 0xc0000428
Here is how to fix 0xc0000428 The digital signature for this file couldn’t be verified Windows 10 or 11 –
Way-1: Check whether you have two operating systems on two HDD
We have seen several people get this error when they try dual booting from two hard disks. If you have two operating systems on separate HDD, you must sacrifice one of them to avoid encountering this problem. Just remove one disk or delete one OS installation and you are good to go. Here is how you can remove one Operating System –
- Click on – Search.
- Type – msconfig.
- Press – Enter.
- Go to – Boot.
- Select the Windows version which you’d like to keep.
- Click on – Set as Default.
- Select another version which you have to remove.
- Click on – Delete.
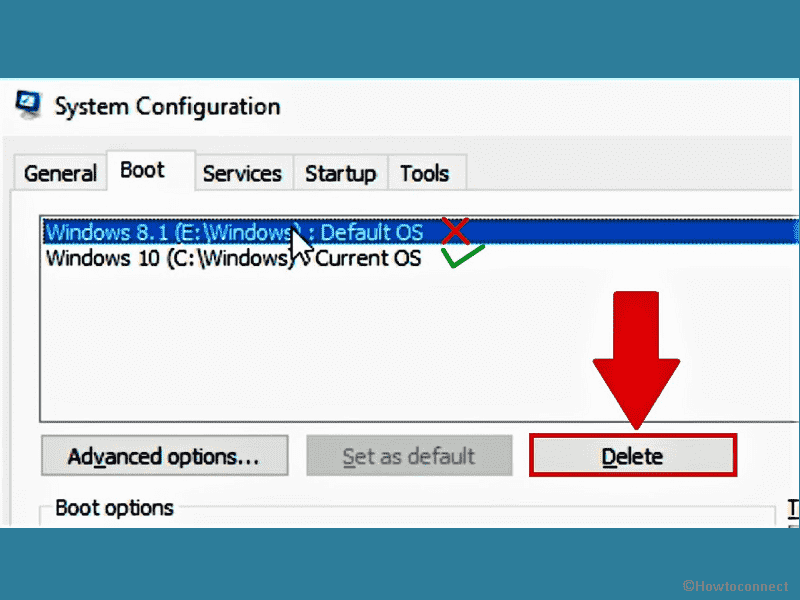
- Select Apply and OK.
- Restart your PC.
Way-2: Repair the OS Installation to solve 0xc0000428
You know the error “the digital signature for this file couldn’t be verified” (0xc0000428) may happen due to an outdated boot manager. It can occur when you update the operating system or install a service pack. Here, we are going to repair the installation with the help of a bootable USB or DVD.
- Insert the Windows media (DVD or USB drive).
- Turn the computer on.
- Press Esc or del or the assigned function key that sends the system to Boot menu.
- Select the media device using arrow keys to Boot from the drive or disk.
- On the Setup, select Language.
- Select Next.
- Click Repair Your Computer.
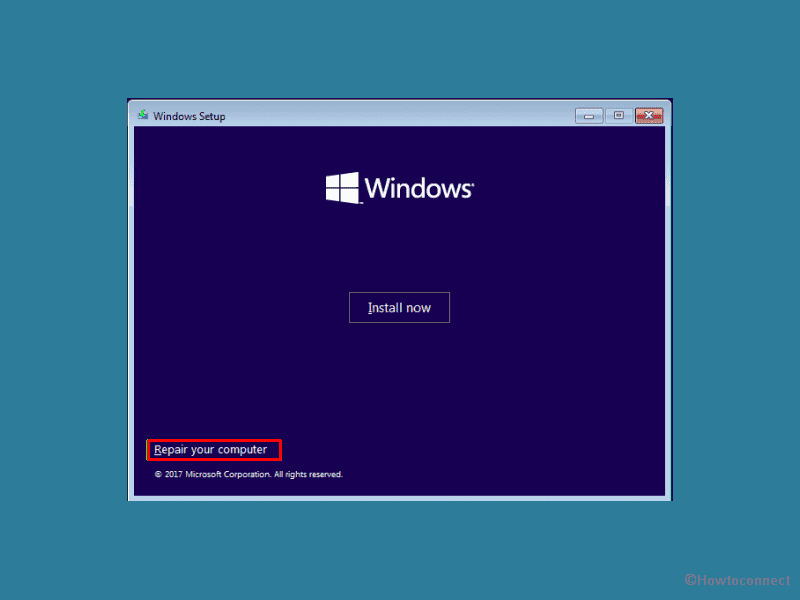
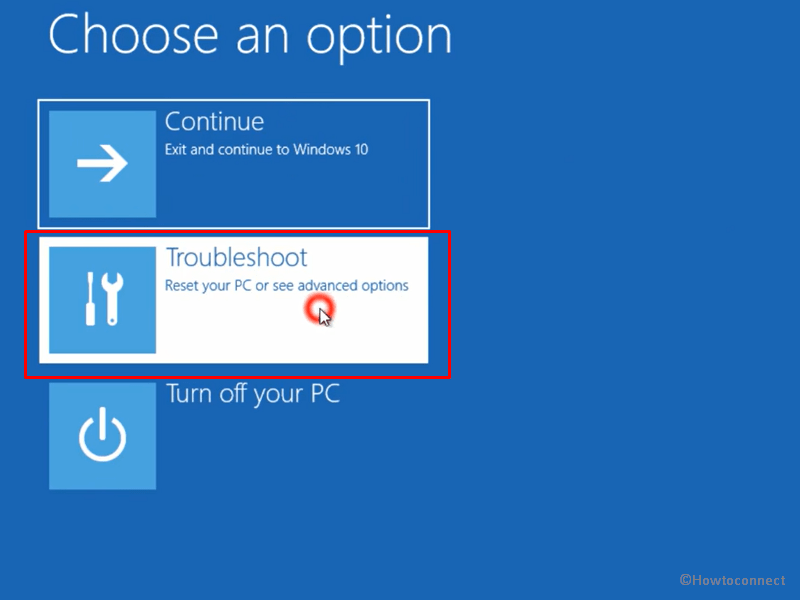
- Choose – Troubleshoot.
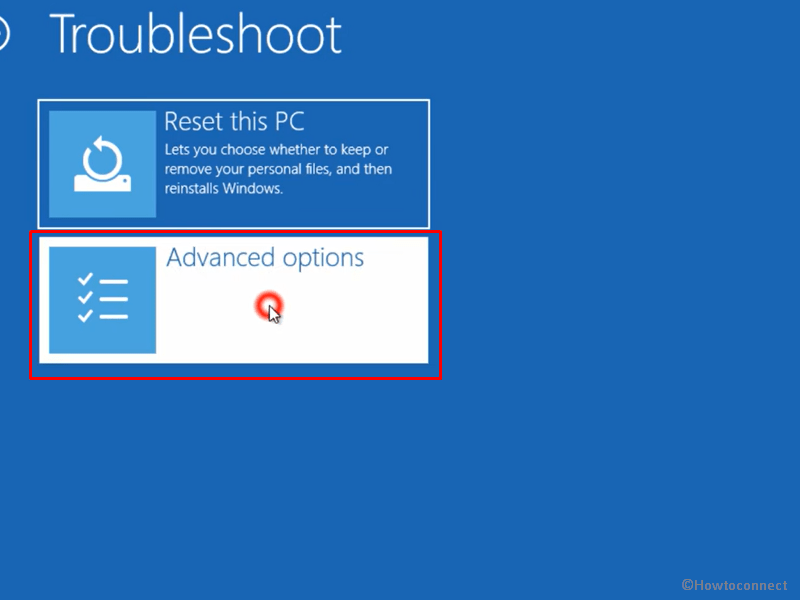
- Click on – Advanced options.
- Select – Startup-Repair.
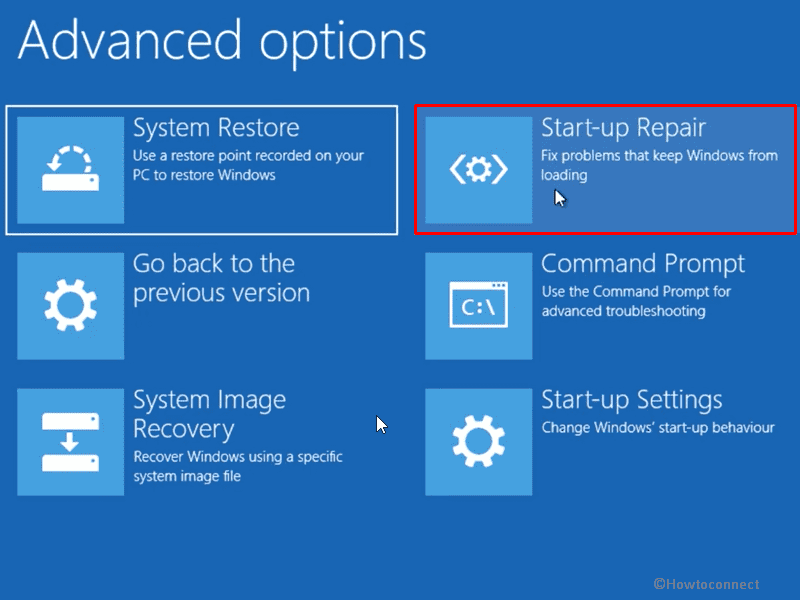
- Choose the Operating System you want to repair.
- Follow on-screen instructions.
We hope you were able to fix the error with the steps given above. Oops! Are you still experiencing the same issue over and over again? Do not bang your head on the wall. Follow the next method.
Way-3: Delete Windows.old Folder
Are you familiar with the Windows.old folder inside the C drive? When you upgrade to a new OS, all the previous system files are shifted into Windows.old. Provided you only use the new operating system (let’s say Windows 11), you can delete that specific folder and it won’t cause any issues. Follow the guide to delete –
- Click Start from the taskbar.
- Type CMD.
- Select – Run as administrator.
- When a User account control dialog appears, click on Yes.
- Type the following cmd command on Command prompt –
RD /S /Q %SystemDrive%\windows.old.
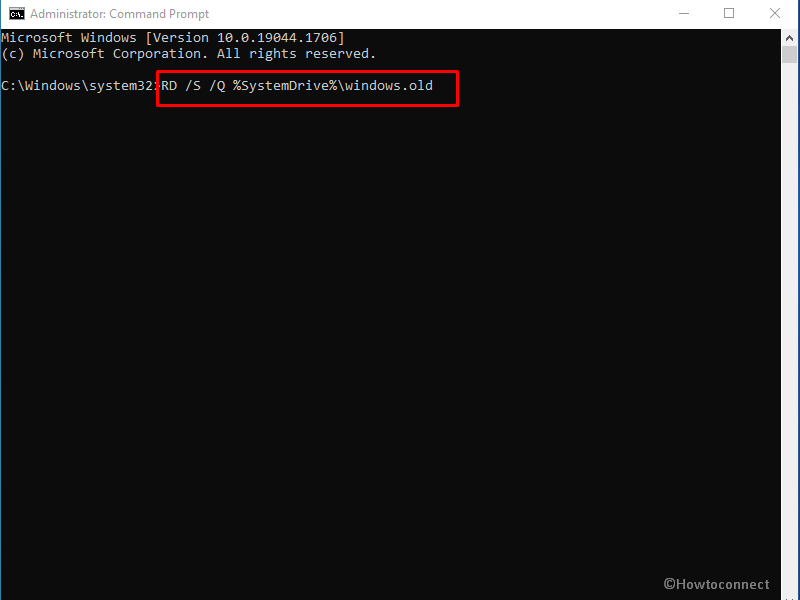
- Press Enter.
- The steps will quickly delete Windows.old; restart your computer.
If you want to use other methods for its deletion, see – Windows 10 – 3 Ways to Fully Delete Windows.old Folder.
Way-4: Use Command Prompt from a Windows Installation Media
For this way to work, you need a Windows Installation Media (USB or DVD). Once you get it ready, you can follow the steps given below.
- Put the Windows installation media DVD in the player or plug the USB into the port.
- Turn on the PC.
- Press the Esc or del or function keys like f2 or f7 to go to Boot menu. The key interferes with the boot sequence.
- From the Boot menu, select the installation media device using up and down arrow keys.
- When the Windows Setup wizard is showing on the screen, press Shift + F10. This will open the command prompt.
- In case, the above step doesn’t launch the command prompt, select Language and click Next.
- Select Repair your computer
- Click on – Troubleshoot
- Choose – Advanced Options
- Then click on – Command Prompt.
- Once the command prompt is open, type “bcdedit” (without quotes).
- Note down the Identifier value beneath Windows Boot Loader.
- Replace Identifier value with your noted value in the command “bcdedit -set {Identifier value} nointegritychecks 1”
- Type the command into the command prompt.
- Hit ‘Enter’.
- Remove the USB drive or DVD and restart the computer.
- If you are you getting the issue again follow the first three steps above and enter the three commands given below (one at a time).
bootrec /fixMBR

bootrec /fixBoot

bootrec /rebuildBCD
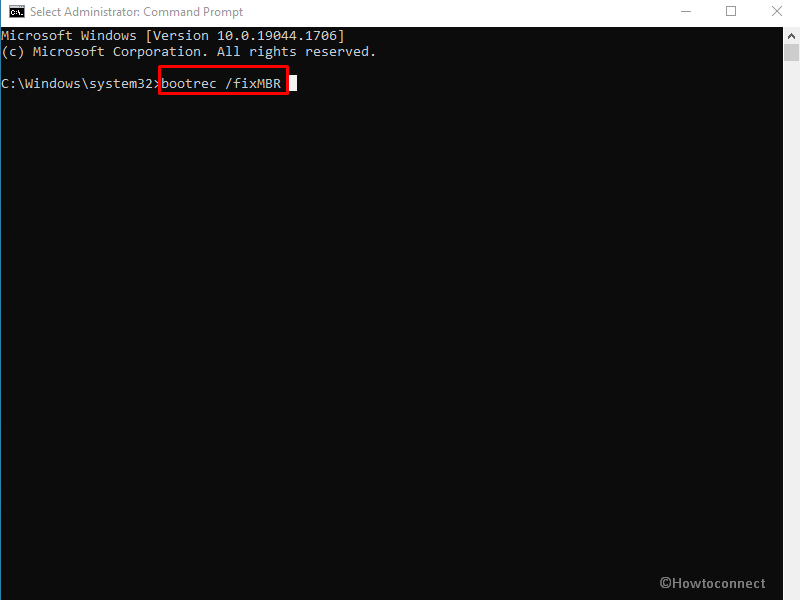
- And then, restart the system.
See – How to Rebuild Boot Configuration Data/BCD on Windows 10
To repair the boot completely you can follow – How to Repair Startup in Windows 10 – Troubleshooting All Issues.
By far, you have got five methods to solve the digital signature for this file couldn’t be verified 0xc0000428 error code. What if those didn’t do the magic for you? Well, we have a few more for you to explore.
Way-5: Disable Driver Signature Enforcement to fix 0xc0000428
Disabling driver signature enforcement helps you install drivers which are not digitally signed which is extremely helpful to solve 0xc0000428 error code. Interestingly enough, doing so will remove “The digital signature for this file couldn’t be verified”. Shall we move on to the method?
- Restart your machine.
- Once the start up progresses, F7 or F8.
- You will get a screen with a few options, including Disable Signature Enforcement.
- Go with the same and restart the system.
There you go! Wasn’t it easy?
You can manually check this type of file by following – How to Find the System Files Not Digitally Signed on Windows 10.
Way-6: Update your BOOTMGR manually
Just like Way 2 and 5, this one also needs an installation media. Grab one and follow the steps we have mentioned below.
- We believe you now know how to boot from a USB or DVD. Do that after inserting the installation media.
- Choose the Language and Keyboard input.
- Click on Repair your computer.
- You need to select the system drive where the Operating System is installed. On most systems, it is (C:).
- From the system recovery options, opt for Command Prompt. Alternatively, you can press Shift + F10)
- Enter this command –
C:

cd boot

attrib bcd -s -h –r

bootrec /rebuildbcd
- Press – Enter.
- You will see a message ‘boot files successfully created’. That’s it. Restart the computer.
We hope you won’t see the 0xc0000428 error ever again.
So yeah, that’s all from our side. If you know any other solution, make sure you hop on to the comment section and jot it down there.
Methods list:
Way-1: Check whether you have two operating systems on two HDD
Way-2: Repair the OS Installation
Way-3: Delete Windows.old Folder
Way-4: Use Command Prompt from a Windows Installation Media
Way-5: Disable Driver Signature Enforcement
Way-6: Update your BOOTMGR manually
That’s all!!
