Are you looking to fix Bitdefender Error 1002 Update Failed? Mostly, this fatal code rolls up during the program installation process, Windows startup or shutdown. Because of this error, the system becomes sluggish and ends up with responding slowly to mouse or keyboard input. Also, it causes frequent crashes and freezes your PC for a few seconds which is really annoying. However, there are multiple workarounds to dispel this issue. In this context, you will get all possible solutions to Fix Bitdefender Error 1002 Update Failed.
Generally, Error 1002 occurs when a virus attacks your PC via the internet and deletes any file of Bitdefender antimalware program. Furthermore, a corrupt or incomplete installation may cause the same issue too. Though it’s difficult to find out the exact reason behind this problem, you need to try multiple troubleshoot that will actually fix the issue.
Table of Contents
Bitdefender Error 1002 Update Failed Solutions
Here is How to Fix Bitdefender Error 1002 Update Failed –
Scan your full system
As we said, most of the time virus causes Bitdefender Error 1002. In that case, Windows Defender Firewall will be the savior which is the built-in antimalware tool of the operating system itself. Though it works continuously in the background, you must manually perform a full scan to remove the viruses that already exist.
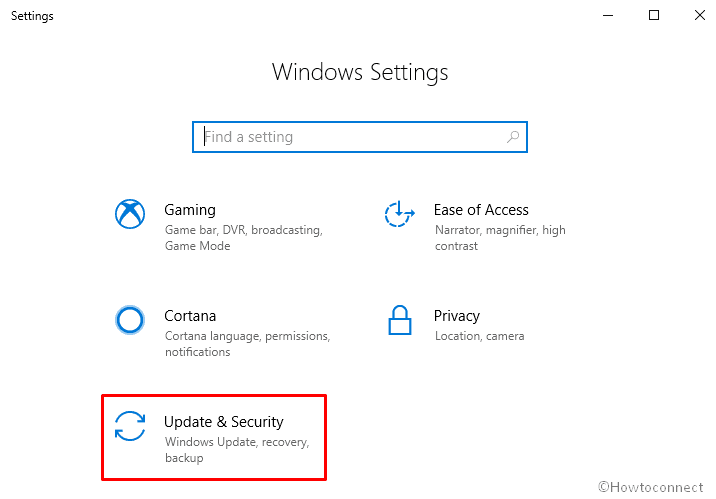
Step-1: Press Win+I to open Windows Settings app and then click on Update & Security.
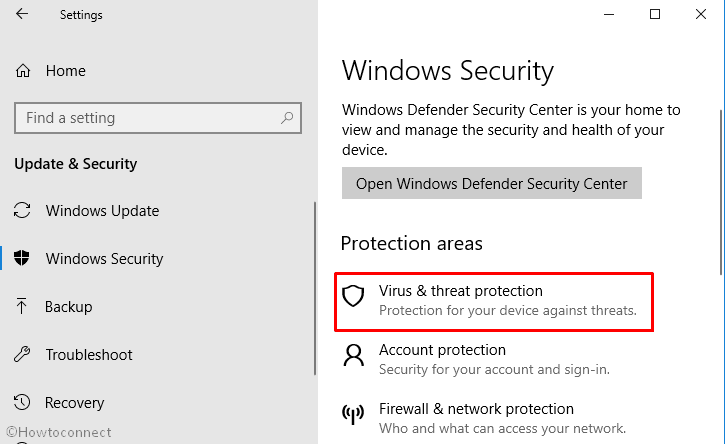
Step-2: On the following page, Select Windows Security from the left column.
Step-3: Shift to the right side and click on Virus & threat protection.
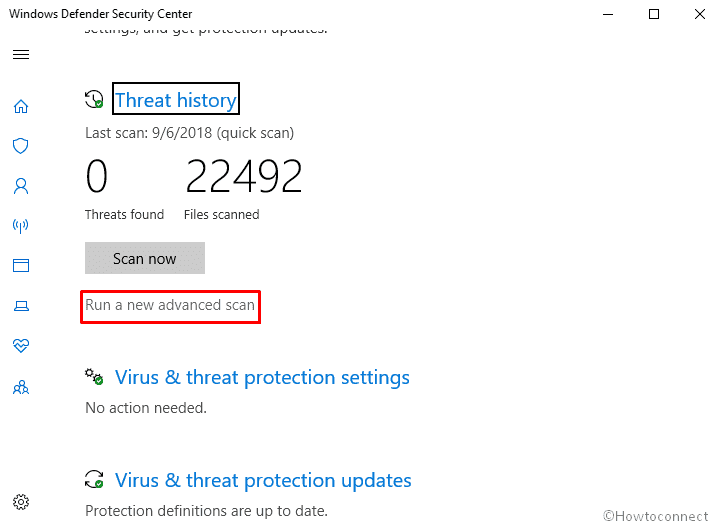
Step-4: Next, click on Run a new advanced scan.
Step-5: Make sure to check the radio button of Full scan and then click on Scan now to initiate the process.
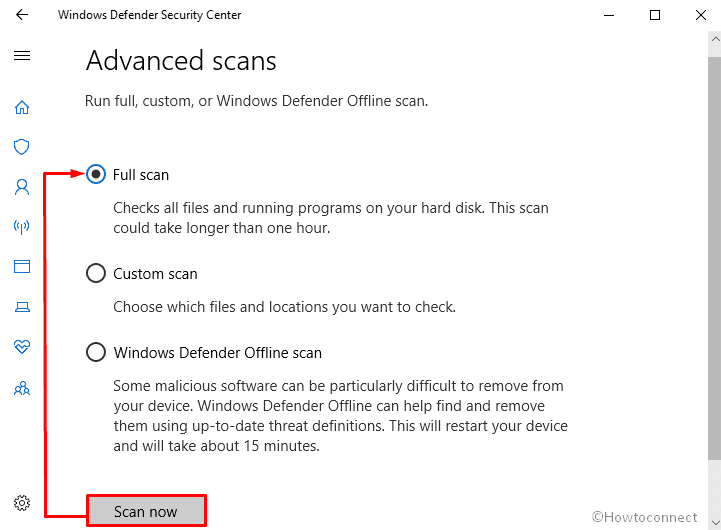
Now, wait until Windows Defender finishes its task. Once it finds any malware, the tool will automatically wipe out.
Run Disk Cleanup
Often bulk of junk files that reduces your disk space may cause such Error. You need to remove these temporary items to Fix Bitdefender Error1002 Update Failed.
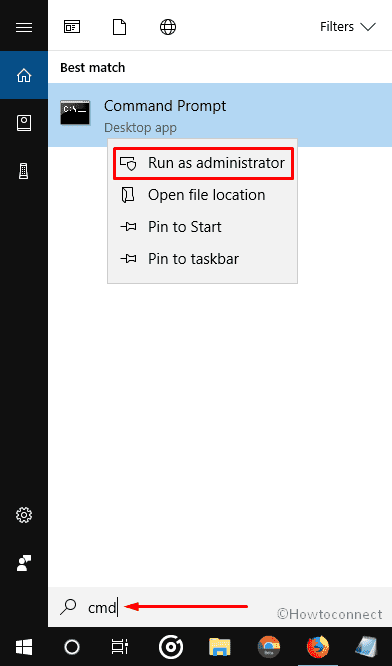
- Click on taskbar search button and type cmd.exe in the box. When the result shows up, right-click on Command Prompt and select Run as administrator.
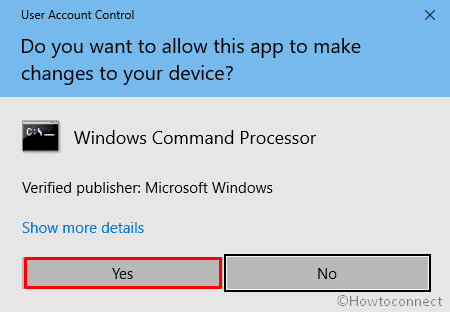
- If a UAC prompts up for consent, click on Yes.
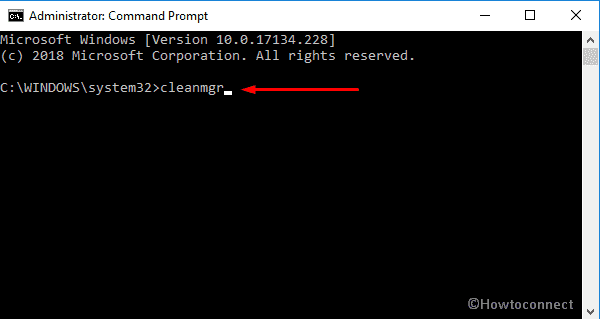
- Next, type cleanmgr after blinking C: \WINDOWS\system> and hit Enter.
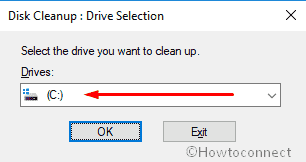
- A dialog box will show up, select your desired drive using the drop-down menu and click on OK.
- On the next window, check all the options and click on OK.
Run Windows System File Checker (sfc /scannow)
Many users found it helpful to Fix Bitdefender Error 1002 Update Failed. The main function of SFC /scannow is to scan your PC thoroughly and dig out the corrupted files by tracing faulty changes.
At first, open Command Prompt as admin.
Once it comes into sight, type sfc /scannow after blinking cursor and Press Enter on your keyboard.
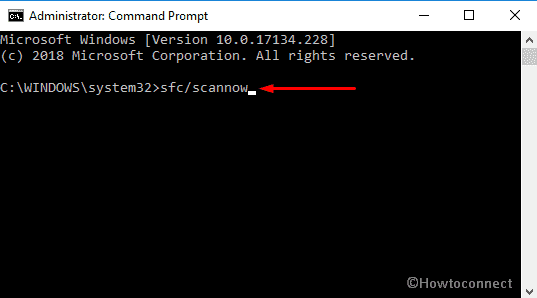
Now the command starts working to find out the problem associated with Error1002 and shows the status in real time so here you need to wait patiently.
Install the Available Window Update
Mostly, Microsoft keeps updating its operating system and fixing maximum issues itself. So, it’s better to stay up-to-date to avoid such errors. Usually, Microsoft provides the updates automatically but if you miss it, you need to get it manually.
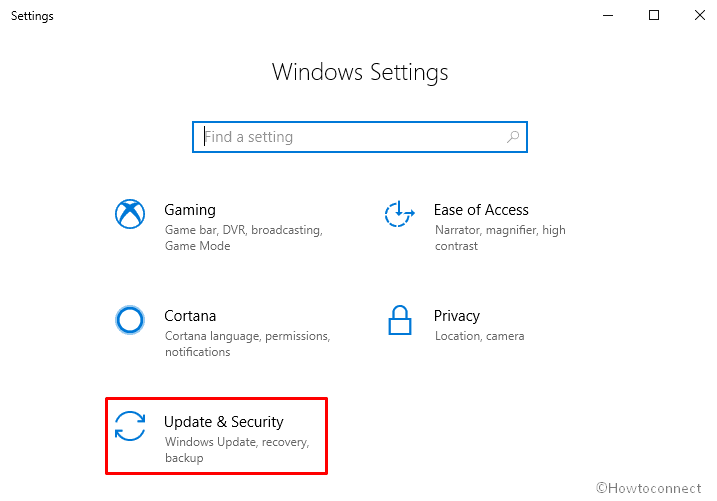
Open Windows Settings and then choose Update & Security.
On the subsequent Window, click on Check for updates from the right pane located under Windows Update section.
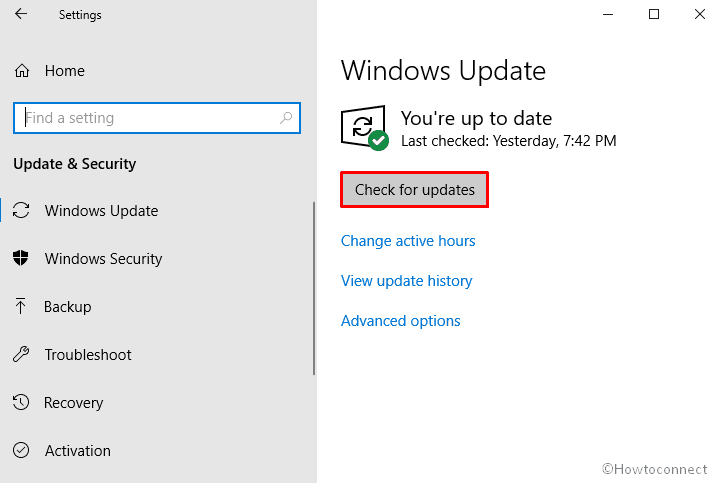
Now, the system will start searching available updates. If it gets any, install immediately.
Re-install the Bitdefender
If Bitdefender Error 1002 still occurs, try to re-install the program. Here’s how –
Do right-click on the Start button and select Settings.
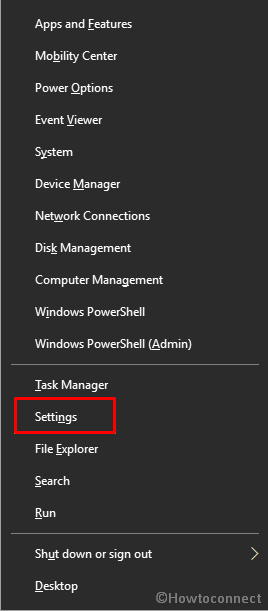
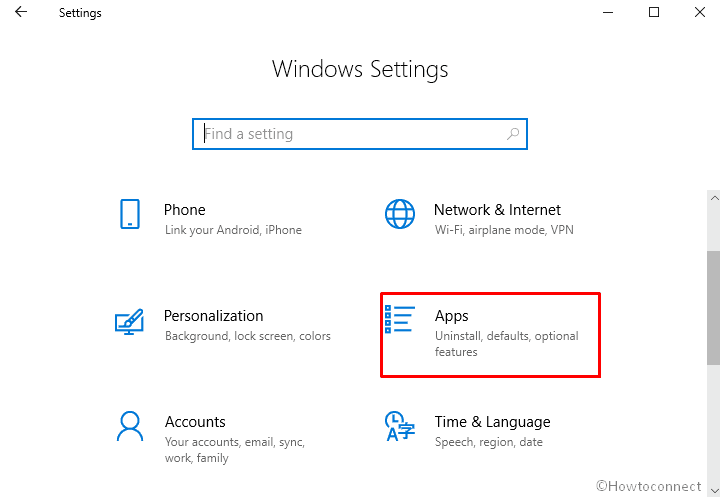
On the following page, click on Apps.
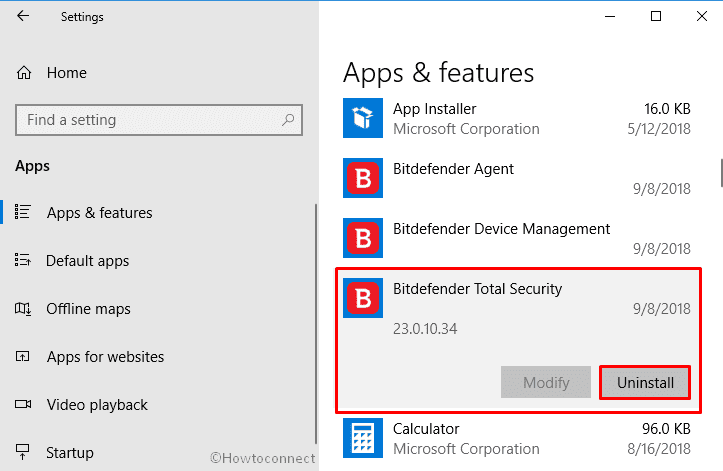
Next, shift to the right pane and scroll down to get Bitdefender Total Security. Once you get it, click on it and select Uninstall.
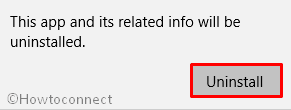
A small pop-up will come up, again click on Uninstall for final confirmation.
Reset the PC
If the above methods don’t work to fix Bitdefender Error 1002 Update Failed, then you can reset your PC to go back to a previous state when your system was decentish.
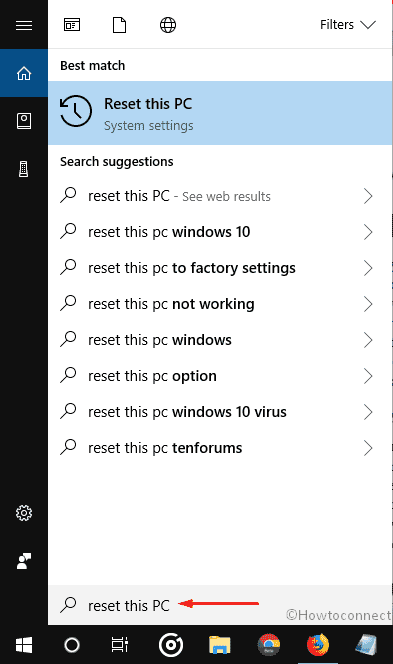
Press Win+S hotkey and type reset this PC in the search box.
Once the result turns up, hit Enter.
Move forward and click on Get started located under Reset this PC section in order to initiate the process.
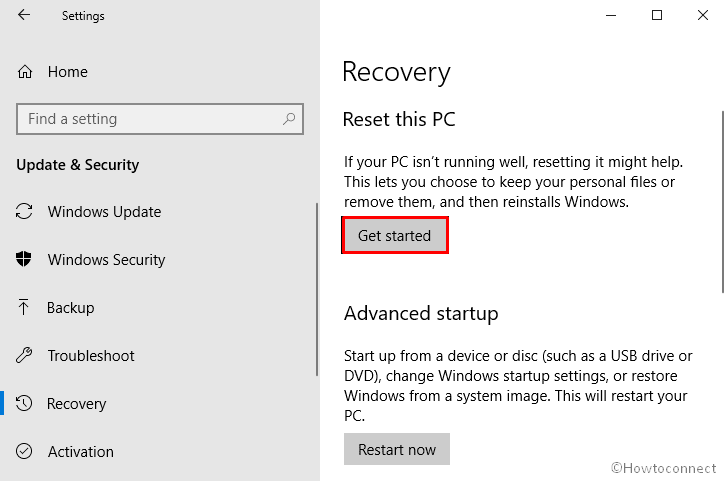
Thereafter, follow the on-screen guide to complete the procedure.
That’s All!