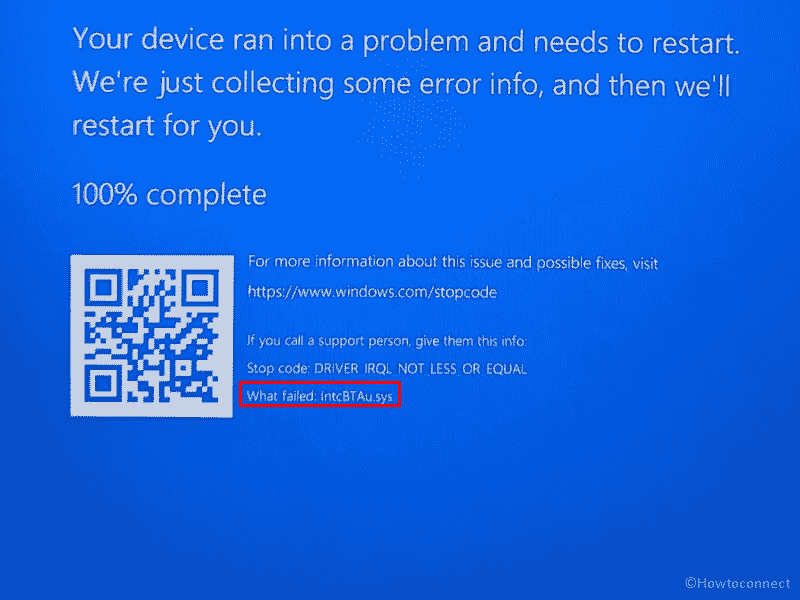
Some users report facing a blue screen error related to Intel Smart Sound technology in Windows 10 or 11. What failed: IntcBTAu.sys is the error that mostly appears with Driver_IRQL_Not_Less_Or_Equal. Occurring with system crash, this stop code will cause the computer to restart frequently with bug checking.
Driver_IRQL_Not_Less_Or_Equal IntcBTAu.sys occurs commonly due to corrupted Intel Smart Sound technology driver. Furthermore, the error will also trouble when any third-party program is creating conflict with system files or the driver.
Table of Contents
Blue Screen IntcBTAu.sys BSoD Error
Here is how to Fix IntcBTAu.sys Blue Screen Error BSOD in Windows 10 or 11 –
Way-1: Update Intel Smart Sound technology
Since IntcBTAu.sys is a part of Intel Smart Sound technology and installed with HD graphic card the problem indicates that something is not right in the driver. But as a regular practice, Intel updates the software to improve user experience and fix old bugs. So, there is a possibility that the next version of the card will be available on the official website of Intel. Update its driver using the below guidelines –
- Right-click on the Start.
- Select – Device Manager.
- When the Windows tool loads on the screen, look for Sound, video, and game controllers.
- Double click on this item.
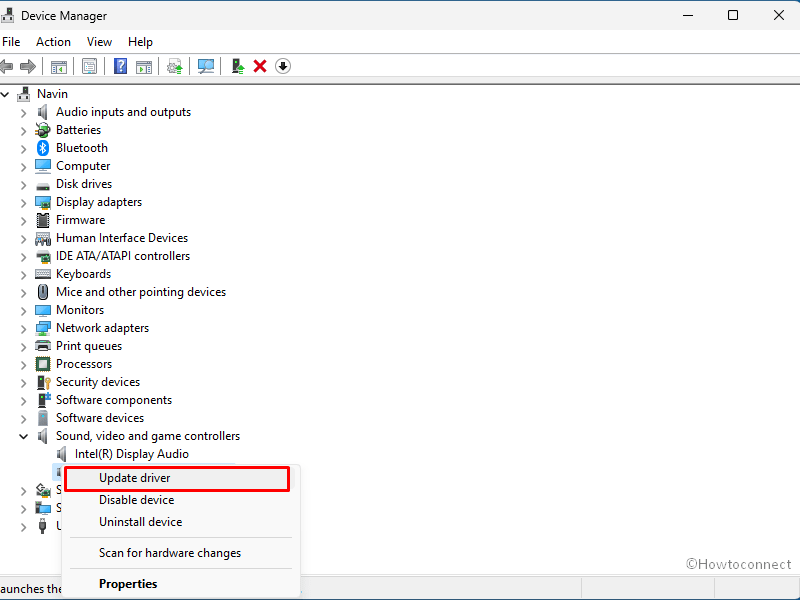
- From the list, right-click on “Intel SST” or “Intel Smart Sound Technology” that appears.
- Select – Update driver.

- On the separate wizard, click on Search automatically for the best driver.
- Restart your computer and check if the error is fixed now or it still persists.
- If it occurs then go to this webpage and download Intel Smart Sound Technology Driver.
- Unpack the zip file and double click .exe.
- Follow the onscreen instructions and install the driver.
Way-2: Uninstall Driver and Reinstall
Sometimes, mere updating the driver doesn’t solve IntcBTAu.sys DRIVER IRQL NOT LESS OR EQUAL Blue Screen Error. In this case, you need to uninstall and reinstall the same using the following Steps –
- Open Device Manager as you have done in the previous method.
- Find – Sound, video, and game controllers and double click on this.
- A list is revealed: right-click on Intel Smart Sound Technology or Intel SST whichever showing there.
- Select – Uninstall device.
- A warning pop-up will prompt showing a checkbox. Leave the box unchecked.
- Click on ‘Uninstall’.
- Now reboot your computer and see if the error is fixed.
Way-3: Uninstall 3rd party antimalware or program
However, some 3rd party programs are trustworthy and you have no reason to doubt that but there is agglomeration of unuseful and problem-creating stuff you can download by getting stitched up anytime. They may cause conflict with the system files or other programs previously installed on your machine and Blue screen is the final consequence. Removal of the program is the only solution so when you face IntcBTAu.sys BSOD you need to uninstall it first of all –
- Right click on the Start from the taskbar.
- Select – Apps.
- When the Settings app loads you can see a list of all installed programs.
- Find the one you need to remove and click on it.
- From the expanded pane, click on “Uninstall”.
- A tiny pop-up will appear; click on Uninstall on that.
- If any wizard opens follow the instructions on that.
- Restart your PC and see if you have gotten rid of the issue.
Way-4: Run SFC /Scanow
Broken system files are another cause of IntcBTAu.sys that might exist due to a number of reasons such as malware, bugs in a Windows update, outdated drivers, and other. Fortunately, you can repair them single-handedly by running a tool running through command prompt with administrative privileges. You need to simply follow –
- Press Winkey.
- type – cmd.
- Now, press – Ctrl+Shift+Enter.
- Once a User account control dialog prompts, click on Yes.
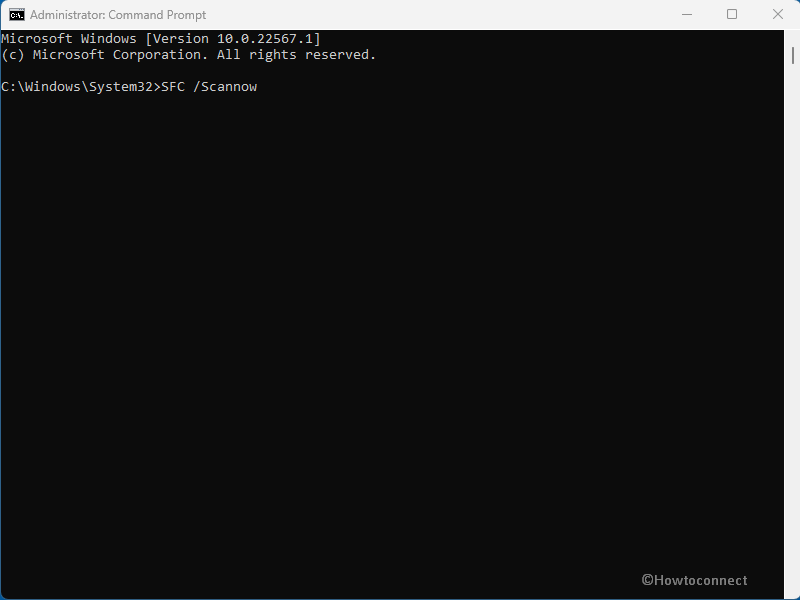
- When on Command prompt, type – SFC /Scannow.

- Press Enter and wait until a few minutes.
- Once 100% completed, restart the machine.
Way-5: Use Disk Cleanup
Several users report that deleting the junk using Disk cleanup also successfully fixes this BSOD in Windows 10 or 11. Cleanmgr will help you to do this –
- Click on Search.
- Type – cleanmgr.
- Press – Enter.
- Choose – (C:) from the drop-down on the small pop-up.
- On the next window, click on – Cleanup system files.
- Again select (C:) Disk cleanup: Drive Selection small window.
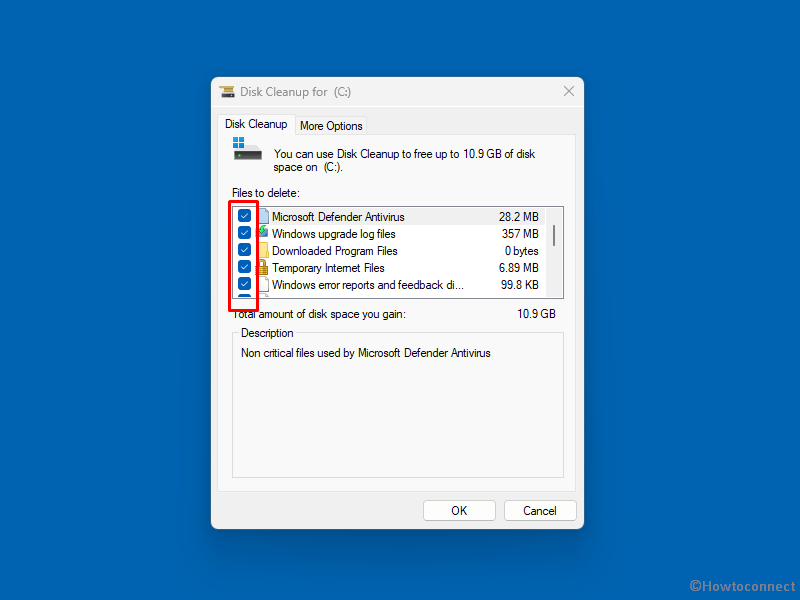
- In the “Files to delete” section, check all the boxes.
- Click on OK.

- A pop up will ask – Are you sure you want to permanently delete these files.; click on Delete files.
- Finally, allow the tool to completely erase the junk and lastly reboot the PC.
Methods list:
Way-1: Update Intel Smart Sound technology
Way-2: Uninstall Driver and Reinstall
Way-3: Uninstall 3rd party antimalware or program
Way-4: Run SFC /Scanow
Way-5: Use Disk Cleanup
That’s all!!
