The Windows wireless service is not running on this computer is the error message multiple users encounter when they try to connect to Network. This is a very annoying issue in Windows 10 as you can’t establish a connection after a restart of your system. After you run the Troubleshooter, this error appears having a cross mark. The internet is unavailable in this case despite there is no any problem in the router. For some users, the network is connected intermittently for a short period of time without any cause.
The Windows wireless service is not running on this computer clearly indicates something bad in regarding services. Many times network adaptor and corrupted system files also create this problem.
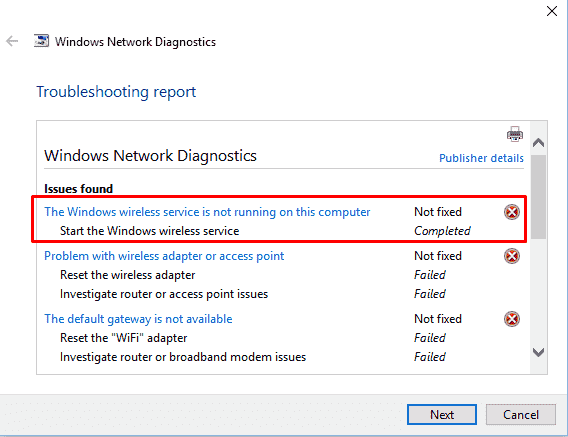
How to Fix The Windows Wireless Service is not Running on this Computer in Windows 10
You will find three easy ways to fix The Windows wireless service is not running on this computer in Windows 10 ahead –
Check WLAN AutoConfig service if running
Step-1: press the Start button, type services.msc and then hit “Enter”.
Step-2: when the Services console appears, scroll down to bottom and locate WLAN Autoconfig in the list. Ensure that this service is running. Otherwise, make a right on WLAN Autoconfig and choose Start.
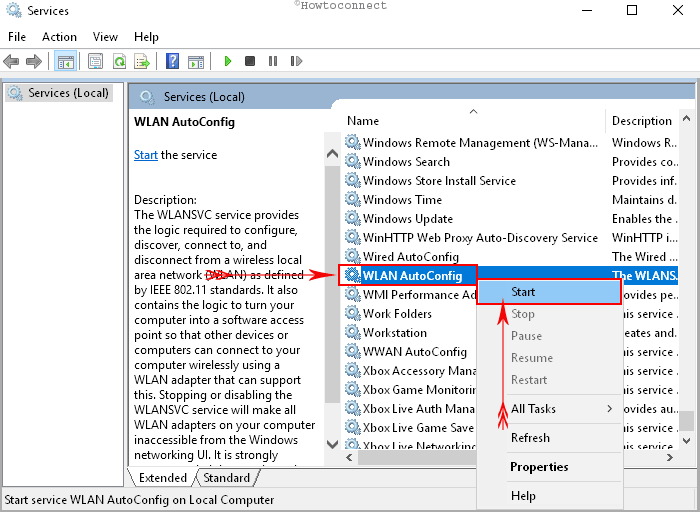
Now try to connect to your network once more.
Sometimes, you may encounter “Windows could not start Error 1068” while Starting WLAN Autoconfig. Take help of this thread in this case.
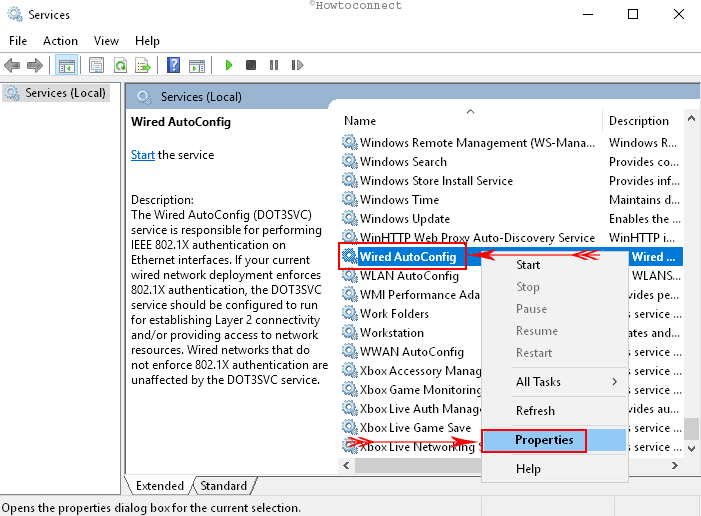
Step-3: If the error occurs again then go to the WLAN Autoconfig service, do a right click and select Properties.
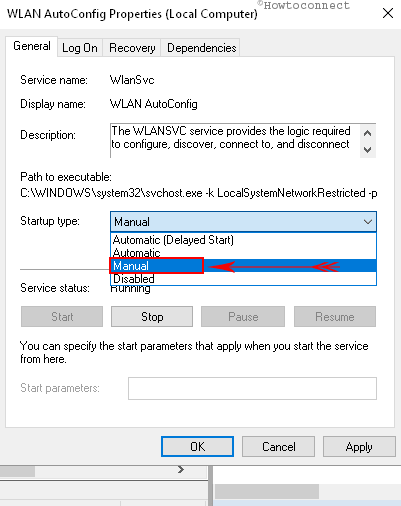
Against the startup type drop down, select Manual replacing the Automatic delayed or Automatic. Now reboot your system and check if the error message no longer exists.
Uninstall the Adapter driver and restart your PC
Click on Start icon from the bottom left corner, type devmgmt.msc, and then press Enter.
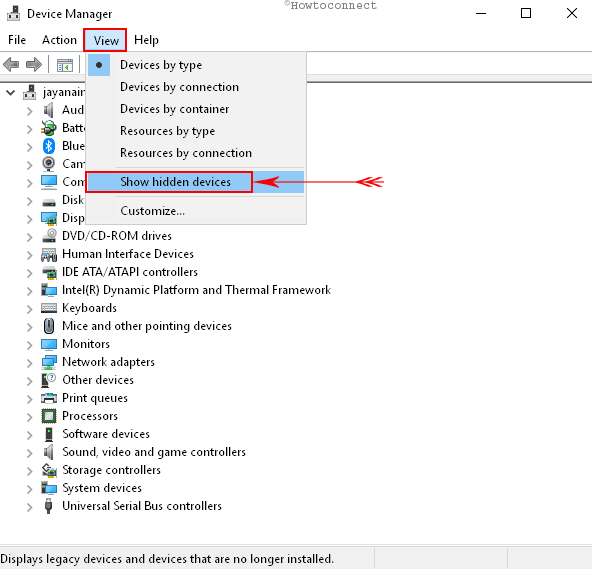
After the Device manager arrives on the display, select View from the toolbar on the top, and perform a click on Show hidden devices in the drop-down.
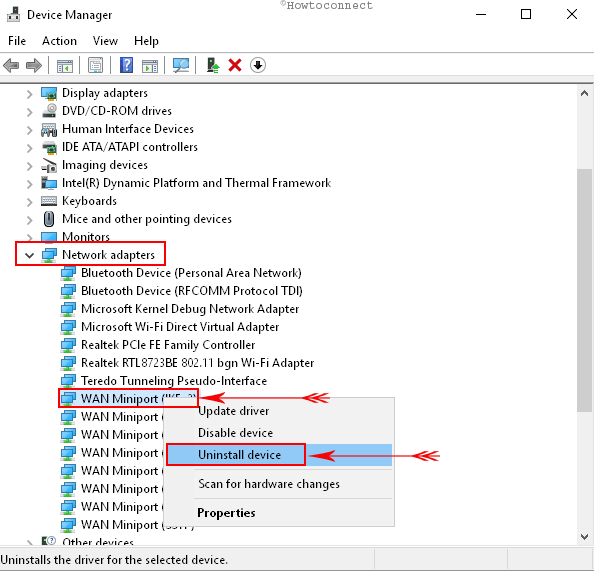
Make a click on the down arrow adjacent to Network adaptors and let it expand. You will see a long list like Wan Miniport, Realtek, Ralink, and others. Do a right click on the correct adaptor responsible to your support wireless network and select Uninstall device.
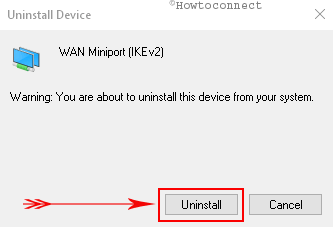
Once a warning popup will come on screen, regardless of caring anything select Uninstall.
Hopefully, you will not confront with the error message The Windows wireless service is not running on this computer.
Uninstall the Previous Windows update
Windows update files having bus is a big cause to create The Windows Wireless Service is not Running on this Computer error in Windows 10. So uninstalling the just earlier update files from Programs & features may provide relief from this issue.
Step#-1: Click on this link to directly go to Windows update section.
Step#-2: Select View update history.
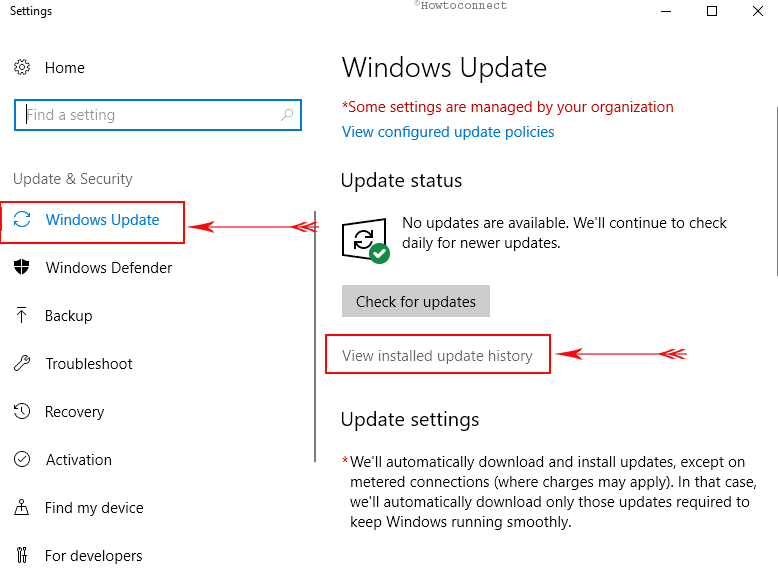
Step#-3: On the next page, make a click on Uninstall Updates.
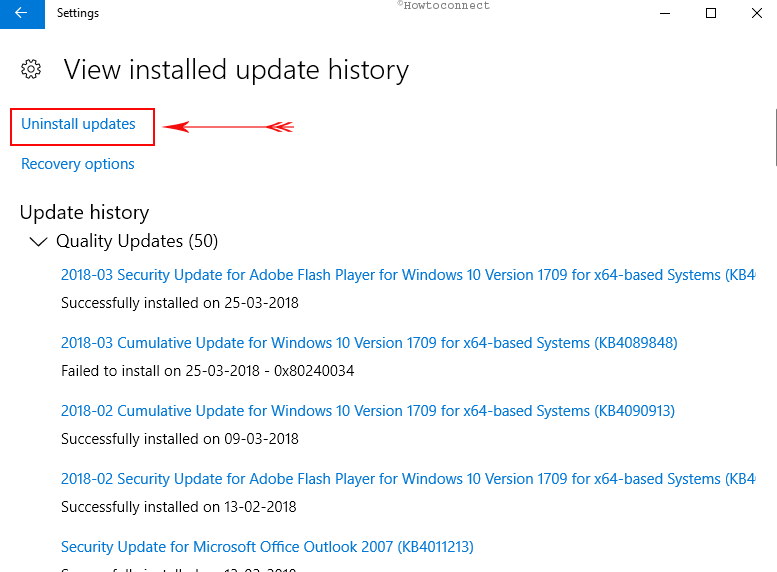
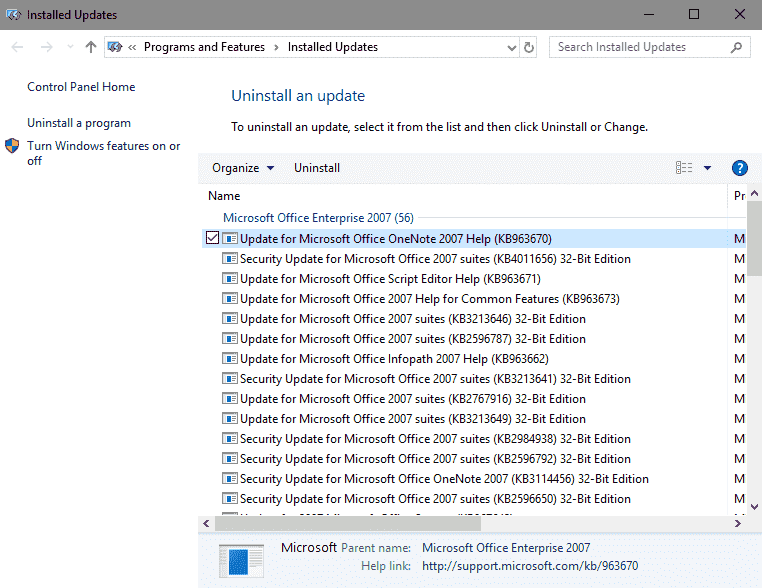
Step#4: Program & features will show you a huge list of the files installed on your system. Locate the previously got update and perform a double-click on it to uninstall.
Run System File Checker
If the above solutions fail to work then there is a possibility of malfunctioning in your system files. SFC is the best and easiest tool to deal with any corruption in the installation files. Follow the method to run this –
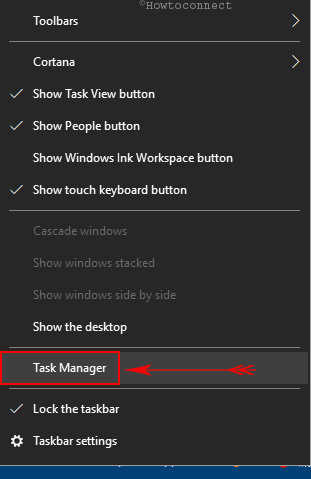
Right-click on the taskbar and choose “Task Manager” from the context menu.
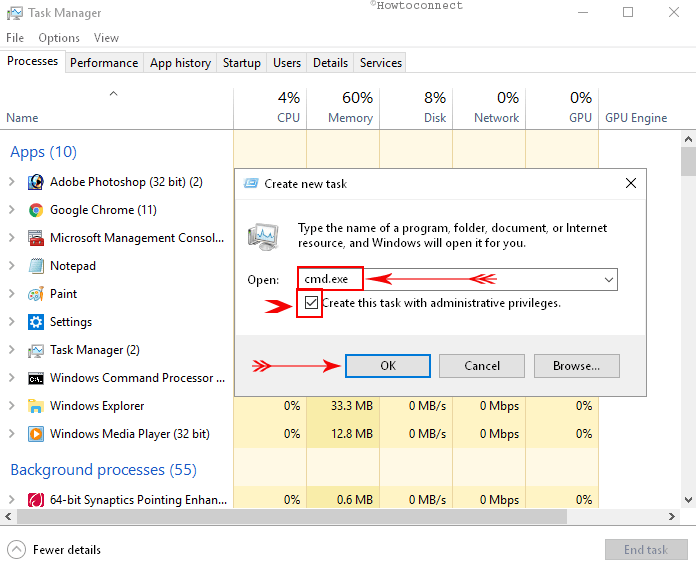
Select File from the menu bar and click on Run new task once the application becomes visible. On “Create a new task” dialog box, type cmd.exe and check the box for “Create this task with administrative privileges”. Hit on OK.
Copy SFC /SCANNOW, paste in the black window after C:\WINDOWS\system32> and press Enter.
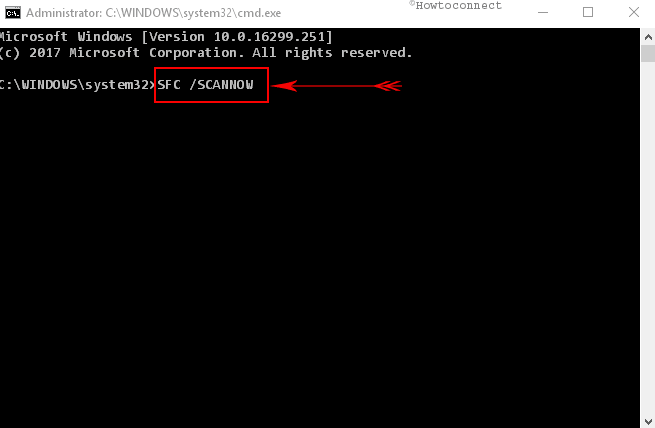
Wait for the command to finish the scan and repair, reboot your computer and then connect to the aforesaid network.
How easy it is!
