Steps to Install Apple QuickTime on Windows 10. – Experiencing trouble in running and grabbing QuickTime on a computer powered Windows 10? Many users complain that they can’t Install Apple QuickTime on Windows 10 in normal circumstances. If you too then you are in the right place to see a guide on the topics like What is QuickTime, How to install moreover with a genuine Download link.
First of all, you would be inquisitive to know what is QuickTime. QuickTime is a multimedia Player and works on almost every Platform pretty smoothly. Being an Apple product it obviously works superbly on Mac but also its performance on Windows, Linux, and other OS is equally admirable. In addition, it is very versatile, fully-featured, and sophisticated and moreover easy to use Media player. The Simple design and interface of this application allows playing audio video and streaming very comfortably. iTune seamless experience enhances the enjoyment of this media player.
Recently Apple has made a declaration to remove support for this media player for Windows. Still, few methods and tweaks are available allowing install Apple QuickTime on Windows 10. Later Microsoft found that running the player on Windows operating system is not unrisky and it may increase vulnerability.
But several users are enthusiastic about this application and despite all the hell reports want to Install Apple QuickTime on Windows 10. So you will see here a step by step guide for the specific installation.
Table of Contents
Install Apple QuickTime on Windows 10
Step 1 – Click this particular Link to download Apple QuickTime for Windows 10. This Setup will function uniformly on both of 32 and 64 bit on your Windows 10.
Step 2 – After the QuickTime download becomes all over, double-click on its Setup so that the file may Start running.
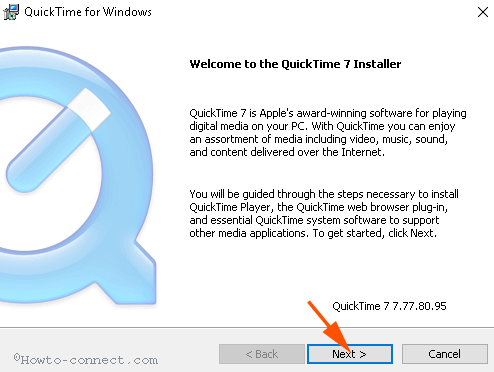
Step 3 – After the installation starts, first of all, you see a Welcome wizard. click Next on this.
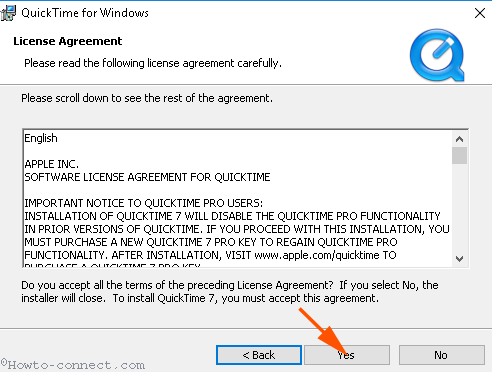
Step 4 – On the subsequent wizard whereof heading is License agreement, click Yes.
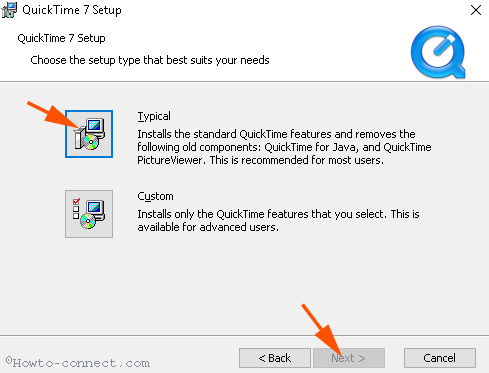
Step 5 – Subsequently, you will view the Setup wizard, choose Typical and then Next.
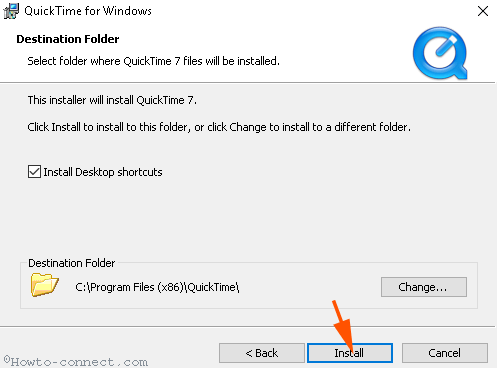
Step 6 – Now Destination folder screen becomes visible which will determine the location where you will find the installation files. Select Install on this.
Step 7 – A UAC pop up prompts at once, select Yes to proceed ahead.
Step 8 – You see the wizard indicating that the application installation is performed, select Finish.
Step 9 – The final screen will inquire if you are keen to grab Pro version of the Player, but you should choose the option No Thanks here.
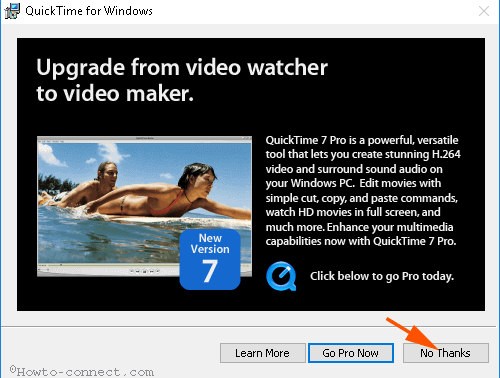
Hence, Player is installed on your Windows 10 PC, navigate to the Start menu and click it in the “Recent added” section on the top of the list.
The application is on your screen, play with different menus and options, and cheer up.
Conclusion
So these are the steps for How to Install Apple QuickTime on Windows 10. You will find that all the options in this Media Player player are quite straightforward. Still, you encounter any trouble concerning this media player freely write a comment below.