Guide and Steps to Use Your Own Mail App Background Color in Windows 10. – You all are familiar with the Mail app on Windows 10 and its basic services. Loaded with multiple facilities, this app is surprising users by providing many additional features. One of the interesting features of the Mail app is it allows to customize the app’s background image.
The basic customization feature of the Mail app lets you select a solid color from colors list from the app or the built-in background images. Similarly, it also allows you to use your own created or downloaded image for the background. However, there is a small drawback in this Mail app – it does not have an option that allows set your own color as app’s background. So, if you desire to add your own favorable color to the background of your Mail app and wondering how to proceed, then simply see the below steps.
Table of Contents
Use Your Own Mail App Background Color in Windows 10
Step 1 – Start the procedure by launching the Paint app. However, even if you are running the Creator Update, you can still go with the Classic Paint app.
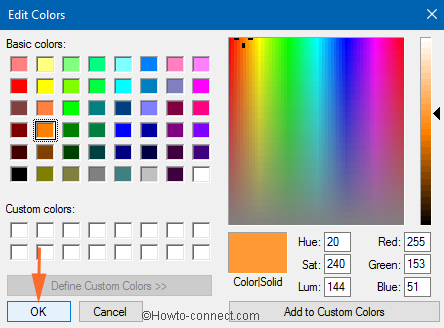
Step 2 – On the menu bar, go to the Colors section and locate the color you wish to use for Mail app. If the favorite color is not visible, click Edit colors. This will bring Edit Colors window on the screen.

Step 3 – Now, pick up your desired color and with the help of the shades slider, decide your favorite shade. After selecting the color and the shade, click OK.
Step 4 – Next, locate the Tools section on the menu bar. Click the option Fill with color.

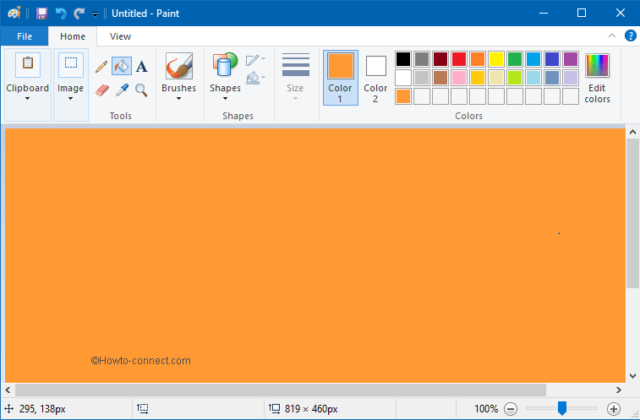
Step 5 – Moving ahead, make a single click on the canvas and this will immediately fill the entire canvas with the color that you have selected in Step 3.
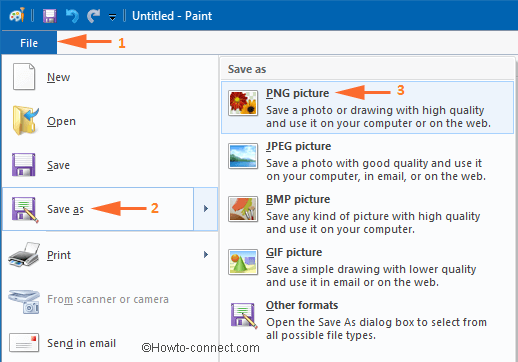
Step 6 – After successfully filling the canvas with one solid color, it’s time to save it. So, select File => Save as => PNG picture.
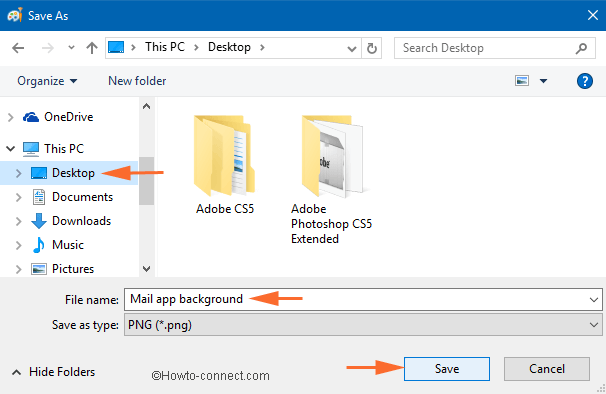
Step 7 – Save the image at your convenient location and give any name of your choice. Lastly, select Save button.
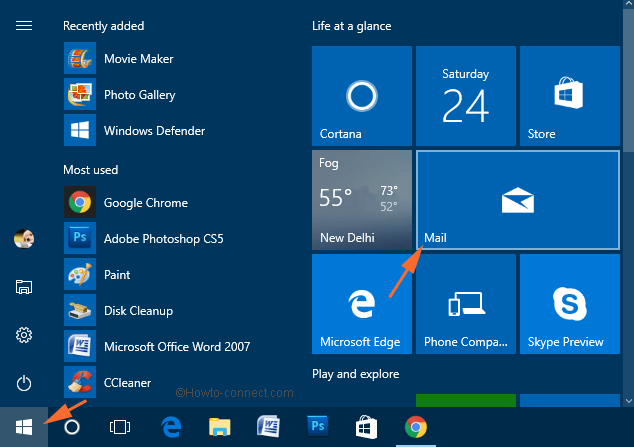
Step 8 – Now, click on Windows icon and select Mail app tile on the right-hand side.
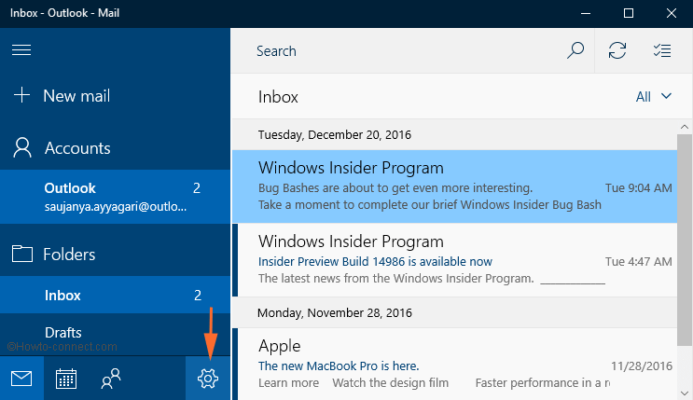
Step 9 – On the lower left side of the Mail app, few icons are present. Select Settings, the gear shaped one.
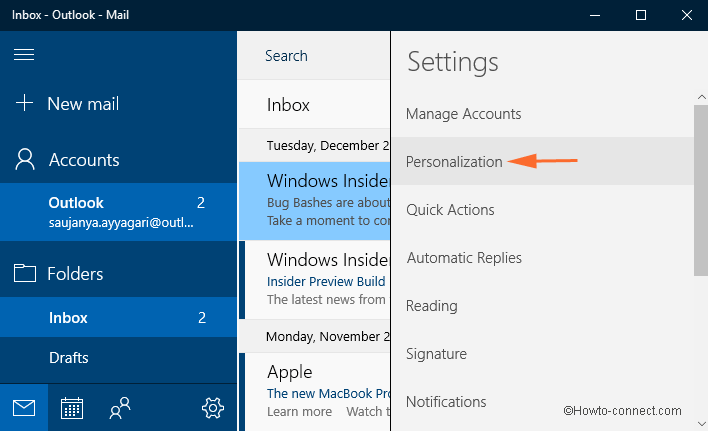
Step 10 – Moving ahead, select Personalization from the list of options that show up in the Settings pane.
Step 11 – Now, the Personalization pane will display a few sections. Navigate to the end of the pane and under Background section, select Browse.
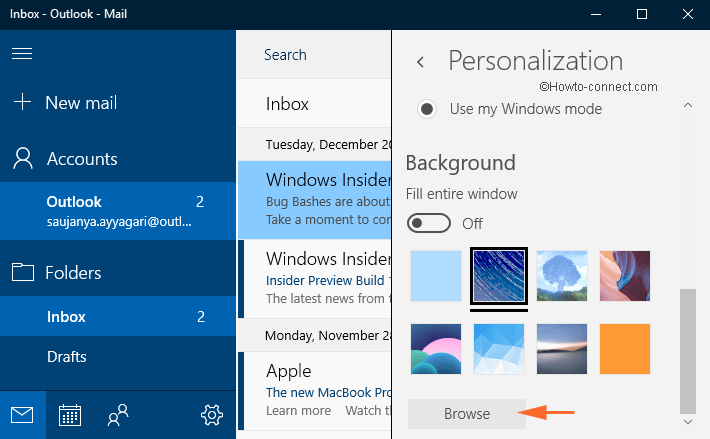
Step 12 – Next, go to the location where you have placed the image file you created with Paint. Select that particular PNG file and furthermore, click Open.
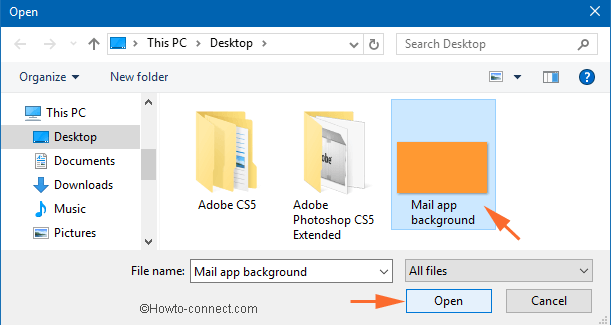
Step 13 – Finally, you are successful to Use Your Own Mail App Background Color in Windows 10.
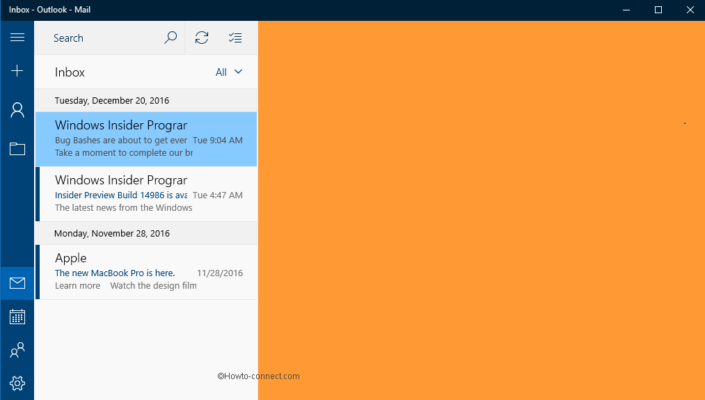
Remove Mail App Background Color or Image in Windows 10
The Mail app does not provide any option to remove your own color or image from the Personalization pane. The app converts the image file to .jpg (if the actual format is different) and stores it deep inside the C Drive.
Step 1 – To begin with, right-click Windows icon and select Run. On the Run box, copy and paste the below path and click OK.
%LocalAppData%\Packages\microsoft.windowscommunicationsapps_8wekyb3d8bbwe\LocalState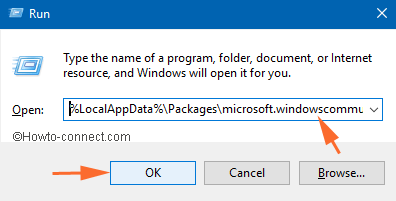
Step 2 – File Explorer will show up, locate a file with a name bg.jpg.
Step 3 – Select that particular image file and press Delete key. Make sure to close the Mail app before deleting the image.
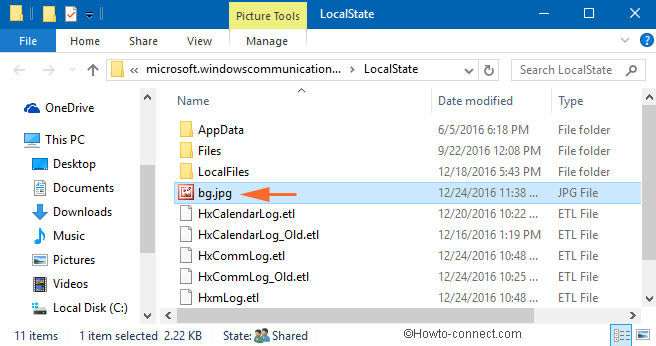
Step 4 – After removing the file, you will not find your own image thumbnail in the Personalization panel of the Mail app.
Conclusion
You all are aware that Windows 10 provides a wide range of customization options in all aspects of the operating system – including few Universal apps. One such app is Mail. However, it carried one small limitation of not providing an option to load a solid color for the app’s background. But, with little effort, you can now easily overcome this drawback and Use Your Own Mail App Background Color in Windows 10.