Before going to make any recording, it’s always a great initiative to Test Microphone in Windows 10. Mic being a hardware peripheral, used for wide range of works like making audio for a video, recording voice, podcasts, musical instruments, and more. Additionally, Speech recognition, as well as VOIP, demands it too. However, the first thing prior to proceeding to any of these, you need to test it. So, here, we will discuss the way to Test Microphone in Windows 10. Moreover, we will also try to cover up the basic troubleshooting tips of the same in case you face issues.
How to Test Microphone Windows 10
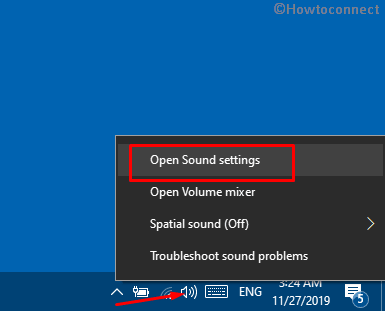
Step-1: After you set up a microphone on Windows 10, right click on the Speaker icon that resides in Notification area and select Open Sound Settings.
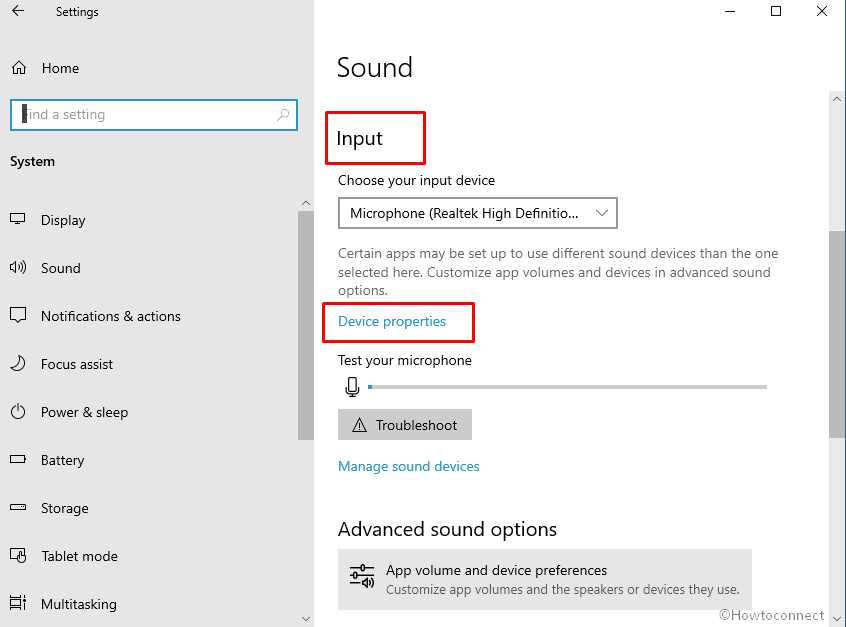
Step-2: Once Sound Settings page appear, go to the right side and find Input.
Step-3: Click on the Device properties link from this section.
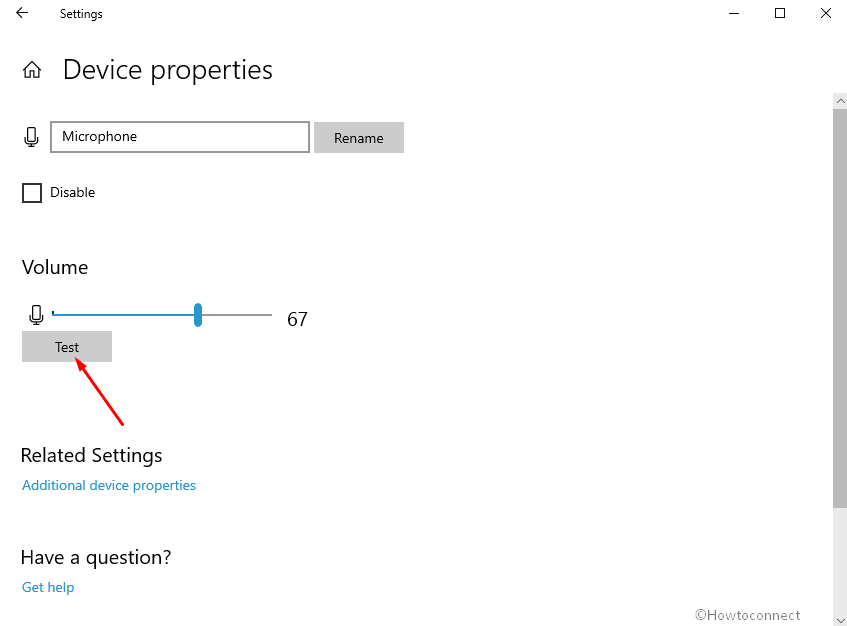
Step-4: Click on Test button.
Outdated –
Step-3: Select the name of the microphone that you have added and perform a click on the Properties button at the bottom (see screenshot).
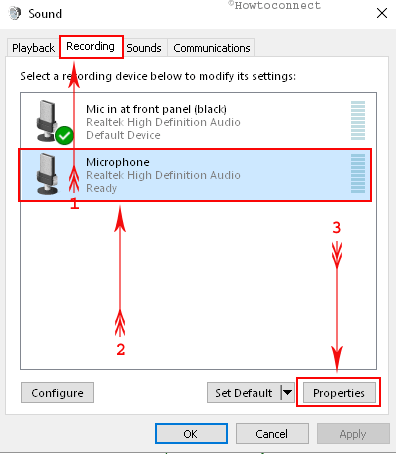
Step-4: Once the Microphone Properties popup appears, go to the Listen tab sharply.
Step-5: Here, checkmark the option Listen to this device as shown in the given snapshot.
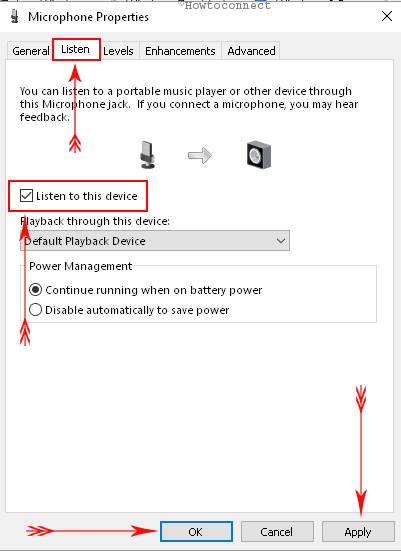
Step-6: Select Apply and then Ok to save the changes.
Step-7: Now Test Microphone in Windows 10. Speak out and listen to your voice from now on.
Once you finish testing the microphone and want to stop the test, follow the below-given steps.
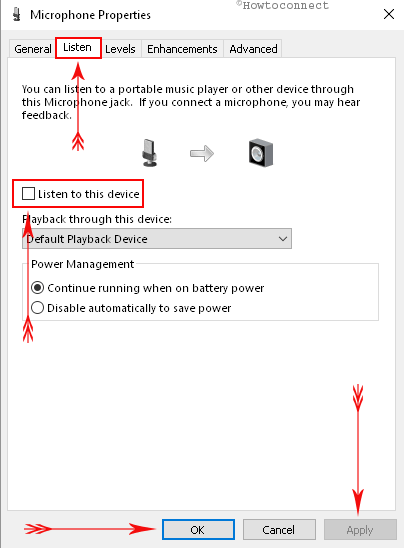
01. Go through the above guidelines up to step-4 and open the Listen tab.
02. Now, uncheck the option Listen to this device and hit Apply and then OK to stop the test.
Even after successful mic set up, some people find them in the dark as they face problems while recording sounds. If your Microphone is not a faulty one, this issue is rather easy to bypass using the following guidelines.
You may also like to read How to Set up Bluetooth and USB Speakers on Windows 10.
Resolve mic not working windows 10 Errors from Recording Device Settings
I. Take the cursor to the notification area in the Taskbar and perform a right click on the Volume icon. Select Sounds from the small menu that appears.
II. Shift to the Recording tab from the dialog and you will see a list of devices here.
III. Try speaking anything and see if the green bar is raised for any of the recording devices.
Note – Many a time, the green bar next to the Microphone raises but users still encountered issues while using a certain program. It means that the Microphone set up is perfect but there might be some issues with the application itself. In that case, you have to change the settings of the program.
On the contrary, if the green bar next to your Microphone doesn’t appear, follow the next guidelines to fix it.
- Stay on the Recording tab, and select Microphone.
- Once highlighted, move down and click “Set default” option as depicted in the image.
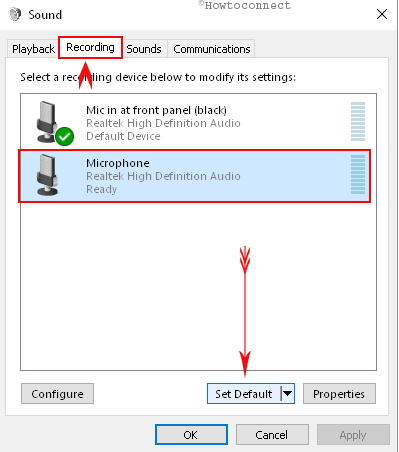
Now, check the green bar beside it again for raising up. If it happens, the problem is fixed already. Now, proceed forward to configure its settings.
A. Select the device representing Microphone and hit on Properties button at the bottom.
B. When the popup appears, shift to the Levels tab from here and set both of “Microphone” and “Microphone Boost” to the maximum.
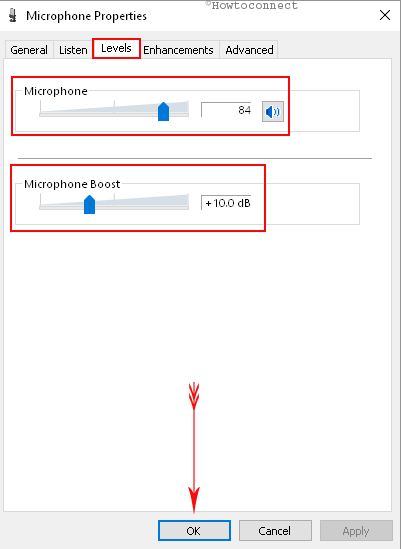
C. Select Ok at the bottom to continue.
D. Now open the Enhancement tab if available and deselect the option namely Disable all sound effects from here.
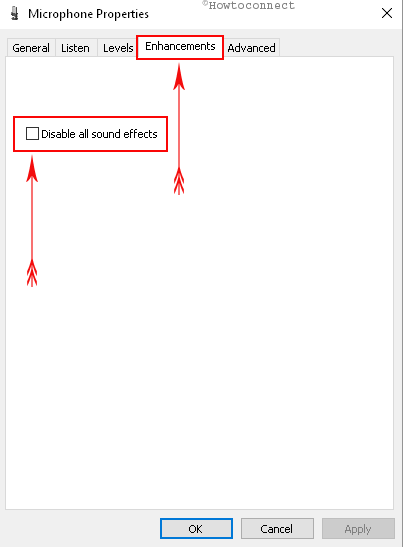
E. Proceed forward and go to the “Advanced” tab and unmark the box next to the option “Allow applications to take exclusive control of this device”.
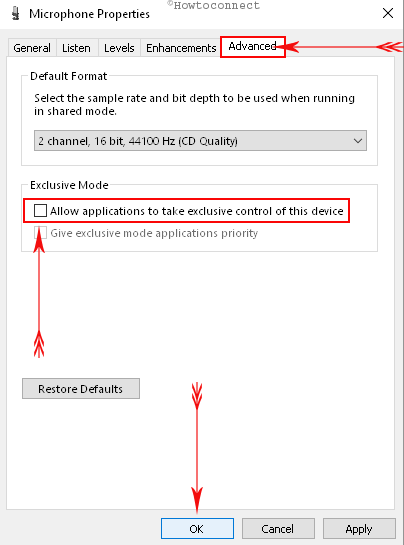
F. Also, uncheck “Enable audio enhancements” if available and select the Ok button to save these changes.
G. Head back to the Sounds Popup again and open the Communications tab.
H. Select the Do nothing option and perform a click on the Ok button.
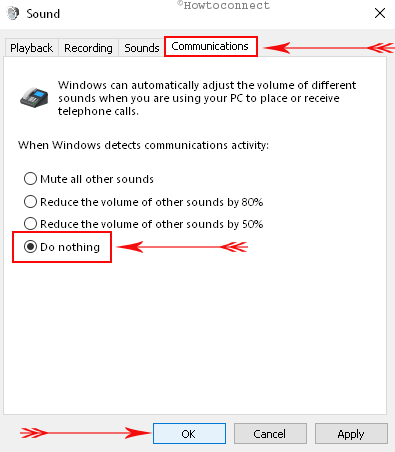
I. Restart Windows and check the raising of the green bar from Recording devices as shown above.
Note – If you don’t see the bar is raising, follow the same procedure for all the devices available here as there may be a probability that they couldn’t recognize your device properly.
That’s all about How to Test Microphone in Windows 10. Try making the good use of Microphone upon proper testing and troubleshooting if you come across any difficulties.
