Windows Defender Firewall is a built-in protection tool in Windows 11 that would block unsafe apps trying to connect internally or externally to internet. It is actually reasonably effective in keeping your system and networking security. By default, this functionality is enabled but you can disable Firewall in Windows 11 using several easygoing methods.
There might be times when you do not want the security to interfere with your work or game, or applications. In such cases, you might want to turn off Windows Defender Firewall in Windows 11. If you are a beginner and want procedures with the steps, you are at the right place.
Disable Firewall in Windows 11
Here is how to disable Firewall in Windows 11 –
Way-1: From Windows Security app
Here are the steps to enable or disable Firewall in Windows 11 easily.
- Click on the – Start.
- Next, click the gear cog.
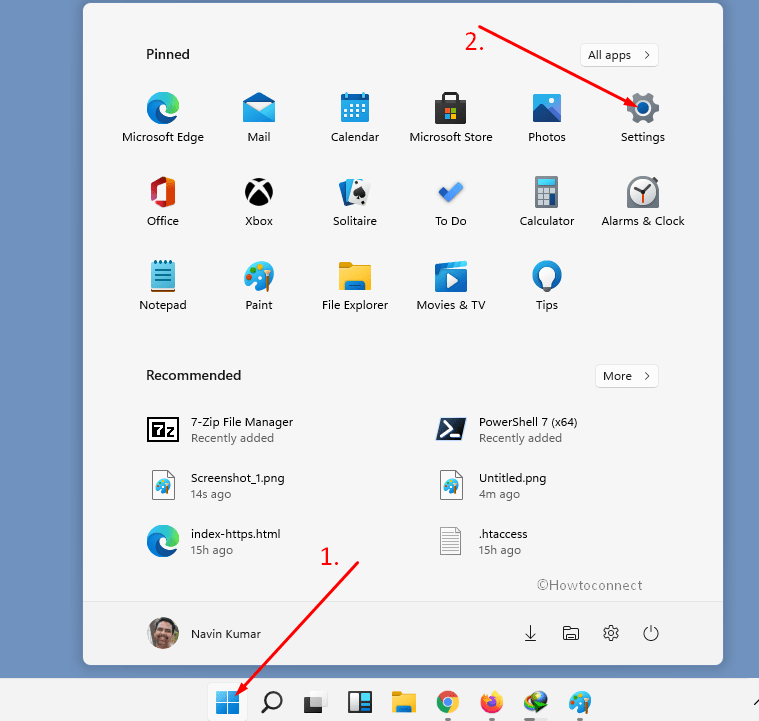
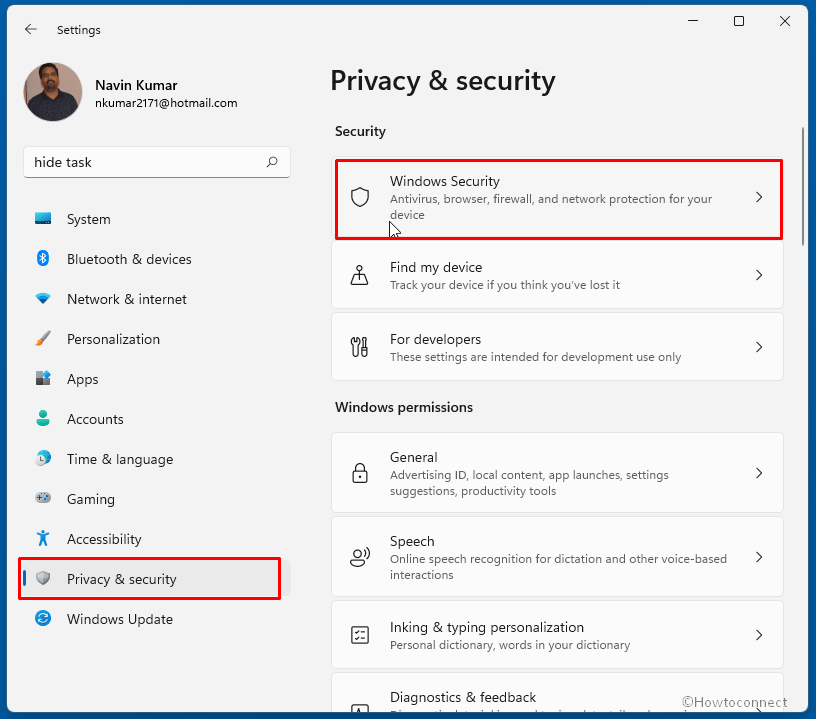
- This will open Windows Settings; select – Privacy & Security.
- On the next Settings page, select Windows Security located in the right pane.
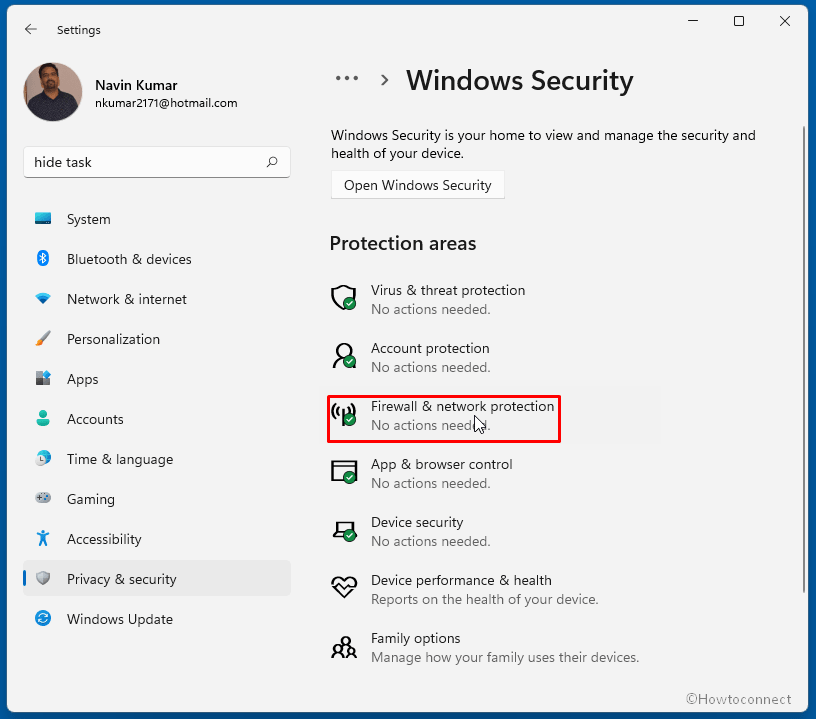
- Click on – Firewall & network protection.
- Now, Windows Security app appears, you’ll find here 3 networks – 1. Domain network, 2. Private network, and 3. Public network. In case, you are using a domain computer then the first one is for your use otherwise you need to disable firewall for the later two instead.
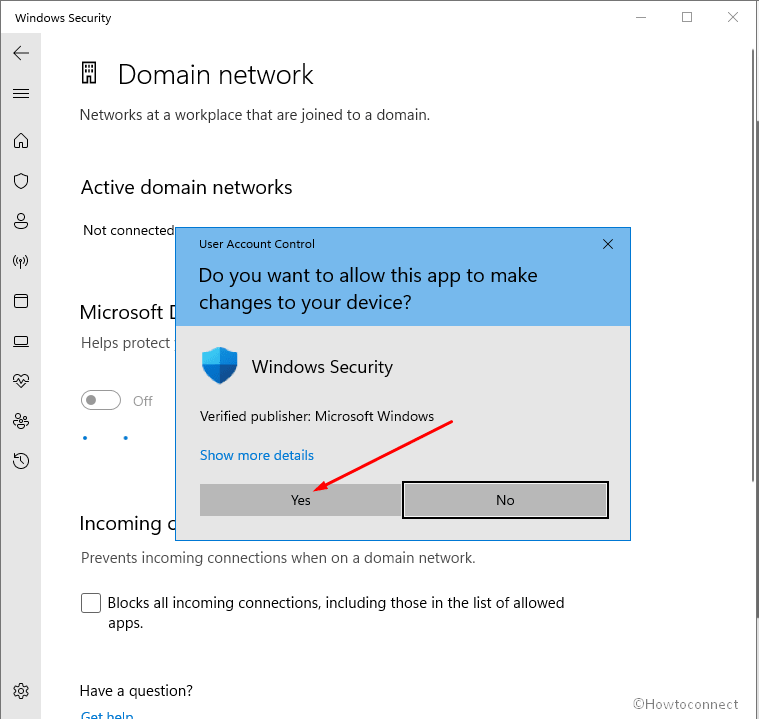
- So, select Domain network link first.

- Click on the toggle switch under Microsoft Defender Firewall.
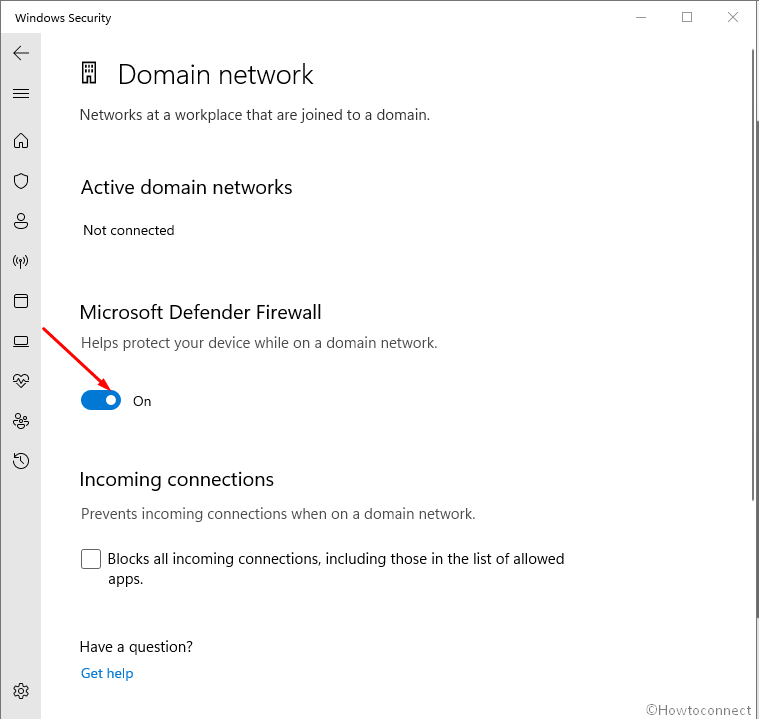
- When User account confirmation pop-up prompts, select – Yes.
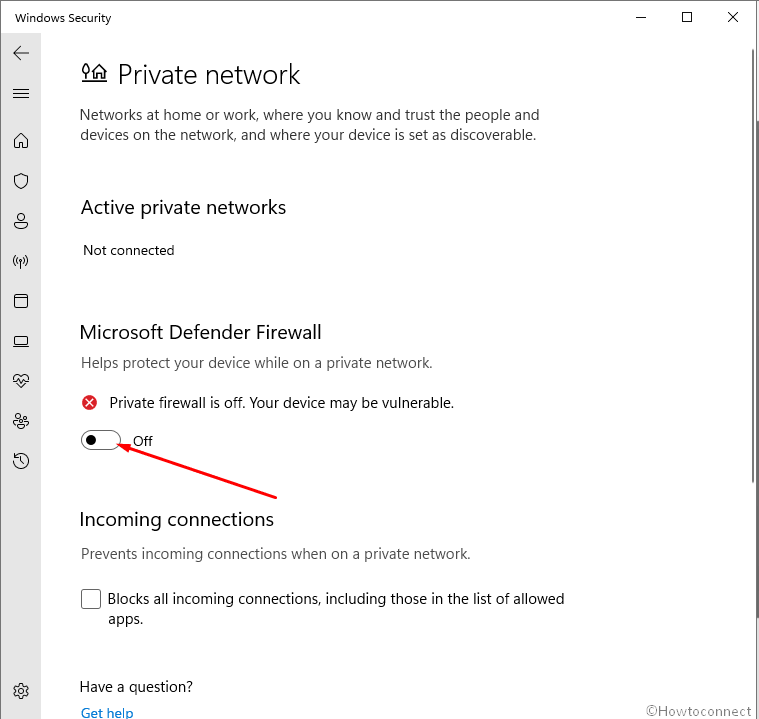
- Come back to Firewall & network protection page again and click on – Private network.
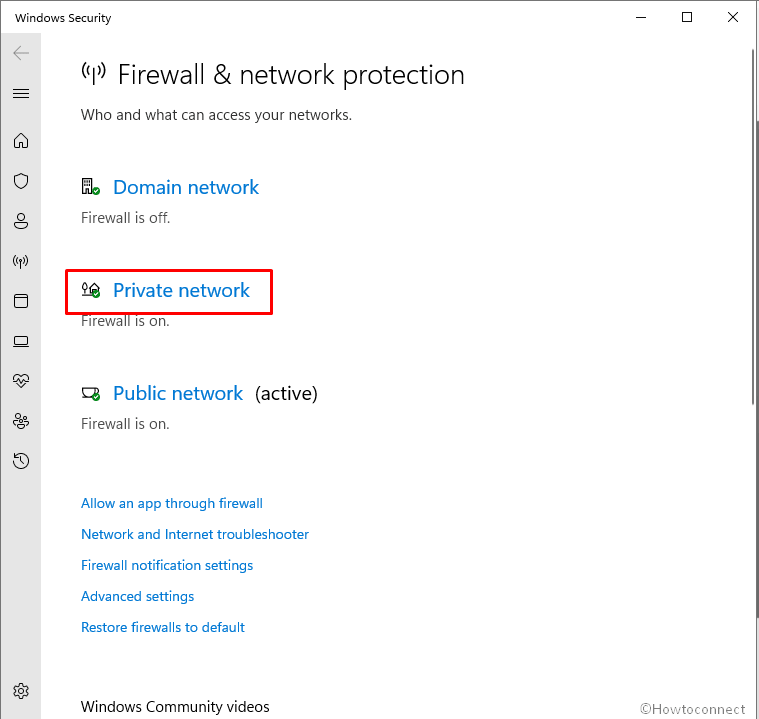
- Turn off the Firewall again.
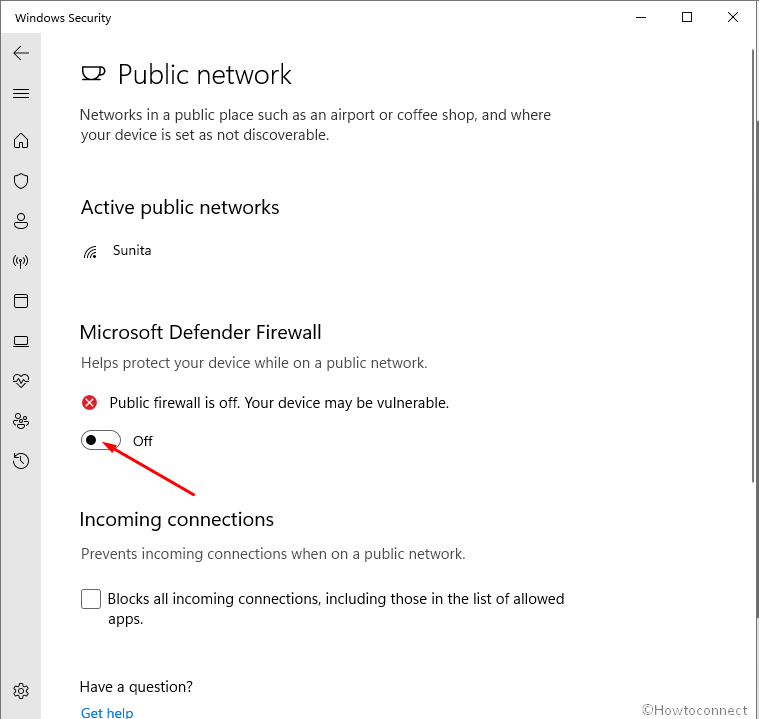
- In the same way, go to the Public network page and disable firewall for this.
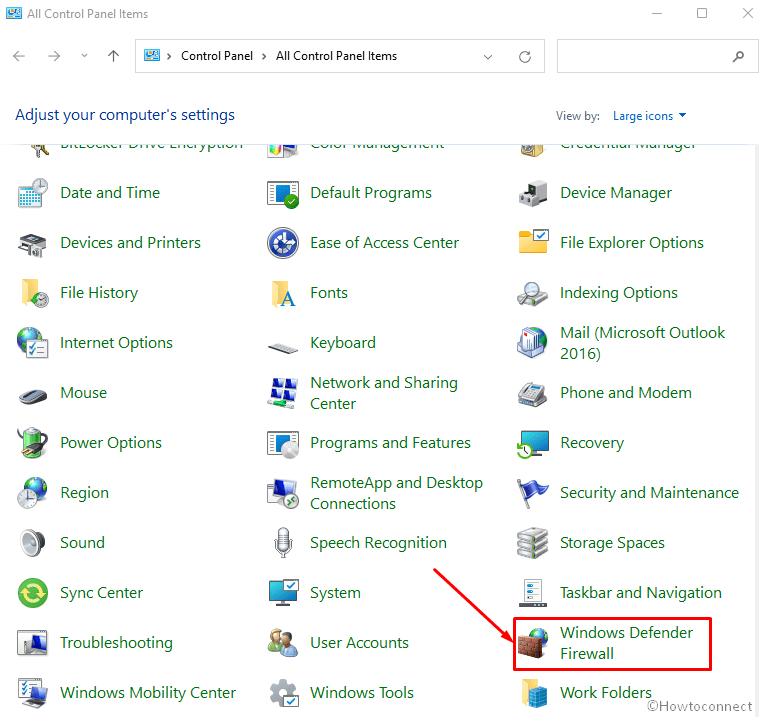
Way-2: Via Control panel
- Press the – Winkey.
- Type – control.
- Hit – Enter.
- When Control panel is up, click – Windows Defender Firewall.
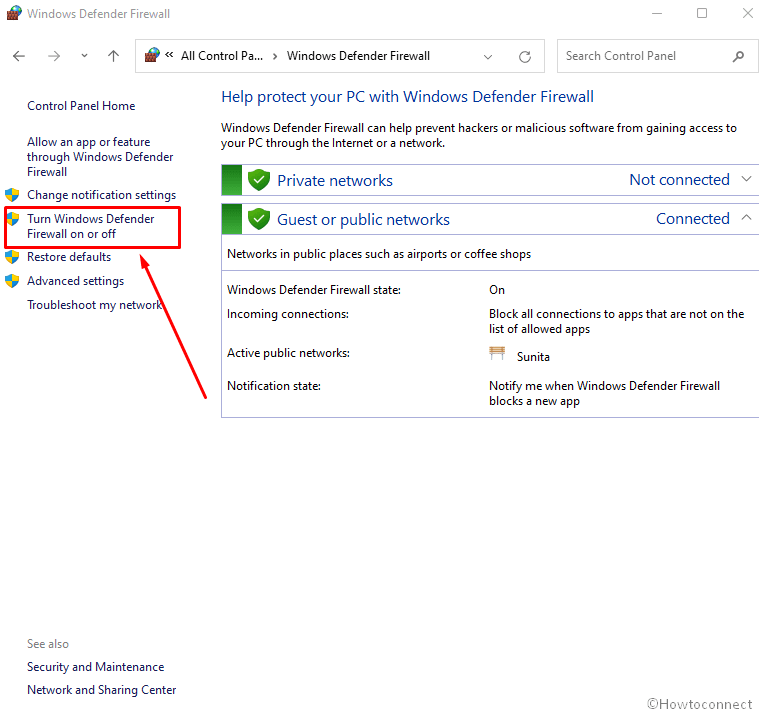
- On the next Windows, select – Turn Windows Defender Firewall on or off link located in the left pane.
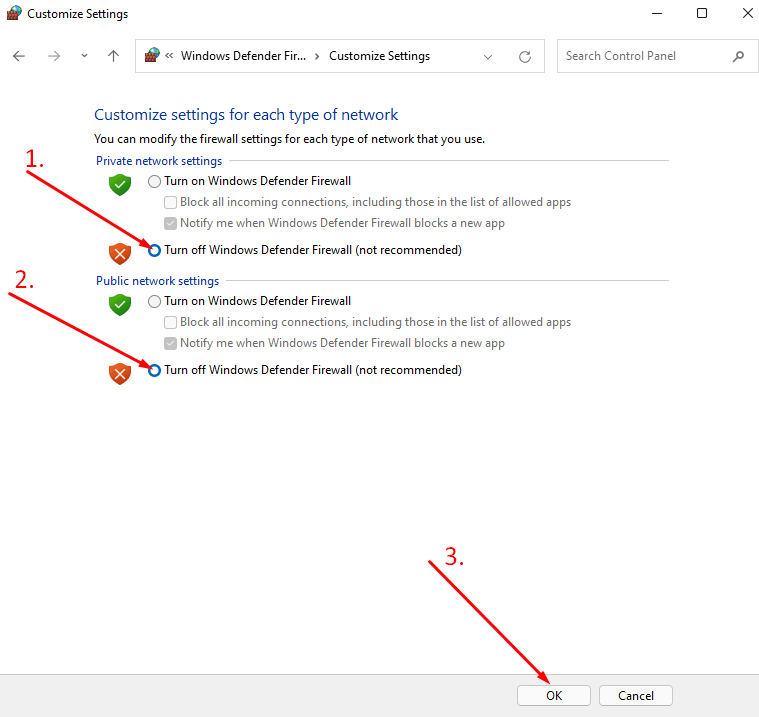
- Check the option – Turn off Windows Defender Firewall (not recommended) in the Private network settings and Public network settings sections.
- Click – OK.
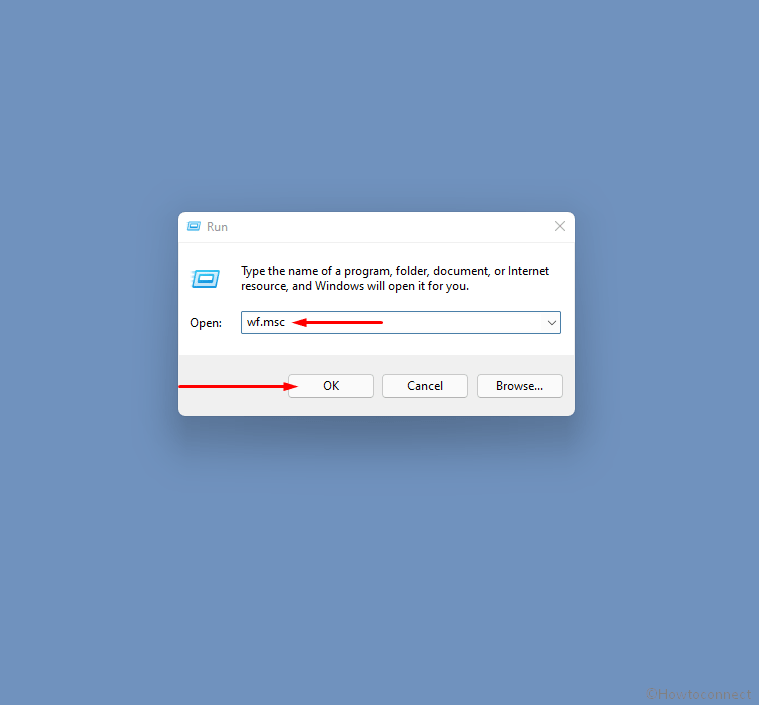
Way-3: Through Windows Defender Firewall With Advanced Security (wf.msc)
- Press – Winkey+R.
- Type in wf.msc.
- Hit the – Enter or click – OK.
- Windows Defender Firewall With Advanced Security will be launched. Make sure that Windows Defender Firewall With Advanced Security on Local Computer is selected.
- Go to the – Action pane.
- Click – Properties.
- The wizard that appears shows Domain profile by default.
- In the State section, click on the dropdown for Firewall state.
- Choose – Off.
- Click on – Apply.

- Now, select the Private Profile tab.
- Here also, click on the drop-down against “Firewall state” and select “Off”.
- Click “Apply”.
- At last, go to the Public Profile tab.
- Turn off the ‘Firewall state’ in a similar way.
Way-4: Disable Firewall cmd
To disable security features from Command Prompt, here are the steps:
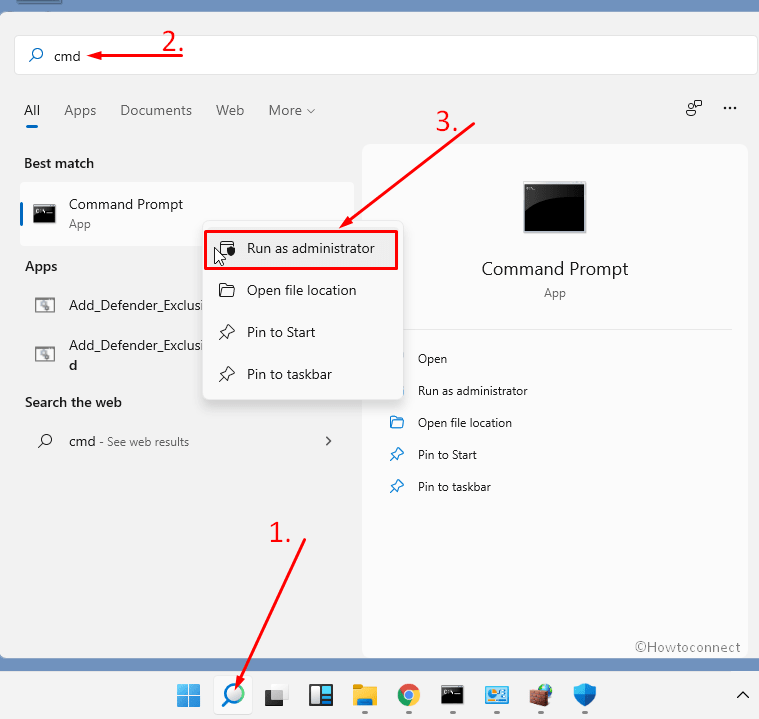
- Click the – Search from taskbar.
- Type in – cmd.
- Right-click on Command prompt that appears under Best match.
- Hit – Run as administrator. Alternatively, you can see the methods here – 13 Ways to open Command Prompt as administrator in Windows 11.
- Once the elevated command prompt opens up, type or copy-paste the following commands and hit Enter –
- Disable Firewall in Windows 11 using cmd command –
netsh advfirewall set allprofiles state off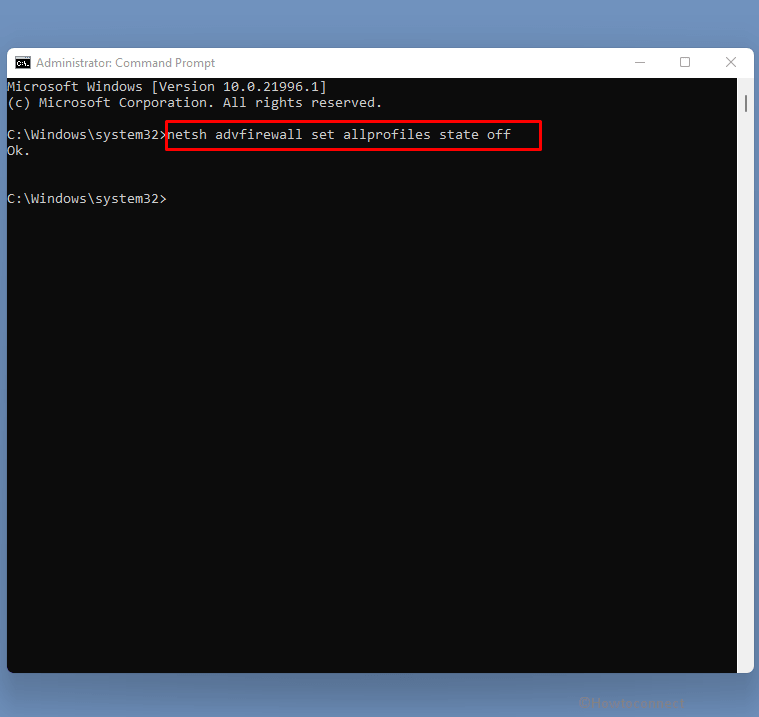
- If you come across a Windows Security Alert window; click on Allow access.
- After turning off you will get a notification for the same.
- Re-enable Firewall in Windows 11 through cmd command –
netsh advfirewall set allprofiles state on- Disable Firewall for current user profile in Windows 11 –
netsh advfirewall set currentprofile state off- Enable firewall in Windows 11 for current user –
netsh advfirewall set currentprofile state on- Disable within Domain Network –
netsh advfirewall set domainprofile state off- Re-enable Firewall within Domain Network –
netsh advfirewall set domainprofile state on- Disable within Private Network –
netsh advfirewall set privateprofile state off- Enable within Private Network –
netsh advfirewall set privateprofile state on- For Public Network (disable)
netsh advfirewall set publicprofile state off- For public network (enable)
netsh advfirewall set publicprofile state onYou can see here as a reference – Disable Windows Firewall via Command on Windows 10.
Way-5: By Registry Editor (Regedit.exe)
If you aren’t able to access Windows Firewall settings anyhow you can use Registry Editor to disable Firewall using the following steps –
- Click the Windows Search from taskbar.
- Type in – regedit.exe.
- Press – Enter.
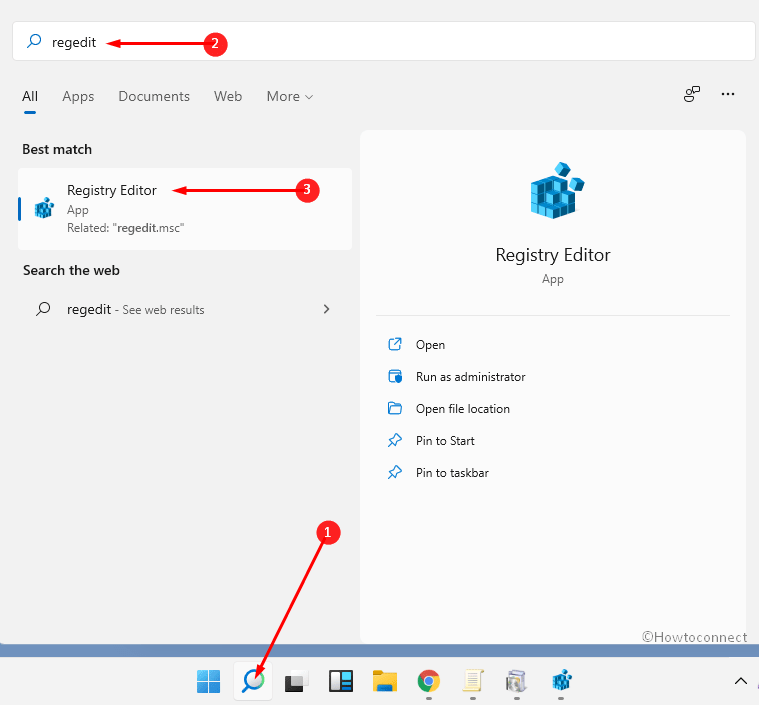
- When UAC dialog box shows up, click – Yes.
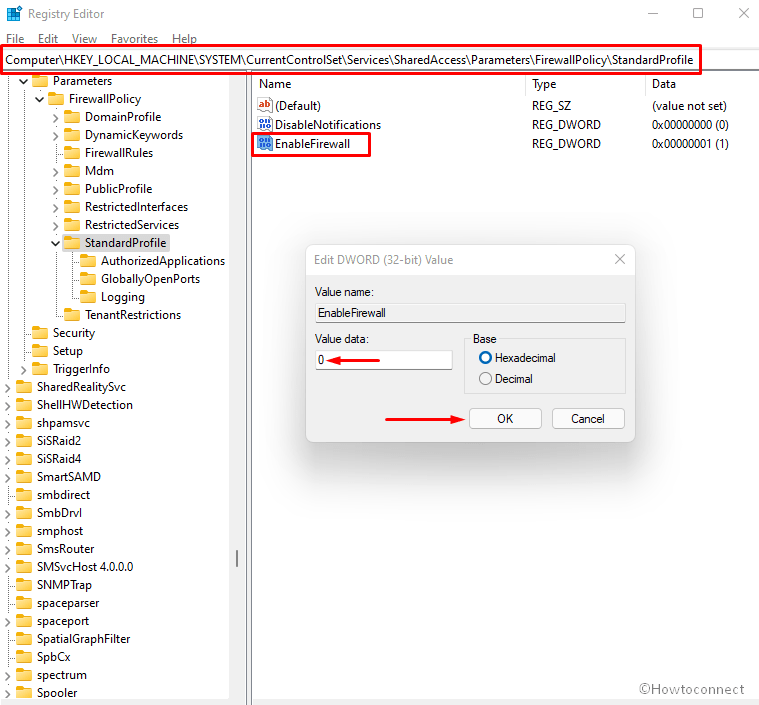
- Copy the below-written string –
Computer\HKEY_LOCAL_MACHINE\SYSTEM\CurrentControlSet\Services\SharedAccess\Parameters\FirewallPolicy\StandardProfile- Paste into the address bar of the Registry Editor and hit the Enter key.
- Go to the right pane and find an entry named – EnableFirewall.
- Double click on this value and set Value data 0 to disable the firewall. Click OK.
- If you have domain environment, then copy the following path –
Computer\HKEY_LOCAL_MACHINE\SYSTEM\CurrentControlSet\Services\SharedAccess\Parameters\FirewallPolicy\DomainProfile- Here, also open the DWORD value “EnableFirewall” by double-clicking and change the data to 0.
- Press Enter and exit the Registry Editor.
- Finally, restart your computer to see the effect of modifications.
Methods list:
Way-1: From Windows Security app
Way-2: Via Control panel
Way-3: Through Windows Defender Firewall With Advanced Security (wf.msc)
Way-4: Disable Firewall cmd
Way-5: By Registry Editor (Regedit.exe)
That’s all!!