To take Screenshots is one of the major things and a part of everyday work, therefore, to Pin Snipping Tool to Start and Taskbar in Windows 10 is a great idea. Multiple methods let complete this task such as using Search, Through Desktop Shortcut and more.
Snipping Tool, a Windows accessory, is the most remarkable inbuilt program for quickly capturing screenshots on Windows 10. Microsoft has made significant improvements in this utility for the latest OS version. Let’s see the methods –
1. Using Start menu
2. Via Search
3. Through Desktop Shortcut
The easiest ways to Pin Snipping Tool to Start Taskbar in Windows 10
Here is how to Pin Snipping Tool to Start Taskbar in Windows 10 –
Way-1: Using Start menu
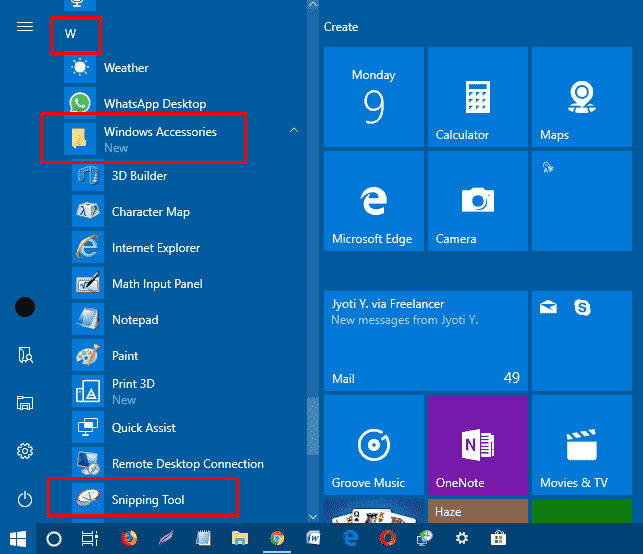
Press Start button and then locate Windows Accessory in the W alphabetical section. Click on the same expand it, locate Snipping tool.
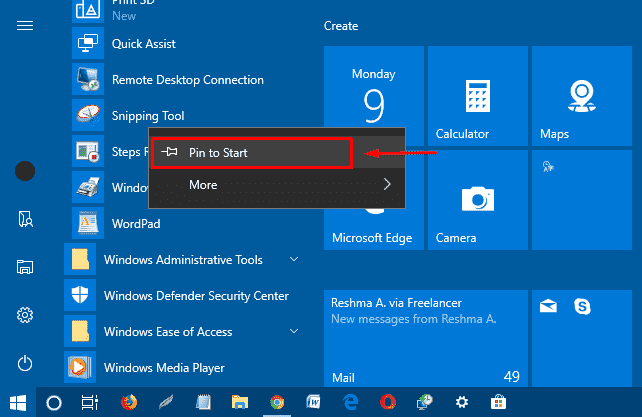
Make a right click on the Snipping Tool option and select Pin to Start.
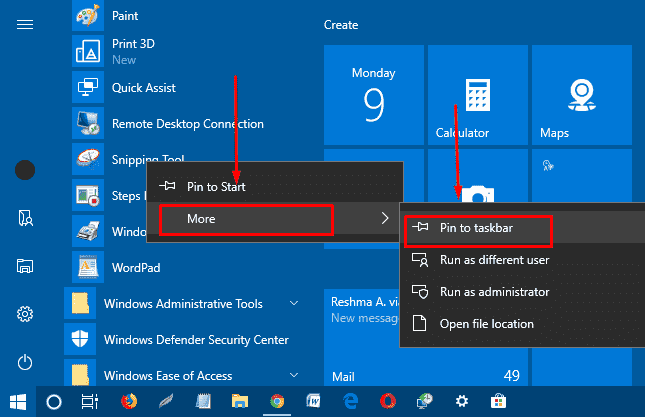
Again right click on “Snipping tool”, hover on More and then choose Pin to Taskbar.
Way-2: Via Search
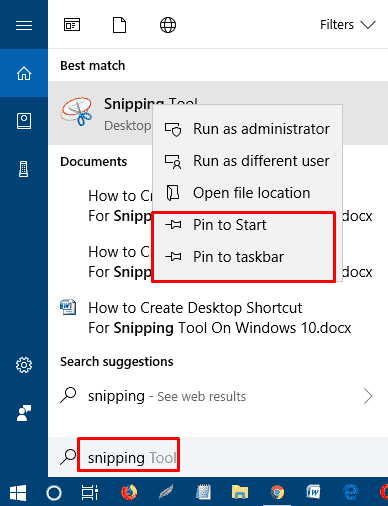
Press the Taskbar search and type snipping.
Perform a right click on the result and select ‘Pin to Start’ and ‘Pin to taskbar’ one after another.
Way-3: Through Desktop Shortcut
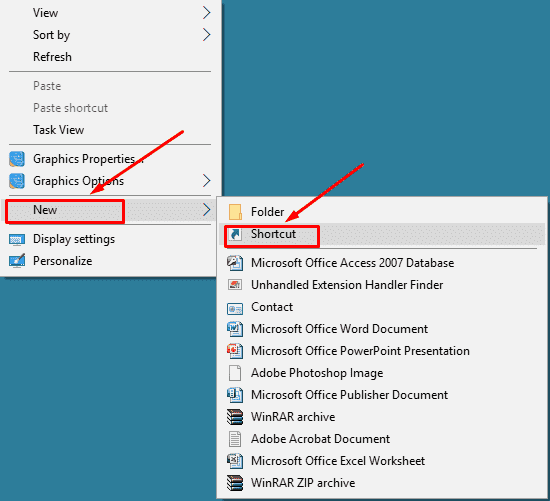
Step-1: Make a right click on blank space anywhere on the desktop.
Step-2: Select “New” option followed by “Shortcut” moving to sub-menu.
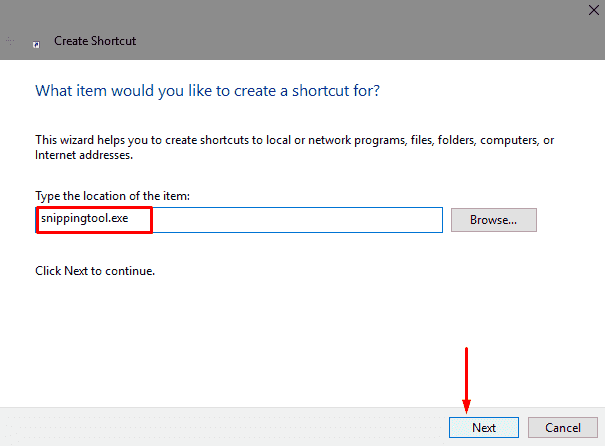
Step-3: Paste snippingtool.exe in the space under “Type the location of the item” and do a click on Next.
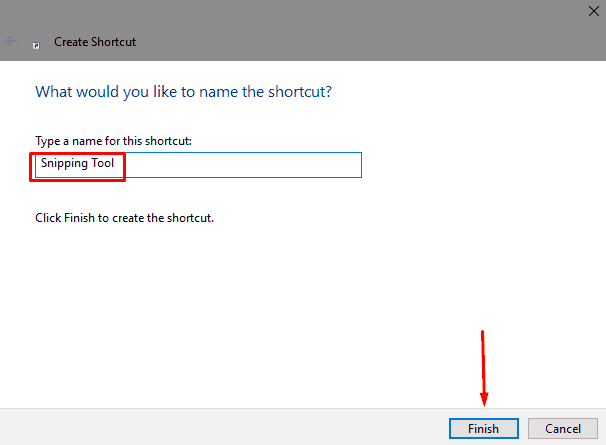
Step-4: When the next window appears, rename the shortcut below “Type a name for this shortcut” if you want and select “Finish”.
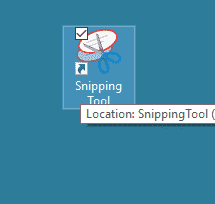
Now you will notice the Snipping tool shortcut on your desktop. For making it more accessible you can pin it to Start menu as well as Taskbar.
Pin to Start menu
Perform a right click on the Snipping tool desktop shortcut you have just created and choose “Pin to Start” from the context menu.
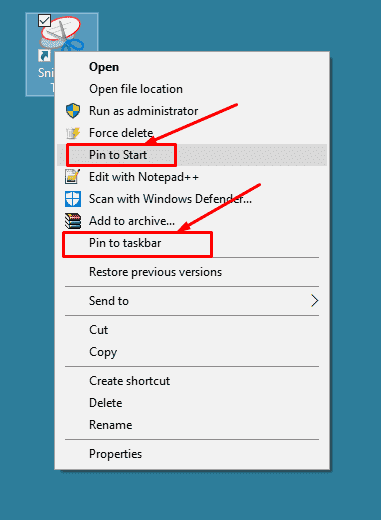
Pin to Taskbar
Make a right click on the same Snipping tool desktop shortcut and pick “Pin to taskbar”.
In a moment, you will see the snipping tool is pinned in the Taskbar.
That’s it. For further use, just make a click from anywhere to take screenshots. Isn’t it so simple!