Windows 11 has a bigger list of minimum system requirements particularly for hardware which your computer may be unable to compete with. When you try to install Windows 11 Secure Boot and TPM requirements may prevent and fail the process. In this case, PC Health Checkup program also confirms this issue and shows an error This PC can’t run Windows 11.
However, you can install Windows 11 without TPM and Secure Boot with a small registry tweak. Microsoft itself has explained a method to do this. This way you can avoid the error appearing during the installation such as “Windows 11 cannot be run on this PC”.
Install Windows 11 without TPM and Secure Boot
Here is how to install Windows 11 without TPM and Secure Boot –
- First of all, create a reg file and copy this to a USB stick. For this,
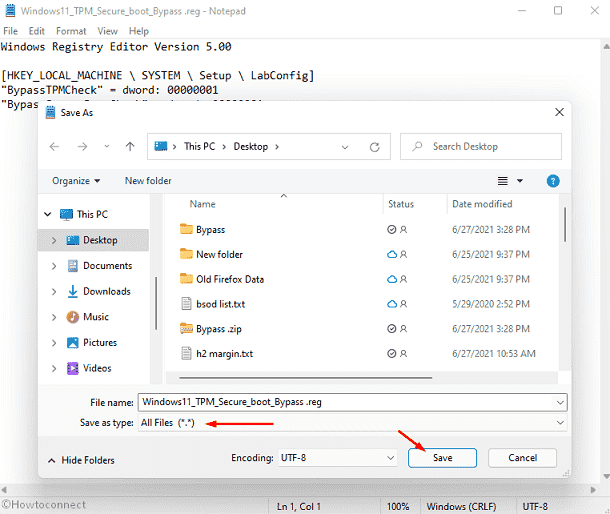
- Right-click on the desktop and select – New => Text document.
- Copy the following content –
Windows Registry Editor Version 5.00
[HKEY_LOCAL_MACHINE \ SYSTEM \ Setup \ LabConfig]

"BypassTPMCheck" = dword: 00000001

"BypassSecureBootCheck" = dword: 00000001
- Paste into the document.
- Select – File => Save as.
- Name the file something with .reg extention(remove .txt).
- Click – Save.

- Alternatively, you can simply download Windows11_TPM_Secure_boot_Bypass.zip file to Install Windows 11 without TPM and Secure Boot. You will have to extract the zip before pasting it to the USB.
- Copy this file to a USB stick.
- Insert the stick into the port.
Microsoft recommended registry modification –
Download this .reg file also and copy it to the USB flash drive – Bypass.zip
Microsoft strongly suggests not installing Windows 11 on a device that does not fulfill the Windows 11 system requirements. However, acknowledging the risks, you are able to create the following registry key values to install Windows 11 without TPM and Secure Boot. This modification will help the system bypass the checking. The Registry change is as follow –
Registry Key: HKEY_LOCAL_MACHINE\SYSTEM\Setup\MoSetup
Name: AllowUpgradesWithUnsupportedTPMOrCPU
Type: REG_DWORD
Value: 1
Source – Microsoft Support.
Install the new version
- Go to Windows 11 download page.
- Click on Download now from Create Windows 11 Installation Media section.
- Double click on MediaCreationToolW11.exe.
- On Windows 11 Setup, select – Accept.
- Click – Next.
- Insert a USB (at least 8 GB) in the laptop’s port and check the option USB flash drive.
- Select – Next.
- After the media is created you will see – Your USB flash drive is ready.
- Click on – Finish.
- Restart the PC and press Esc (depending on manufacturer) when the machine is turning on.
- From Boot device options, select the USB Flash drive.
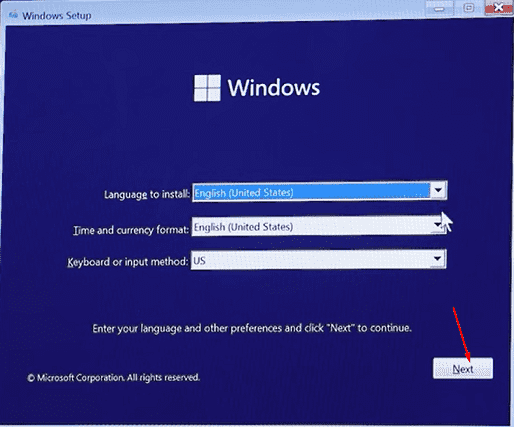
- Now, on Windows 11 installation file and choose the Language and click “Next”.

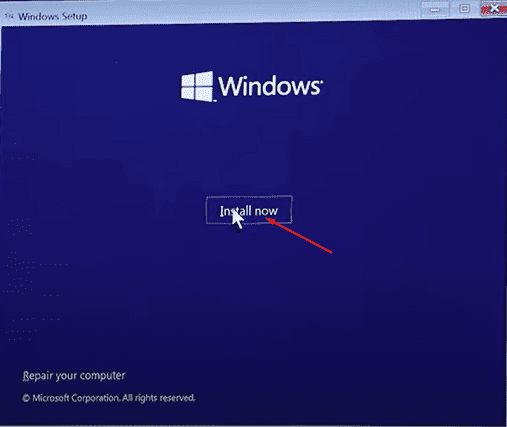
- Click – Install Now.

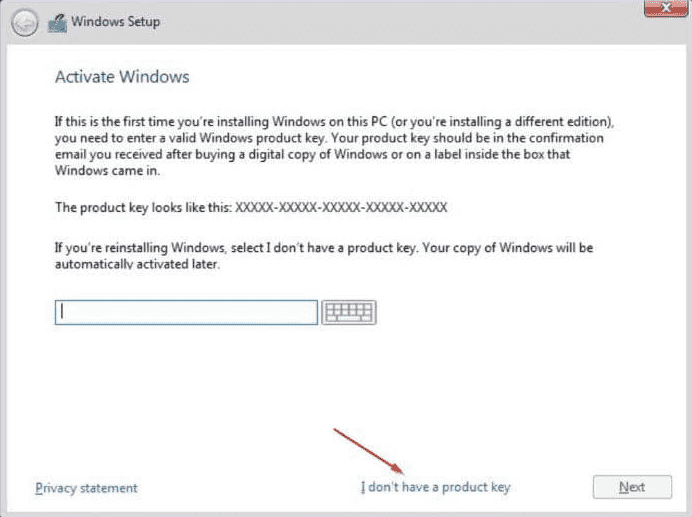
- On the next window, select – “I do not have a product key”.

- Choose the version you are going to install.
- Click – Next.
- If you come across an error message stating that Windows 11 cannot be installed on this device you need to use the reg file. You may also notice “Windows 11 cannot be run on this PC”. Now, you return back to the version selection.
- Press the – Shift key + F10.
- When the command prompt opens, type notepad.exe and press – Enter.
- On the notepad, click File => Open.
- In the open window, switch to “All files” under file type and locate the USB stick.
- Once you have found the reg file, right-click and select – Merge.
- Do the same with both .reg files.
- Click Yes on the confirmation dialog.
- The command prompt and Notepad window will now be closed.
- On the Windows 11 Setup version selection, again click – Next.
- Check the box of license terms and install Windows 11 as usual.
Install Windows 11 without TPM and Secure Boot Using Rufus
If the above methods don’t work Rufus 3.19 Beta has added an option to bypass TPM and Secure Boot when installing Windows 11. This is an Image option named Extended Windows 11 installation (no TPM / no Secure Boot). Using this you can easily install Windows 11 without TPM and Secure Boot. Here are the steps –
- Go to the Windows 11 ISO on the Desktop from the link available in the previous method.
- Click on Download now located under “Create Windows 11 Installation Media”.
- Run the .exe file for the Media creation tool.
- Select Accept on Applicable notices and notices terms window.
- Select Language and Edition and click on Next.
- Check the option ISO file and select ‘Next’.
- Select a path to save the ISO file. Click on Save.
- Once the Windows.iso file is completely saved.
- Open Rufus and select Device and Boot selection.
- Click Image option drop-down.
- Select – Extended Windows 11 installation (no TPM / no Secure Boot).
- Click on Start.
- Now follow the previous method to complete the installation process.
See – How to create Windows 11 bootable USB (Simple methods)
That’s all!!
