Do you know to Edit IP Settings for Network Connection in Windows 10 directly through Settings application? The Network & Internet category of the Settings application adds up a new option IP settings for the same. You can assign the Internet Protocol for a wireless or ethernet connection either Automatic (DHCP) or Manual from this section.
Automatic (DHCP) is suggested to use as it easily manages the IP settings. In case, your network supports DHCP, then by default, it automatically assigns IP addresses to the PCs on your network. The Benefit of this setting is that you become free from editing IP address time and again.
Follow Fix DHCP Not Enabled in Windows 10 if you encounter the error message on your PC.
In contrast, choosing Manual requires you to manually Edit IP Settings for Network Connection in Windows 10.
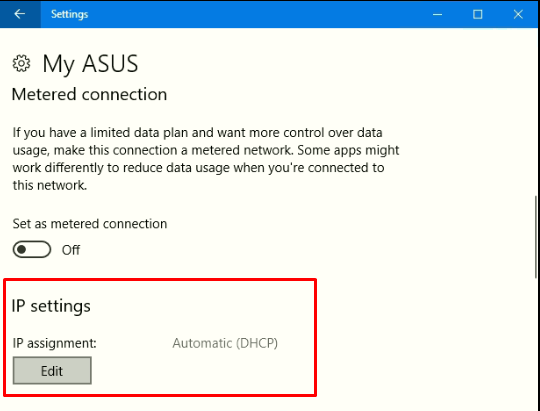
But to avail this Edit IP settings option in Settings application, you need to have build 16226 or higher running on your computer.
Edit IP Settings for Network Connection in Windows 10
Step 1 – To Edit IP Settings for Network Connection in Windows 10 launch Settings application. To do so, first open Start Menu and then select the Settings option.
Step 2 – Click Network & Internet option on the home screen of Settings application.
You may like to read How to View Network Status in Windows 10.
Step 3 – Now depending upon what connection (WiFi or Ethernet) you are using click that on the left sidebar. As we are using WiFi, the steps and screenshots are of the same.
See How to Show and Hide WiFi Networks in Windows 10 to learn more.
Step 4 – Moving ahead, on the right pane, you will find the WiFi name you are connected to, click on it.
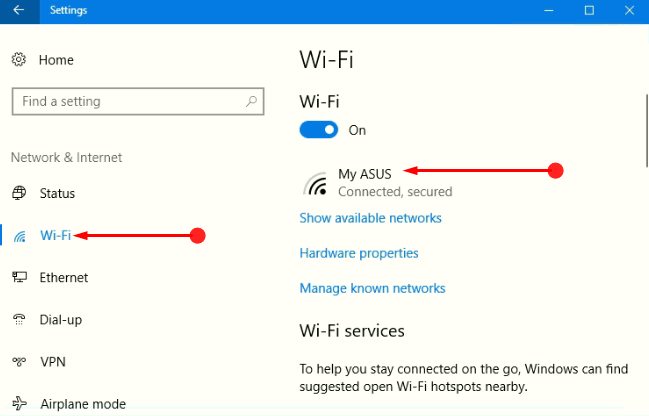
Step 5 – In the following page, you will notice a heading namely IP settings. So, click on the Edit button that appears below IP settings as shown in the below image.
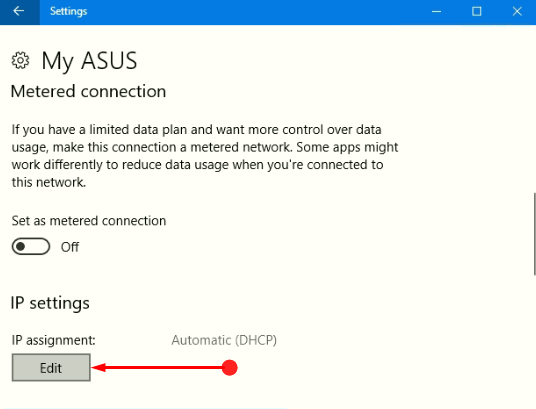
Step 6 – Select the drop down of Edit IP settings and you will see two options – Automatic (DHCP) and Manual.

The below section illustrates both the options and based on your requirement, choose anyone.
Automatic (DHCP)
Step 1 – Select Automatic (DHCP) and click Save button.

The function of Automatic (DHCP) is very simple to understand. It is a server that enables your computer to request IP addresses along with network parameters automatically.
When you are not sure about the IP address, it is best to Edit IP Settings for Network Connection in Windows 10 and set it as Automatic (DHCP). This will immediately take help from the DHCP server and in future, there will be no need of configuring it while traveling.
Manual
Step 1 – Click the drop down of Edit IP settings and select Manual, the second option.
Step 2 – The above action will display two more toggles – IPv4 and IPv6. So, to Edit IP Settings for Network Connection in Windows 10, first turn ON IPv4.
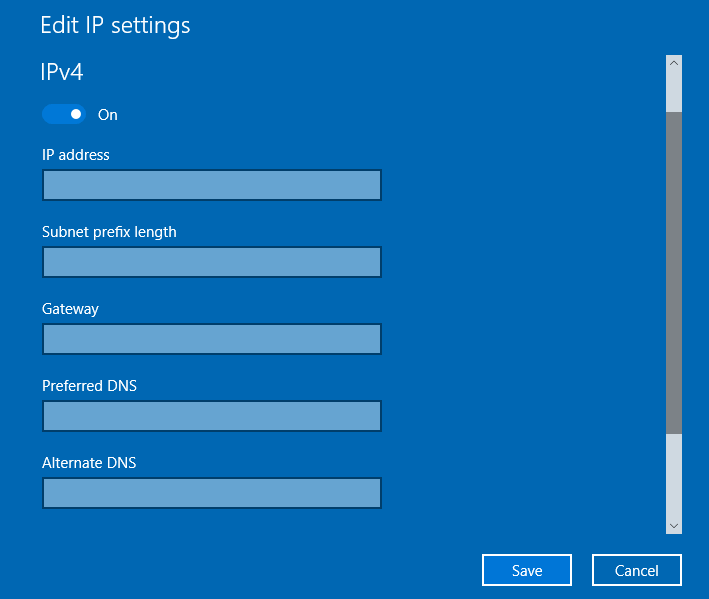
Step 3 – This will display all the necessary fields such as IP address, Gateway, Preferred DNS and so on. Carefully enter the numbers in the respective fields. Finally, click Save button to implement the changes you made for IPv4.
For reference, you can also follow Fix: Default Gateway Not Working in Windows 10 in case you see any problems.
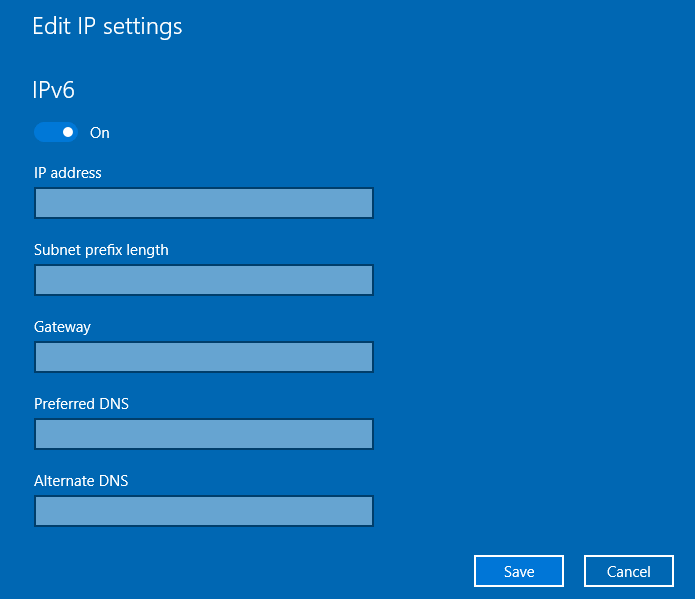
Step 4 – Now, toggle ON the switch of IPv6 and then fill up the details on the respective fields. Lastly, to successfully Edit IP Settings for Network Connection in Windows 10, click Save button.
Conclusion
Completing the above steps will help you to Edit IP Settings for Network Connection in Windows 10 perfectly. Well, to configure Network Connection through Settings application is easier and simpler when compared to the previous method. With this development, you can edit the IP settings from single interface only. Give an attempt to this feature of IP settings and let us know how it works.
