0x8024B102 is the error code that appears when trying to install a Windows update. Commonly, updating process fails and system reverts back to the previous version when this issue occurs. This annoying problem might happen in Windows 11 or 10 and show you the screen “We couldn’t complete the updates. Undoing changes”.
Windows update error 0x8024B102 mostly appears due to the presence of third-party antivirus programs and Corrupted database cache. Furthermore, conflicts between software, broken system files, and blocking Firewall app may also cause this issue to occur.
Windows update Error 0x8024B102
Here is how to fix Windows update Error 0x8024B102 –
Way-1: Update the patch manually
Windows update installation process is however automatic but the mandatory condition is your system must be connected to a stable network. This is not possible for every user to have internet access 24/7 so any alternative method is preferable. Thankfully, Microsoft update catalog hosts all the files of patches and allows downloading any time according to your convenience. Therefore, follow the instructions to download and install the Windows update manually –
- Before downloading you will have to know the KB number of the update. So, click on the Search icon from taskbar.
- Type – update history.
- Press – Enter.
- When the Settings page appears, note down the KB number causing the error.
- Navigate to the official website of Microsoft Update Catalog by clicking this link.
- Next, click the search bar and type the patch ID (KB….) you have noted.
- Press – Enter.
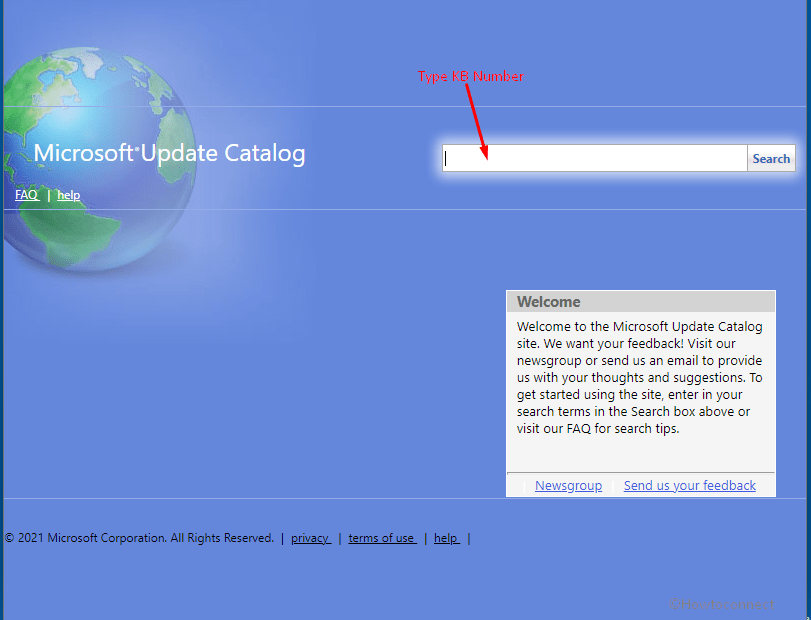
- Find the accurate file that suits your computer and click on the – Download.
- Click on the link located on the prompted page.
- Once the .MSU file is downloaded, double click on it and select Yes on UAC dialog.
- Follow the onscreen instructions until the update is installed.
See – How to Download and Install Update from Microsoft update catalog on Windows 11/10.
Way-2: Run Windows Update troubleshooter
Windows offers built-in utility to diagnose and repair issues in almost all components and says them, Troubleshooter. Whether you are getting problems with Internet connection, Power, Program compatibility, Store apps or other a tool is available for every issue to help you. In case of error code 0x8024B102, Windows update troubleshooter should work perfectly to fix the headache. Most of all the this is an easy to use Fixit tool so simply follow a few steps –
For Windows 10 –
- Press the Windows + I keys.
- Settings app will open automatically; click on Update & security.
- Select – Troubleshooting from the left pane.
- Go to the right and click on Additional Troubleshooter.
- From the list on the next look for Windows update.
- Click – Run the Troubleshooter.
- The tool will detect the problem if any and will either automatically fix it or suggest you do take measures.
For Windows 11 –
- Click – Start.
- Type – Settings and press Enter.
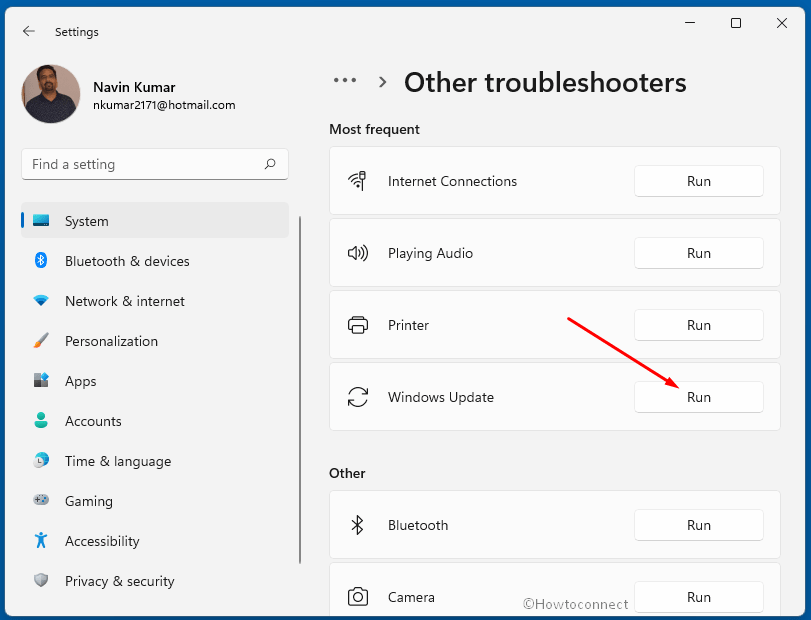
- When the ‘Settings’ app is launched, click – Troubleshoot.

- Select – Other troubleshooters.
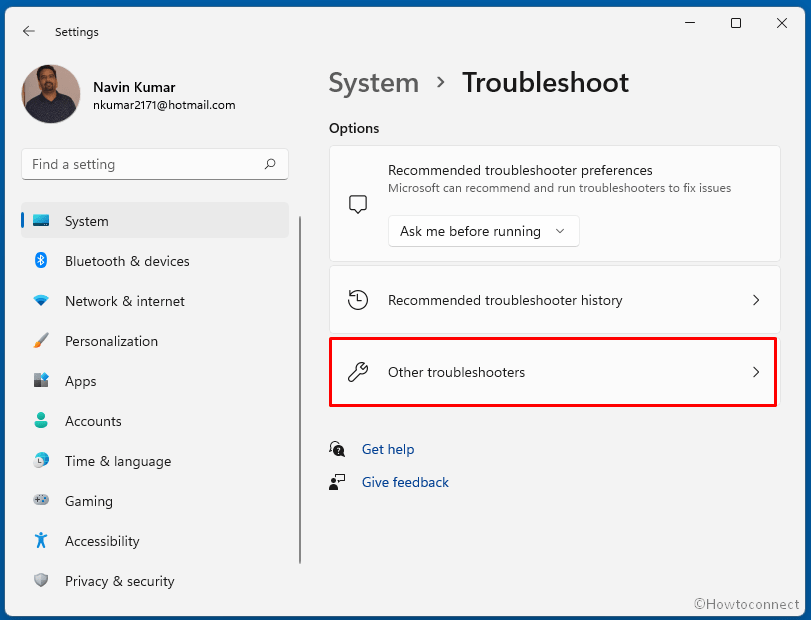
- Go to the Windows update section and click on – Run.
You can also get help from – Use Common Windows Update Troubleshooter on Windows 11/10, 8.1, 7
Way-3: Reset Windows Update components cache
Windows update cache stores the files and when it gets broken somehow you can not install any patch. The database doesn’t properly support during the process resulting in failure of installation with certain error coder. When Windows update Error 0x8024B102 occurs there might be corruption in the Windows update cache. But you can easily reset the component to fix the issue by following the guide –
- Click the – Start.
- Type – cmd.
- Select – Run as administrator.
- Next, click Yes option for the UAC.
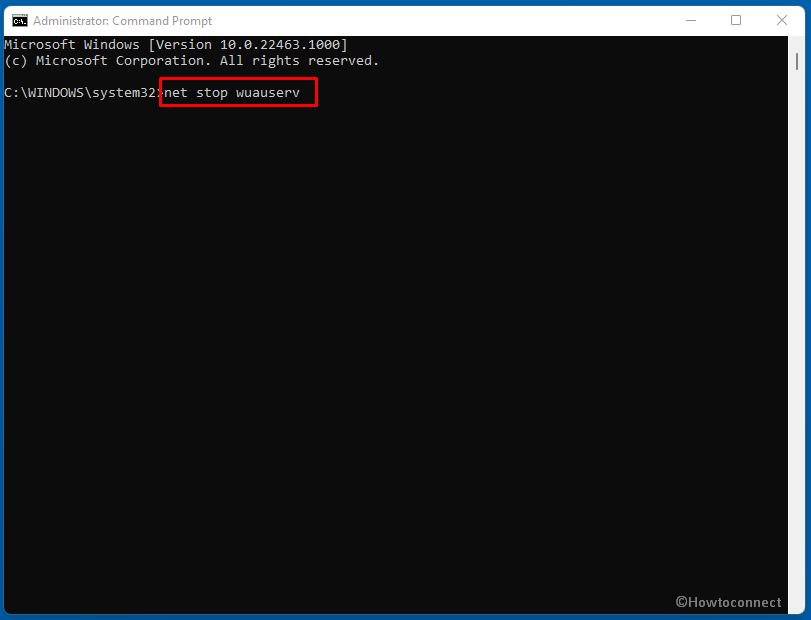
- Copy-paste or type one line at one time and press Enter after each from the following commands –
net stop wuauserv
net stop cryptSvc
net stop bits
net stop msiserver
- Now enter the below texts one by one in the same way –
ren C:\Windows\SoftwareDistribution SoftwareDistribution.old
ren C:\Windows\System32\catroot2 Catroot2.old
- Continues with running the following commands –
net start cryptSvc
net start bits
net start msiserver
- Once completed, restart the PC.
- Go to Settings > Update & Security > Windows update (in case of Windows 11, directly navigate to Settings > Windows update).
- In both versions, select – Check for updates.
Alternatively, read and follow from here – How to Reset Windows Update to Default in Windows 10.
Way-4: Check internet connection
The automatic Windows update process starts only when stable internet access is working on the PC. Furthermore, if the network is intermittent the update will stop in the middle and throw a certain error. You have encountered Windows update Error 0x8024B102 then the Internet connection might be interfering with the process, so, check all aspects of the network thoroughly.
Make sure that the metered connection is not enabled for the running network. In case, all seems alright, power off the router a few seconds (min 10) and power on. Disconnect the system from the wireless connection or plug out the ethernet for a few moments. Reconnect (Wi-Fi or cable ) and try updating Windows again.
Way-5: Block antivirus program for a while
No doubt antimalware plays an important part to keep the system safe from alarming threats but this often blocks Windows from receiving updates. This occurs when the software is extra cautious and it treats the update files as viruses by mistake. If the same happens on your computer you can easily check it by disabling the antimalware using the below steps –
Disable Virus & threat protection and Windows Firewall
- Press Windows key on your keyboard.
- Type – security.
- Click the option Virus & threat protection from the right of the result pane.
- Select the link – Manage settings.
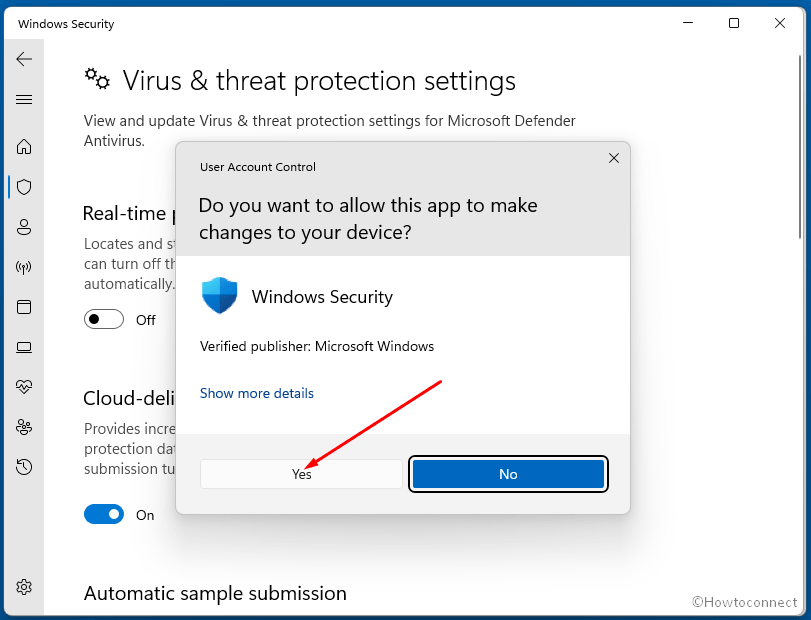
- Turn off the toggle switch for Real-time protection.
- You will be asked for confirmation; click on – Yes.
- Next, click on Firewall & network protection from the left pane of the app.
- Select Private network.
- Turn off the switch under Microsft Defender Firewall.
- Click the Back arrow from the top left of the app.
- Select – Public network.
- Doing the same disable the Microsoft Defender Firewall using the toggle there.
Turn off third-party antivirus
- Click on Show hidden icons up arrow from the taskbar.
- Right-click on the antimalware software icon and choose Disable.
- Either choose to disable the tool permanently or select a time period after which the program will be activated automatically.
Note – The method for turning off 3rd-party anti-malware programs might vary depending upon various software but more or less it will be similar.
Way-6: Repair corrupted system files
Threats, conflicts between apps, or buggy update files might engage in conflict ending up with missing or corrupt system files including dll, exe, and other core components. These corrupted files are capable to disturb the Windows update installation. Consequently, you couldn’t receive a patch because of this corruption. But Windows includes a handy tool that can effectively deal with such messes. System File Checker being a command-line utility rectify the corruption and malfunction on Windows operating system.
Therefore, in case, you find 0x8024B102 Windows 11 or 10 update error then simply run the SFC and fix this issue as follow –
- Open command prompt as administrator.
- Type the following text –
sfc /scannow. - Press – Enter.
- The command line will begin system scan, enter verification phase, and replace the affected files with the cached.
- After the process reached 100%, reboot the system and check if the update error still persists.
- In case of getting 0x8024B102 again, run the below command elevated Command Prompt –
dism /online /cleanup-image /restorehealth
- Allow the DISM tool to perform the restoration and restart the PC in the last.
What is SFC (System File Checker) and How to Run in Windows 10?
SFC /Scannow, DISM.Exe, CHKDSK Windows 10
Way-7: Run Disk Cleanup to free disk space
Sometimes Windows update errors occur because of less disk space that can not accommodate the files. These days, Windows updates have huge amount of data you can say in GBs and require a large free room on disk. Therefore, before deciding to install it, you must have to ensure that your drive is not full and has at least 16 GB empty space. If not then you can extrude unnecessary items from your system to retrieve some extent using the Disk cleanup tool. Follow the guidelines –
- Click on – Start.
- Type – cleanmgr.
- Hit the – Enter.
- You come across a small pop-up; select (C:) and click OK. Note: We assume that C is the System drive on your computer.
- The tool will figure out how much data can be erased from the disk and show a Window. Click – Delete system files.
- Again choose a (C:) and press Enter.
- After a while, another window will appear. Check all the boxes in the Files to delete section.
- Confirm the prompt and give some time to remove the files and recover some space.
- Go to Windows Update settings and click on – Check for updates.
See – Windows 11/10 – How to Open and Use Disk Cleanup
Way-8: Uninstall 3rd party programs
Windows provides almost all tools and utilities that can fulfill the basic needs of a user. But in quest of some extra users download third-party software which finally may become the reason of errors and flaws. Even if you have downloaded low code software this may end up with disaster for a Windows 10 or 11 PC. In case, you encounter Windows update Error 0x8024B102 then there might be a 3rd party tool creating something wrong. So, remove the program using the following guidelines –
- Click on Search from the Taskbar.
- Type – apps and features.
- Press – “Enter”.
- Discover the third-party programs in the installed apps list. Click on 3 dots and select Uninstall in Windows 11. In Windows 10, directly click on Uninstall.
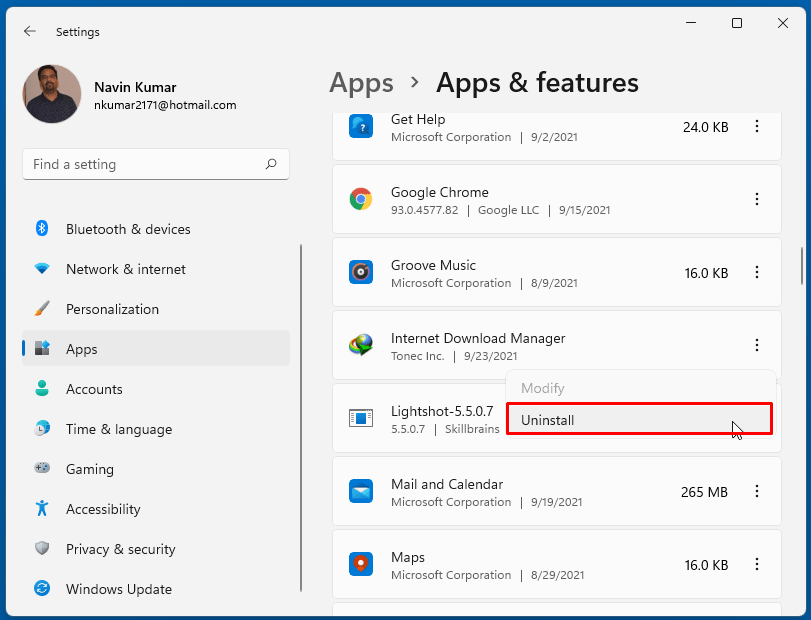
- Again select Uninstall and follow the guidelines appearing on the screen.
- Reboot your computer and check for the error if it is fixed.
Way-9: Check whether Developer mode is turned off
From Windows 10 and now on Windows 11, Developer mode functionality is provided particularly for users interested in building applications and using visual studio. The setting supports WSL, Bash shell, Device Portal, Device Discovery, and a lot more. But enabled Developer mode usually causes errors when downloading and installing Windows updates and this is a part of history. So, disable the mode using following steps –
For Windows 10 –
- Press – Windows and I keys.
- Select – Update & Security.
- Click – For Developers from the left pane.
- Go to the right.
- Turn off Install apps from any source, including loose files.
- When prompted, click – Yes.
- Now, right-click on – Start.
- Next, select – Apps and Features.
- Go to the right pane and click – Optional features.
- Check – Windows Developer Mode.
- Click – Uninstall.
- After completion, reboot your PC.
For Windows 11 –
- Open Settings (Win+I).
- Click on – Privacy & security.
- Select – For Developers from the right side.
- Disable the Developer Mode using the toggle.
- Now go to Settings > Apps > Optional features.
- Click on Developer mode and select “Uninstall”.
Way-10: Fix the hard Disk corruption
Check disk tool is a useful utility to detect defective areas in hard disk and resolve them automatically. The command line utility uses specific parameters to locate poor sectors, recover readable information, force the volume to dismount, and mend logical disk errors. Chkdsk must be able to lock the drive to correct errors. Since error 0x8024B102 is often caused by bad sectors in the Hard Disk, running the tool may help to fix the issue. Follow the below steps to run the utility in Windows –
- Open Command Prompt as administrator.
- In the command prompt, insert –
chkdsk C: /f /r /x - Hit – Enter.
- If the volume is currently in use, press Y to initiate the scanning process at the next startup.
- At last restart your compputer and check if the error occur.
Way-11: Clean Boot Windows 11/10
There are several processes and services that start automatically and keep running right from the starting of the computer. A few of them may do detrimental activities with the update component and interfere with Windows update when installing. To fix the error, you need to perform a clean boot and then try for receiving the update.
- Press Windows logo key + R.
- Write msconfig.
- Hit – Enter.
- In the General tab, check – Selective startup.
- Also, select – Load startup items.
- Click on Services tab.
- Check – Hide all Microsoft services.
- Next, click on – Disable all.
- Go to Startup tab.
- Click – Open Task Manager.
- When the Task Manager appears, right-click on each of the items there and select Disable.
- Return back to the System Configuration window and click on Apply followed by OK.
Way-12: Use System Restore
Sometimes, the issue occurs after installing a certain program or making a change in the Settings. Windows offers functionality that brings the system back to the previous time when no issue was happening on the PC. The tool reverts back all the changes made from your part thus there is no chance left for the issue to occur. Move along with the below steps –
- Click the – Start.
- Type the term – rstrui.
- Hit Enter to launch System restore wizard.
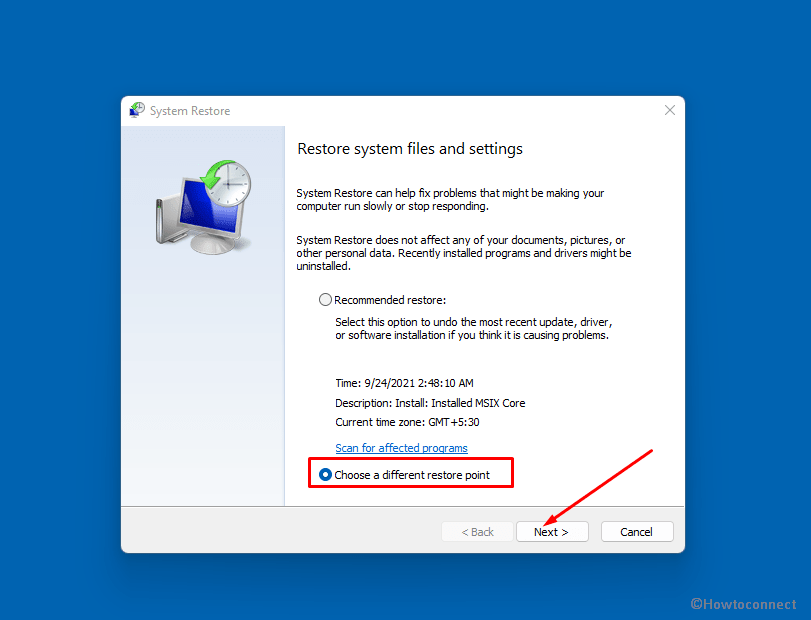
- Select the option – Choose a different restore point.
- Click – Next.
- Select the Date and time when the issue was started to happen and click on Next.
- Choose Finish and the Yes on the confirmation dialog.
- This process will take time in hours so relax for some time and see when it is completed.
Way-13: Perform In-place upgrade
In-place upgrade is a method to upgrade the operating system version directly to the most recent build. This way you get an alternative to receive Windows update automatically. The method will save you from the error code appearing successively. So, Perform in-place upgrade to fix Windows update Error 0x8024B102. Follow the instructions –
- Navigate to the Windows 10 Software Download page of Microsoft.
- Next, click on Download tool now.
- Double-click the setup file you got.
- Allow UAC by clicking – Yes.
- Once, the license terms page appears, select – Accept.
- Check the radio button showing for – Upgrade this PC now.
- Click on – Next.
Way-14: Uninstall previously installed Windows update
Every month after installing security update, multiple users become victim of some error so I decided that this way should be in this list. Only previous LCU caused Printer Error 0x0000011b and Excel Crash. Moreover, there are a number of bugs generating multiple issues for different users on Windows 10 as well as on Windows 11 regularly So, if you are getting error code 0x8024B102 there might be a previous Windows update behind this. In this case, you will have to uninstall the update and then check if the error is solved.
- Press – WIndows and X keys simultaneously.
- Select – Run.
- Type – appwiz.cpl.
- Hit – Enter.
- Control Panel\All Control Panel Items\Programs and Features window will prompt up.
- Click on View installed updates from the left pane.
- Move down to Microsoft Windows section and find the Windows update in the list.
- Right-click on the KB number and choose Uninstall.
- Confirm the removal by selecting Yes and don’t turn off your computer until the process gets finished.
Methods list:
Way-1: Update the patch manually
Way-2: Run Windows Update troubleshooter
Way-3: Purge Windows Update components cache
Way-4: Check internet connection
Way-5: Block antivirus program for a while
Way-6: Repair corrupted system files
Way-7: Run Disk Cleanup to free disk space
Way-8: Uninstall 3rd party programs
Way-9: Check whether Developer mode is turned off
Way-10: Fix the hard Disk corruption
Way-11: Clean Boot Windows 11/10
Way-12: Use System Restore
Way-13: Perform In-place upgrate
Way-14: Uninstall previously installed Windows update
That’s all!!