This article will deal with three different procedures to Recover Space after Installing 1803 Windows 10 April 2018 Update. Windows 10 usually saves a copy of the previous installation file and store it on the Windows.old folder. This is indeed a safety concern in case anything goes wrong while updating process is going on. With these files, the system can revert itself back to the default settings.
This safety feature can take up to 10-20 GB of HDD space that might run into issues further. Fortunately, Windows 10 offers you to reclaim a large amount of disk space using Storage Sense, Temporary files moreover through classic Disk Cleanup. Hence, let us proceed these ways in details.
How to Recover Space after Installing 1803 Windows 10 April 2018 Update
Way-1: By Removing Temporary Files
1. Perform a joint press of Win+I allowing the system to open Windows Settings app.
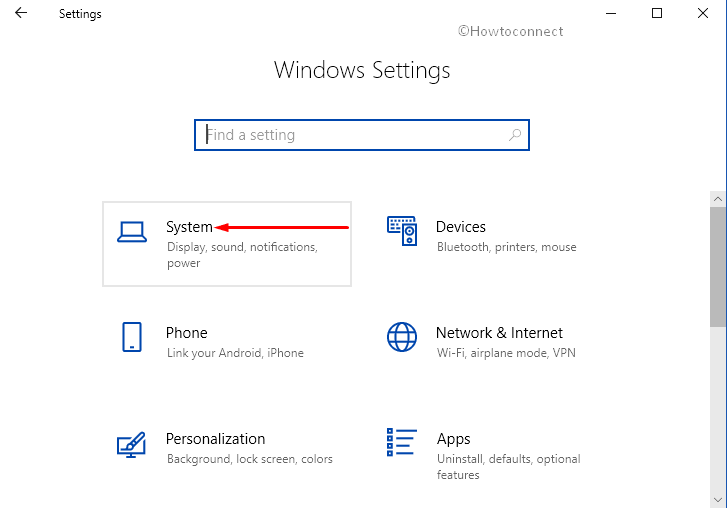
2. Once moved to the main interface, proceed to System and make a click on it.
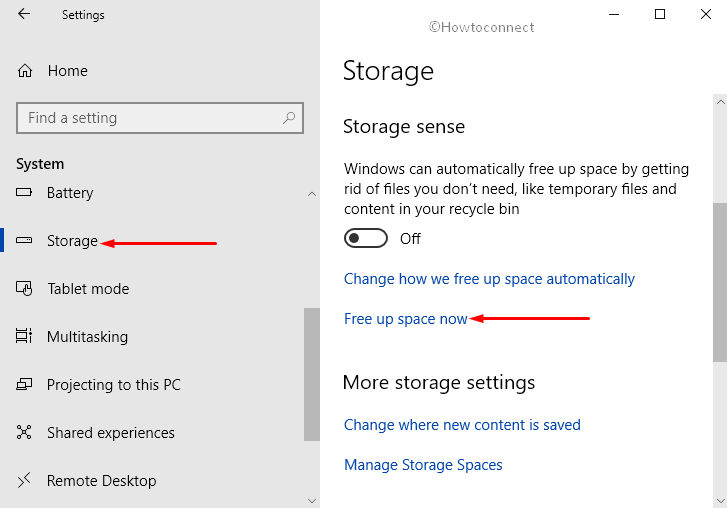
3. Select Storage from the left pane of the following page and jump alongside pane.
4. Move down and do a click on the link Free up space now (see snapshot).
5. When the new page rolls on to display, reach out to “Remove temporary files” section and check the “Previous Windows installation(s)” option from the list. Finally, hit the Remove files button.
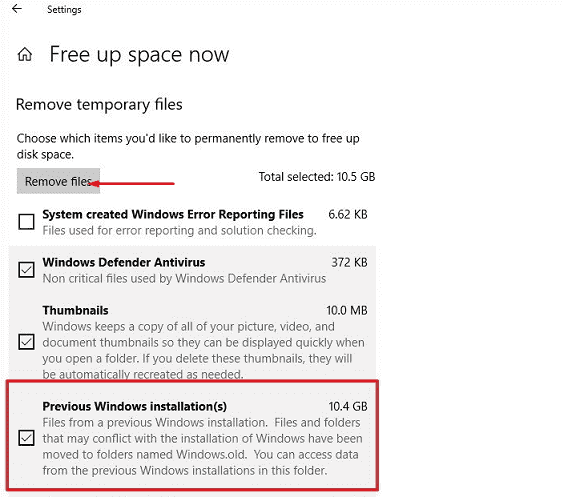
Hence, prior to finishing up the process, the operating system will delete the “Windows.old” folder which was previously in use to store backup files.
Way-2: Recover Space after Installing 1803 Windows 10 April 2018 Update by Using Storage Sense
Step-1: Open Start Menu and make a hit on the gear icon to access Windows Settings app as depicted in the below picture.
Step-2: Head to the System category and do a click on it when highlighted.
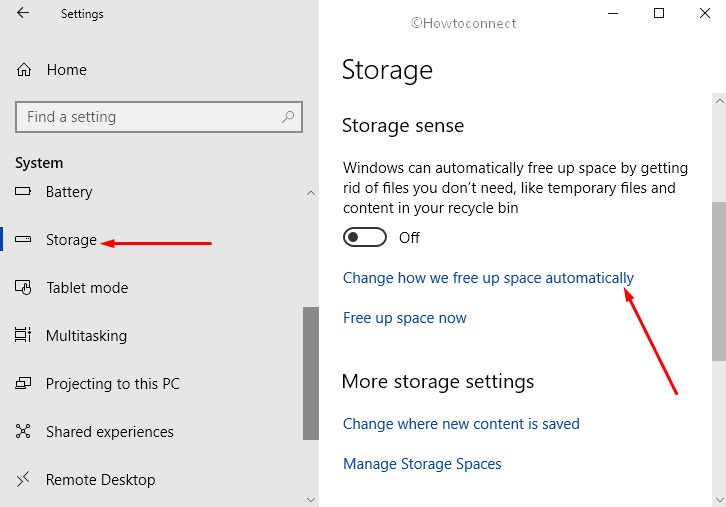
Step-3: Once the new page is visible, choose Storage from the left pane and shift the cursor to corresponding right side.
Step-4: Scroll down and click the link provided with Change how we free up space automatically.
Step-5: When shifted to the new settings page, reach out to Free up space now section and check the box namely “Delete previous version of Windows“.
Step-6: Lastly click the Clean now button to proceed with freeing up space (see image).
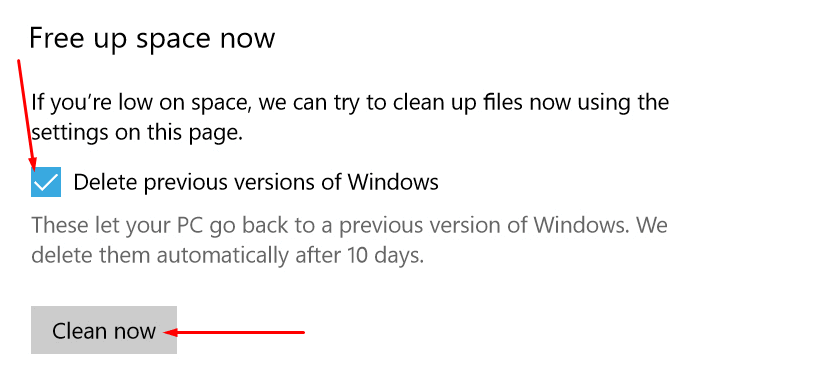
Therefore, once the cleaning up finishes, the OS will erase the backup files that were stored before to roll back to the previous version.
Way-3: Through the Disk Cleanup Tool- prevalent way from past
Windows 10 added all possible utilities to “free up disk space” after update in the built-in Settings app and we have already got acquainted with those. However, there is also as usual way from the past to perform the task using Disk Cleanup tool. Let’s see the method:
i. Move the mouse pointer to the taskbar area and perform a click on File Explorer icon from there.
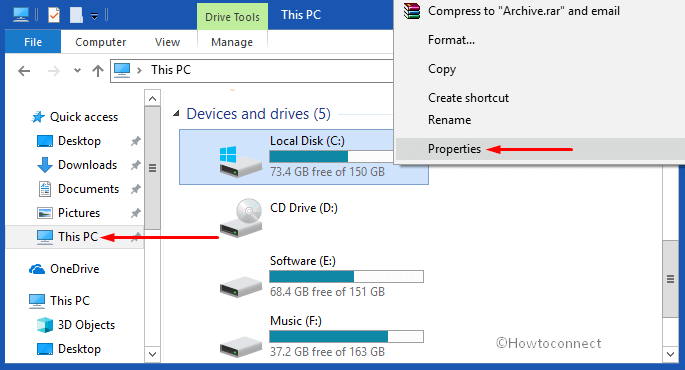
ii. Once the File Explorer shows up on the PC screen, select “This PC” from the navigation pane and move over to adjacent right side.
iii. Move ahead to Local Disk (C:) drive and put a right click on it. Choose Properties from the menu.
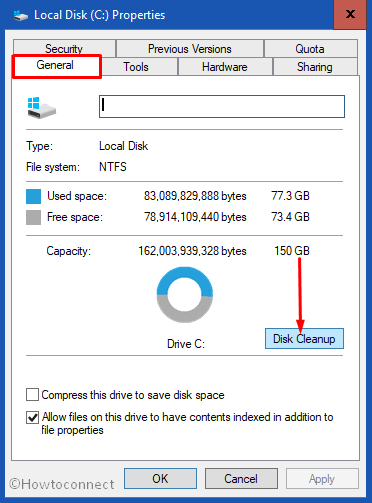
iv. Switch to the General tab from the popup dialog and hit on the Disk Cleanup button.
v. The system will take a bit time to load and a Disk cleanup utility popup will be visible on the screen for (C:) drive. Select “Clean up system files” button.
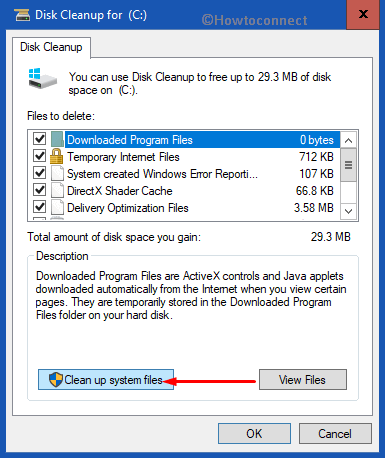
vii. A loading bar will appear and once fully loaded, a new popup will appear on the screen. Check the “Previous Windows installation(s)” under “Files to delete” segment and choose the “OK” button to proceed.
See: How to Schedule Disk Cleanup in Windows 10.
Therefore, when the system successfully eradicates out these files, you will get your space back and same can be used for performing other tasks.
These are all about the ways to Recover Space after Installing 1803 Windows 10 April 2018 Update. Follow the instructions correctly to avoid any further errors and have a good time with Windows 10 April update 2018.